Bright and Brilliant Images with Levels Tool
You shoot raw, adjust white balance, exposure and make a crop… but the image still does not make a statement or reflect the right atmosphere. Sounds familiar? Maybe it’s time to get into the Levels and Curve tools. In this first post of a series you learn how to make bright and brilliant images with the Levels tool.

Bright and Brilliant Images with Levels Tool
The importance of using the Levels and Curve tools in a raw processing workflow cannot be overstated. In this post, I will focus on the basic Levels tool functions. Let us start with the medium contrast image, below.

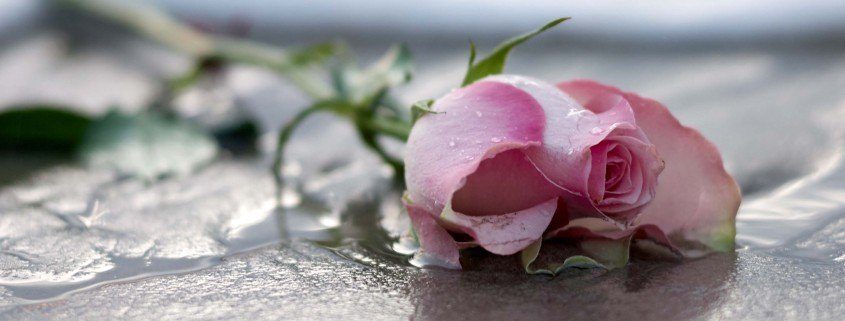
The weather was cloudy when I saw this rose on the beach. Low contrast light conditions are fine for close-ups. The water is reflecting the sky and there is some backlight, but that does not make it shine as I intended.
Before using Levels
In my training, I refer to the Levels Tool as a Histogram kind-of-tool. It takes a histogram as input. Because of this I first apply all necessary adjustments that will affect the Levels’ histogram.
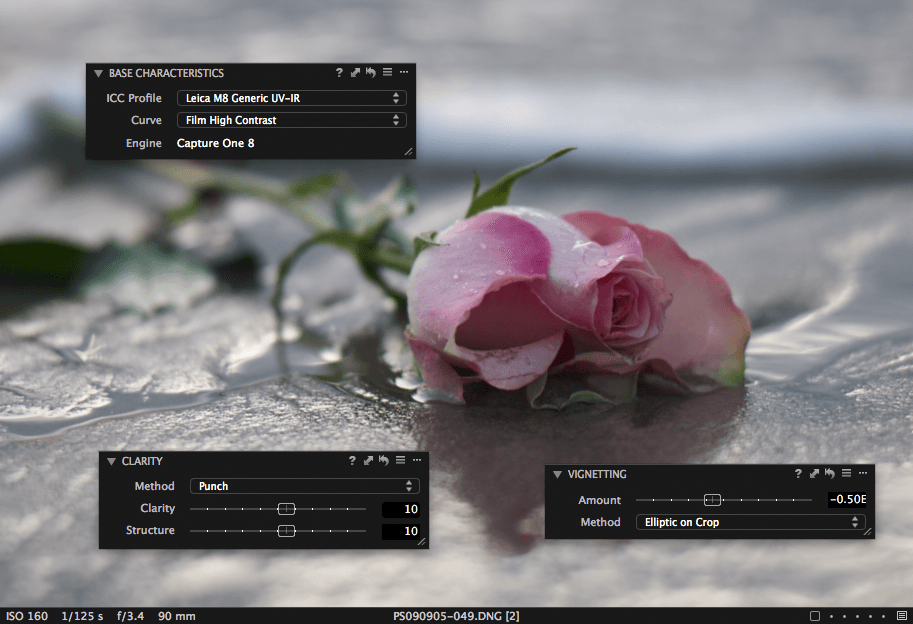
For example, I first crop the image, next I adjust the Exposure, High Dynamic Range, and Clarity. In the screenshot below, I show you the tools Base Characteristics tool with Film High Contrast curve, the Clarity and Vignetting tools and their settings.
Shadow and Highlight Point
Medium and low contrast images do not use all the brightness values or the full dynamic range of the camera. As a result, they look a bit dull because the tonal scale is reduced. There is no real dark or bright area.
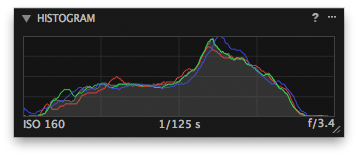
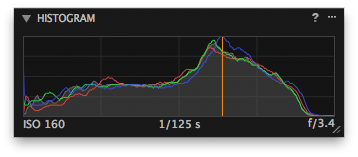
The histogram for the image fits easily within the 0-255 range of the Levels Tool. Too easily, actually, and it reflects the lack of both real highlights and deep shadows.
Auto Adjust or manual?
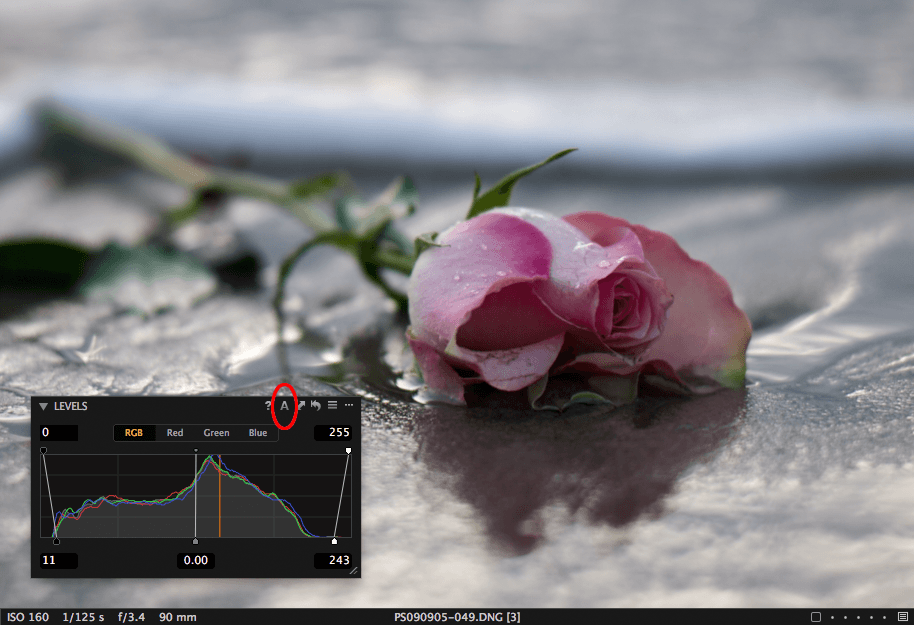
The Levels tool Auto Adjust is a great start for adjusting the Shadow and Highlight Levels but you can also set it manually by dragging the markers or use the eye-dropper. The shadow level sets which level in the raw file will be the darkest area on output. The same counts for the highlight level as the brightest area.
Input versus Target Levels
To be more precise on what the Levels tool actually achieves here, let’s clarify the distinction between Input Levels and Target Levels. Input levels are found on the bottom of the Levels tool and represent the values in the raw file. You can see that I did use the range of 11-243 in this image.
Input levels are converted to target levels on output, which can be found at the top of the Levels tools.
The input level of 11 is converted to 0 (zero) in the output and input level 243 to 255. Target levels of 0 and 255 represent the maximum black and white level respectively. Optionally, you can adjust the target levels as well if it serves your needs, like with printing, to 5 and 250 for example.
The image now has a better tonal scale and therefore more punch.
Darken or Brighten
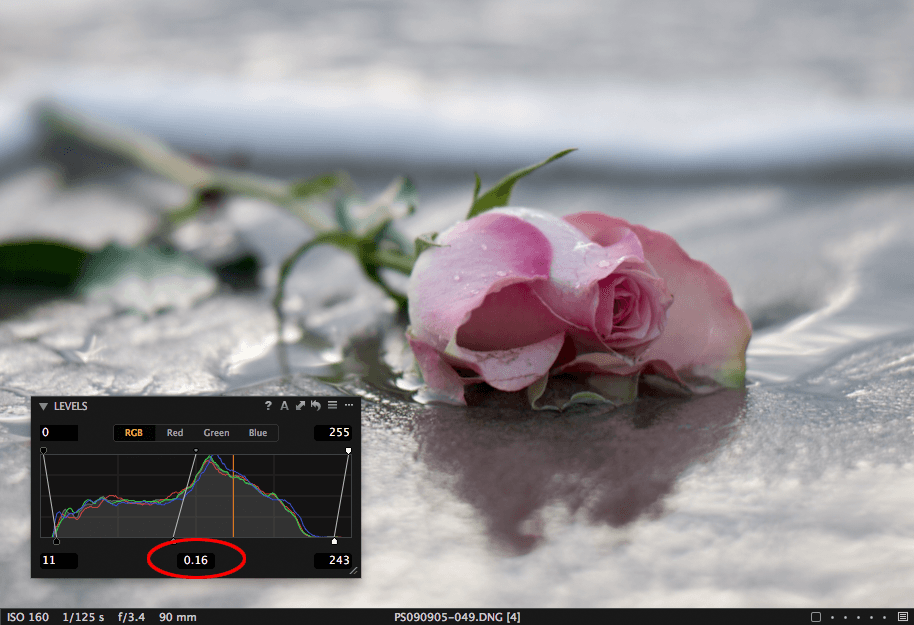
Setting the shadow and highlight levels will change the overall image brightness. This can be corrected with the mid-tone marker in the Levels tool. Modest use has little effect on the endpoints of the histogram. In other words: little risk for clipping or losing data. Positive values open up shadows and reduce the impression of contrast.
A ‘full’ Histogram from End-to-End
Technically the biggest advantage of setting the shadow and highlight level plus the mid-gray with the Levels tool in Capture One is that it creates a ‘full’ histogram from end to end on output. This will smoothen gradations without banding (in contrast to set levels in a processed image).
Also, using Levels precedes the use of the Curve tool, which I will discuss in my second blog of this series named Create your Atmosphere with Curves.
High Contrast Images and Levels
In general, you do not need to set shadow and highlight levels on high contrast images, which tend to clip at one or either side of the histogram. However, you can still benefit from the Levels mid-tone adjustment to make modest brightness adjustments without the risk of clipping. I prefer this to the use of the Brightness slider in the Exposure Tool. Or, as we will discuss in the next blog, you can also use the Curve tool for that purpose.
Thank You
For reading. Please feel free to leave a comment. Like us on Facebook or subscribe to our newsletter to stay informed about new blogs.
Best Regards,
Image Alchemist
Note
This post has been published earlier at blog.phaseone.com; I reworked it for Capture One 8 when posting it here at Image Alchemist



Hi,
Is there a way to prevent the automatic adjustment when import raw files?
Example: when I deliberately underexposed photos jpg import it is okay while raw are correct at the right exposure automatically (sorry for my little English)
Grazie
Hi Steve, you can disable auto adjust during import. In the Import Images dialog, go to the Adjustments section. Uncheck the box for Auto Adjust.
Regards, Paul
Grazie Paul
Alex sometimes has free downloadable raw files for practice that can be sent for critiquing. However I have C1 Pro for Sony. His images are not taken with Sony camera therefore not able to be edited with my software. Are there any raw files available that are Sony images? I really would like to be able to get his feedback.
Hi Steve,
I do not know how Alex is working with his downloadable raw files but I suggest to use your own images instead. As an alternative, deactivate your Pro Sony and run as Pro in trial mode and work with Alex’ files.
Best, Paul Steunebrink / Image Alchemist