Move Managed Catalog Images
You can store images both inside and outside your Catalog. Storage images outside the Catalog give you more flexibility. Storing images inside often happens by accident because it is Capture One’s default. Fortunately, you can easily move images inside the Catalog to a location outside of it, without affecting adjustments or losing any sleep over it.
Move Managed Catalog Images
In a previous post, Moving Catalog Images, I discussed moving referenced images. This post is about moving managed images. The term referenced images refer to images stored outside the Catalog folder, and managed images refer to images stored inside the Catalog.
In this post, we look at how you can move managed images out of your Catalog and make them referenced.
Images Inside The Catalog
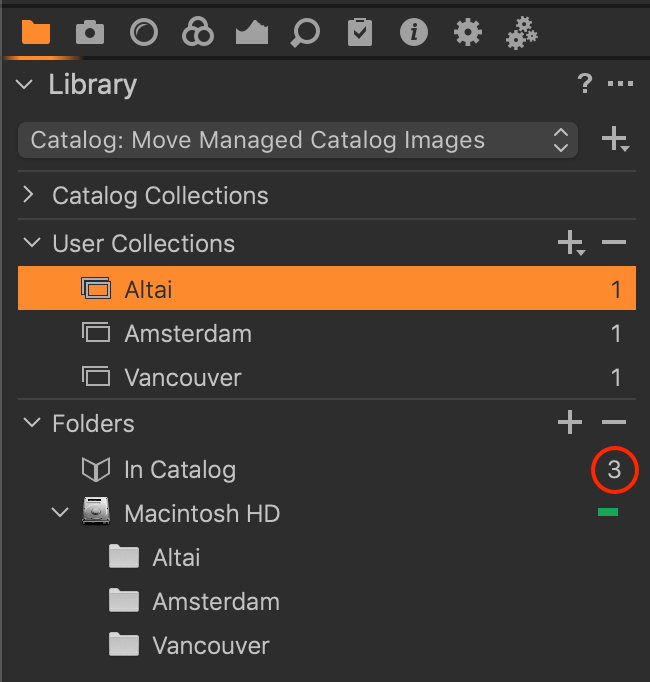
When you open your Catalog with Capture One and go to the Library tool > Folders section, you see the In Catalog item. The number next to it shows you the number of images stored inside your Catalog.
Select the In Catalog item and see all the images inside your Catalog in your Browser.
Verify And Backup
Before doing any maintenance, I always verify the Catalog to be sure I am working with a file that is in good condition. Go to File menu > Verify Catalog or Session, and browse to your Catalog. Follow the instructions on the screen.
After the verification process, I create a database backup via File menu > Backup Catalog.
Add Folders
The first step in moving your images out of your Catalog is that you create a folder for it and add it to the Catalog. If the folder already exists on your disk, you can skip the creation of a new folder. If the folder is already known in Capture One, because you imported images from it, you can skip this step too.
You can create folders first in Finder (macOS) or File Explorer (Windows), and next add them to the Catalog. Or you combine both steps. I will explain to you the combined approach.
Open your Catalog in Capture One and go to the Library tool > Folders section. Click on the plus sign (+) next to Folders. Browse to the location of the folder to add. If it exists, select it and click Add. If not, go to its parent folder, click the New Folder button, create it, select it and click Add.
Repeat the process until you added all folders. Note that it can be helpful to show or hide the folder hierarchy. You can do this from the Library tool, 3-dots menu, Show/Hide Folders Hierarchy (toggle).
Tip
Adding a large number of folders to your Catalog can be a daunting task, as it has to happen one by one. You can not add multiple folders that are nested into the same parent folder in one go. Fortunately, the import function can do this.
The trick is, that after creating all folders on disk as explained earlier, you fill all those folders with an image. Preferably the same image with a name as RemoveMeLater.
Go to File menu > Import Images, in the Import From section browse to the parent folder, check the Include Subfolders option. If any there are images listed that are already in the Catalog, also check the Exclude Duplicates option. Make sure you import to the Current Location. This will ensure that the folders are included in the Catalog.
Now import the dummy images. In the Library tool > Folders section all folders are added. In the Library tool, Catalog Collections > Recent Imports select your last import, select all images and delete them. Note that the folders remain in the Catalog, now empty.
Move Them Out
Imagine you have hundreds or perhaps thousands of images inside your Catalog that you want to move outside and store in different folders. In this scenario, it makes sense to collect the images in different Albums or Smart Albums first, one for each specific folder.
In particular, the search capabilities of Smart Albums are a great help. If you let the Album and folder names match with each other, it will make the next step a lot easier.
Move Images To Folders
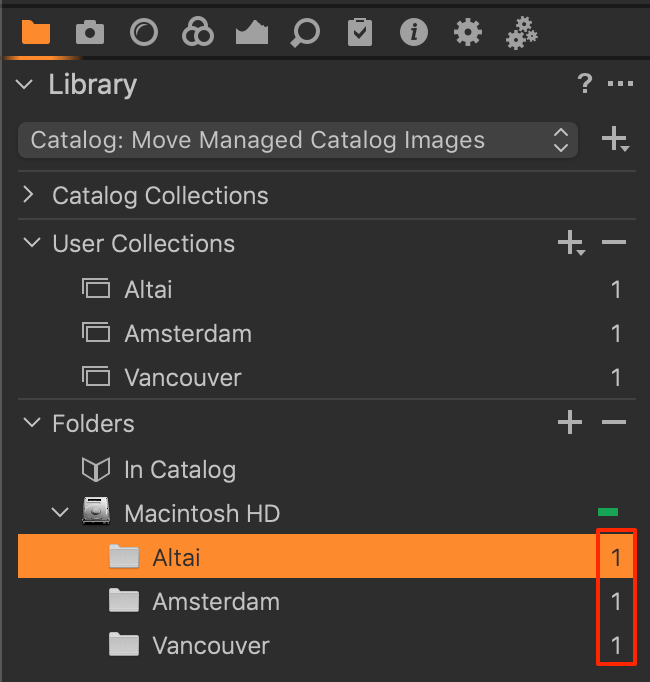
Finally, you move your images to the folders you created. You select the images and drag and drop them onto the desired folder. Select manually, by search or by Album, if you prepared these in the previous step. If the Album was explicitly created for the purpose, delete it after the move.


Note that moving images from inside to outside does not affect the Album’s contents. Albums are virtual and automatically updated for the new location.
Also note that after each move, the counter of the In Catalog item decreases with the number of images you moved.
Reverse
Just for completeness, you can move images from a folder outside the Catalog inside as well if you would like to do that. Just drag and drop the images onto the In Catalog item. Capture One takes care of the rest.
Wrap Up
When you are ready, you verify and backup the Catalog again as you did before you started.
Thank you
for reading. Please feel free to leave a comment. Like us on Facebook or subscribe to stay informed about new blogs.
Want to try Capture One? Or would you like to buy it?
Best Regards,
Image Alchemist


Thank you so much for this. I searched, read, and watched several others, including C1 Support, but your advice here guided me through a resolve cleaning up my catalog, saving me huge space on my master drive and making Capture One more beautiful, more functional, more simple to use than I ever imagined. Thank you, m
Hi Max,
Thank you so much for your feedback. Enjoy Capture One!
Best regards, Paul Steunebrink / Image Alchemist
Thanks for this posting! I accidentally imported files to the catalog and this helped me get them into my external file structure.
Happy to hear that, Rick!
Best regards, Paul Steunebrink / Image Alchemist