Capture One Color Editor
The Capture One Color Editor is a unique tool and one of a kind. Very little how-to information however exists and most users do not know how to integrate it in their workflow. Fortunately, guidance is here now and nothing can stop you anymore. Explore!
Capture One Color Editor
From my experience as Capture One trainer, I dare say that the Color Editor tool is regarded as one of the bigger mysteries. Only a minority of Capture One users understand and use it. That is a shame because you can achieve extraordinary results with little effort with this tool. The main barrier is that most users do not understand how the tool operates and what you can use it for.
Time to reveal this hidden gem. Join me on a trip to explore the Capture One Color Editor tool.
Anatomy Of The Tool
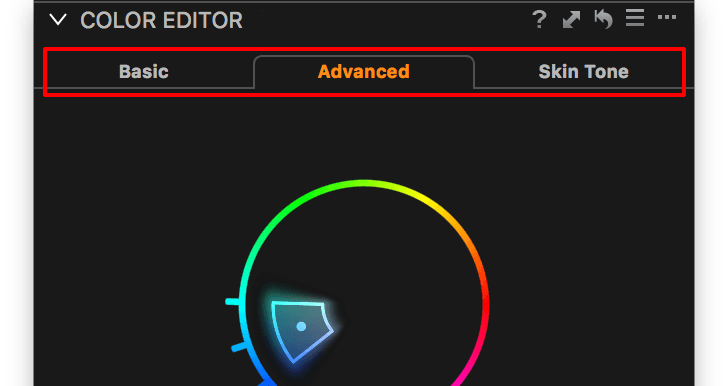
In the default Workspace, you find the tool at the bottom of the Color tool tab. Maybe it is collapsed because it is a very large tool. In Capture One Pro, Pro (for Sony) and DB you see three tabs for the respective editors:
- Basic Color Editor
- Advanced Color Editor
- Skin Tone Color Editor
In Capture One Express (for Sony) you only have the Basic Color Editor, hence no tabs. All three Color Editors work essentially the same but obviously with some differences.
Note that you can combine edits from different editors, but you will rarely need to.
I will first discuss the main characteristics of the three editors, what they have in common, and how it works. Next, I will briefly mark their differences and advice which to use when.
To All Editors
As the name implies, the Color Editor in Capture One allows you to edit colors. How does the tool work? Well, this is basically a two-step process:
- you select a color,
- you edit the selected color.
The first step is easy. Select the editor of choice. I select the Advanced editor in this example.
Enable the cursor tool for that editor. This is a Color Correction picker. Each Color Editor has its own picker. Select the picker from the Color Editor tab or from the cursor tools in the Toolbar.
Last, sample the color to edit in the Viewer, the blue of the sky for example.
Next, you edit that color. All three Color Editors work with the Color Wheel as a means to represent all available colors for both hue and saturation. The center of the wheel represents the lowest saturation and the wheel the highest. The color sample is visible as a colored area in the Color Wheel.
Editing a color means that you can change three properties of color:
- Hue
- Saturation
- Lightness
In Capture One Pro you can create a floating tool, as with all tools via the Window menu > Create Floating Tool. And like the Color Balance tool, you can enlarge a floating Color Editor for precise adjustments.
Basic Color Editor
The Basic Color Editor is the easiest to use but also a bit limited. That is because the Color Wheel is already divided in to six zones. Adjustments are done per zone. Identify the zones in the Color Wheel and in the list below it.
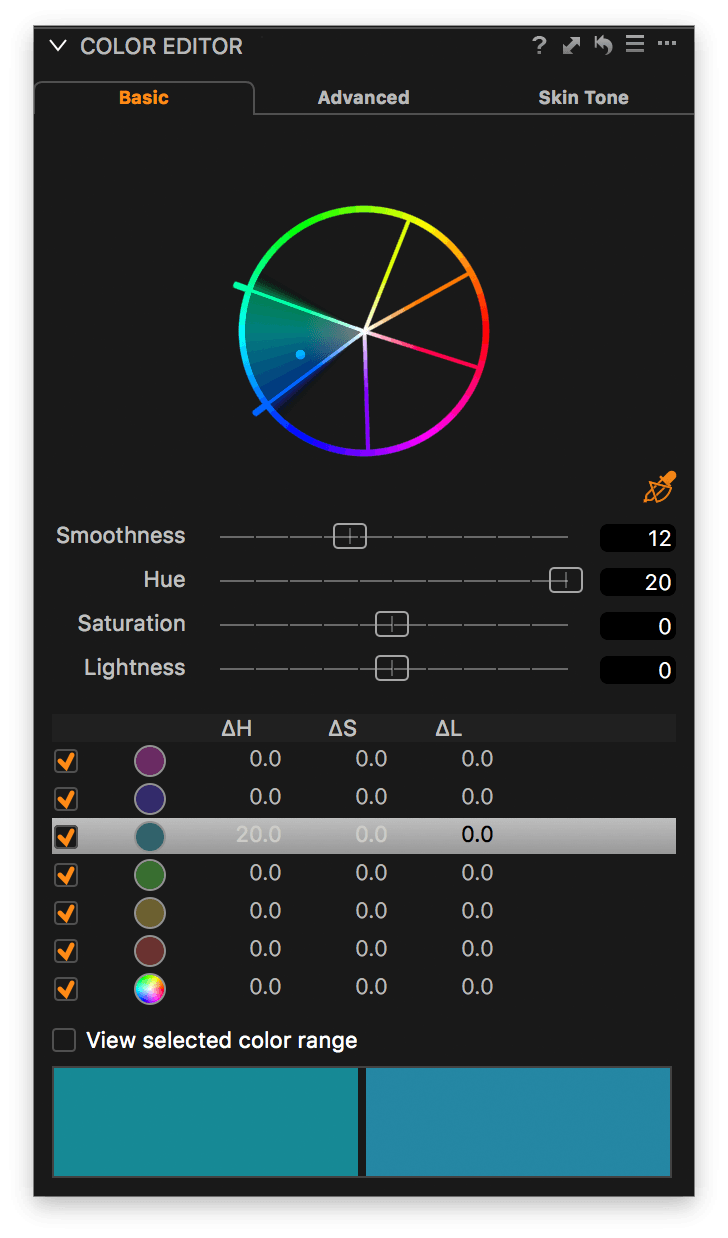
You can edit each part separately. You click in the Viewer on the color you like to edit with the Basic Color Correction picker as a cursor tool, and the corresponding slice in the pie is selected.
Note that you can make a slice bigger or smaller to include or exclude neighboring colors, but all saturation levels of a color are always selected.
You can not use the Basic Color Editor on a local adjustments layer. The Basic Color Editor is a great tool if you have Capture One Express (for Sony) as you have no other option.
For all other occasions, I suggest you look at the Advanced Color Editor.
Advanced Color Editor
The Advanced Color Editor in Capture One works in much the same way as the Basic Color Editor but no color samples are offered out of the box. That is the reason the Color Wheel is initially black. This scares users who are new to this tool.
You can make up to 24 color selections and shape each of them as you like. Use the Color Correction picker to sample a color in the Viewer.
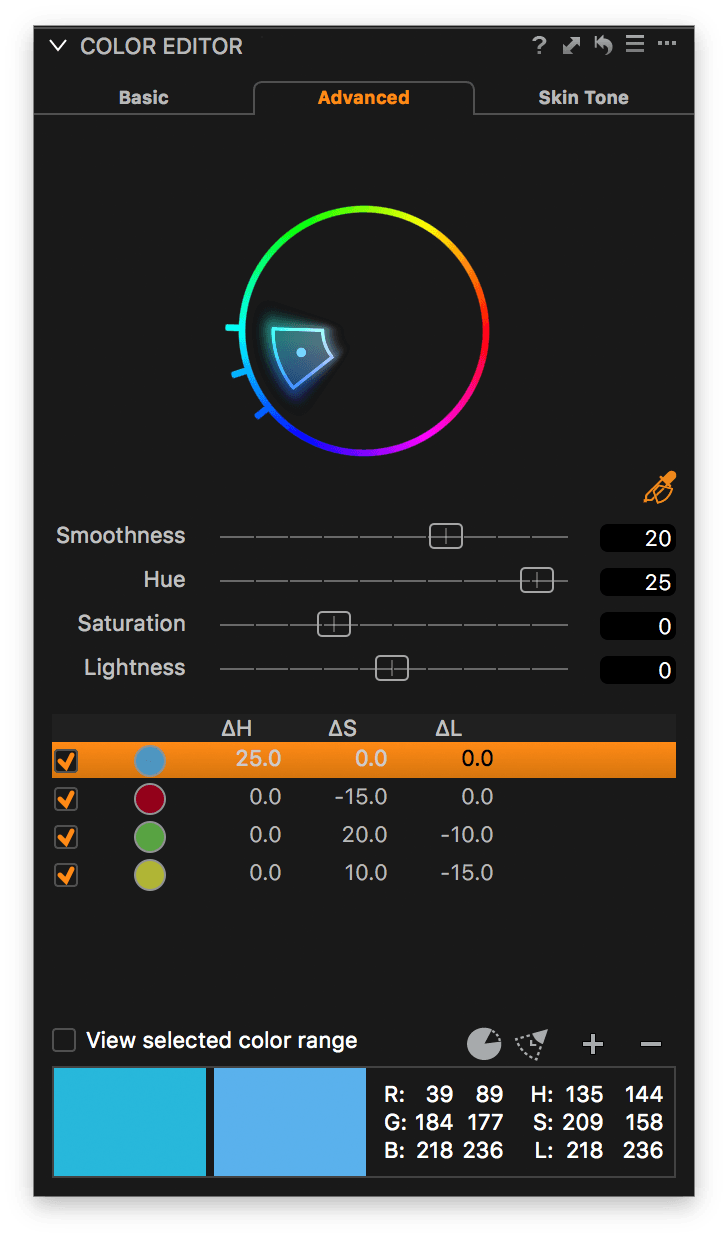
The Advanced Color Editor has a few extra options like Invert Slice and Expand Full Saturation Range. The Advanced Color Editor has the biggest range for slider adjustments of all three editors, in particular for the Lightness sliders (-100 to + 100 compared to -10 to +10 for the other two editors).
You can use the Advanced Color Editor on a local adjustments layer. The Advanced Color Editor is the most universal and versatile Color Editor of the three editors and obviously the most used.
Skin Tone Color Editor
The Skin Tone Color Editor works in much the same way as the Advanced Color Editor. The Color Wheel is initially black until you sample a color. It is for every color, not just skin tone although it is very suitable for that task.
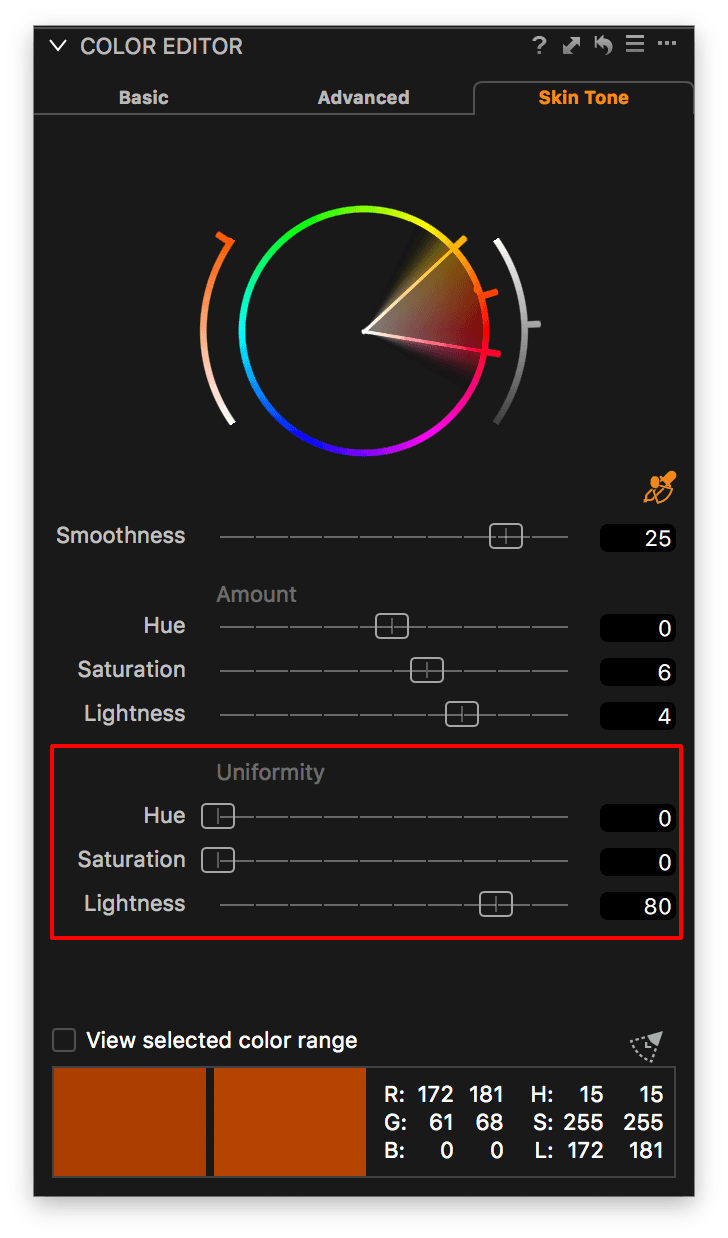
The Skin Tone Color Editor is unique because it has adjustments for Uniformity, which other Color Editors lack. With Uniformity, you bring colors together, for example, make a skin with red spots more uniform.
However, there is one drawback: the editor can edit only one sample. As soon as you create a new sample, the previous is replaced but the adjustments remain. Also, note that the range of slider adjustments is much smaller compared to the Advanced Color Editor.
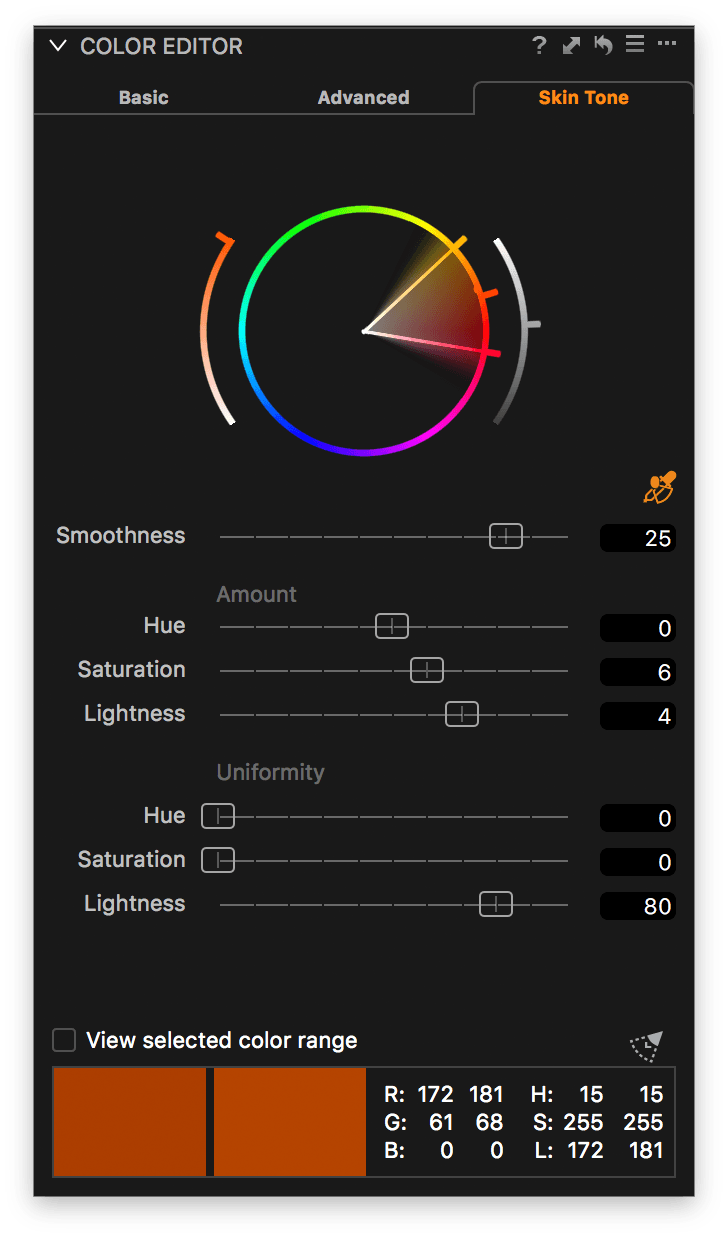
The original single Uniformity slider was expanded to three sliders in Capture One 9. At the same time, extra Saturation and Lightness controls were added left and right to the Color Wheel. You use the Skin Color Correction picker to sample a color in the Viewer.
You can use the Skin Tone Color Editor on a local adjustments layer.
Color Editor Practice
I will now focus on the Advanced Color Editor and discuss how to use it. I will discuss the special extras of the Skin Tone Color Editor later in this post.
Eye Candy
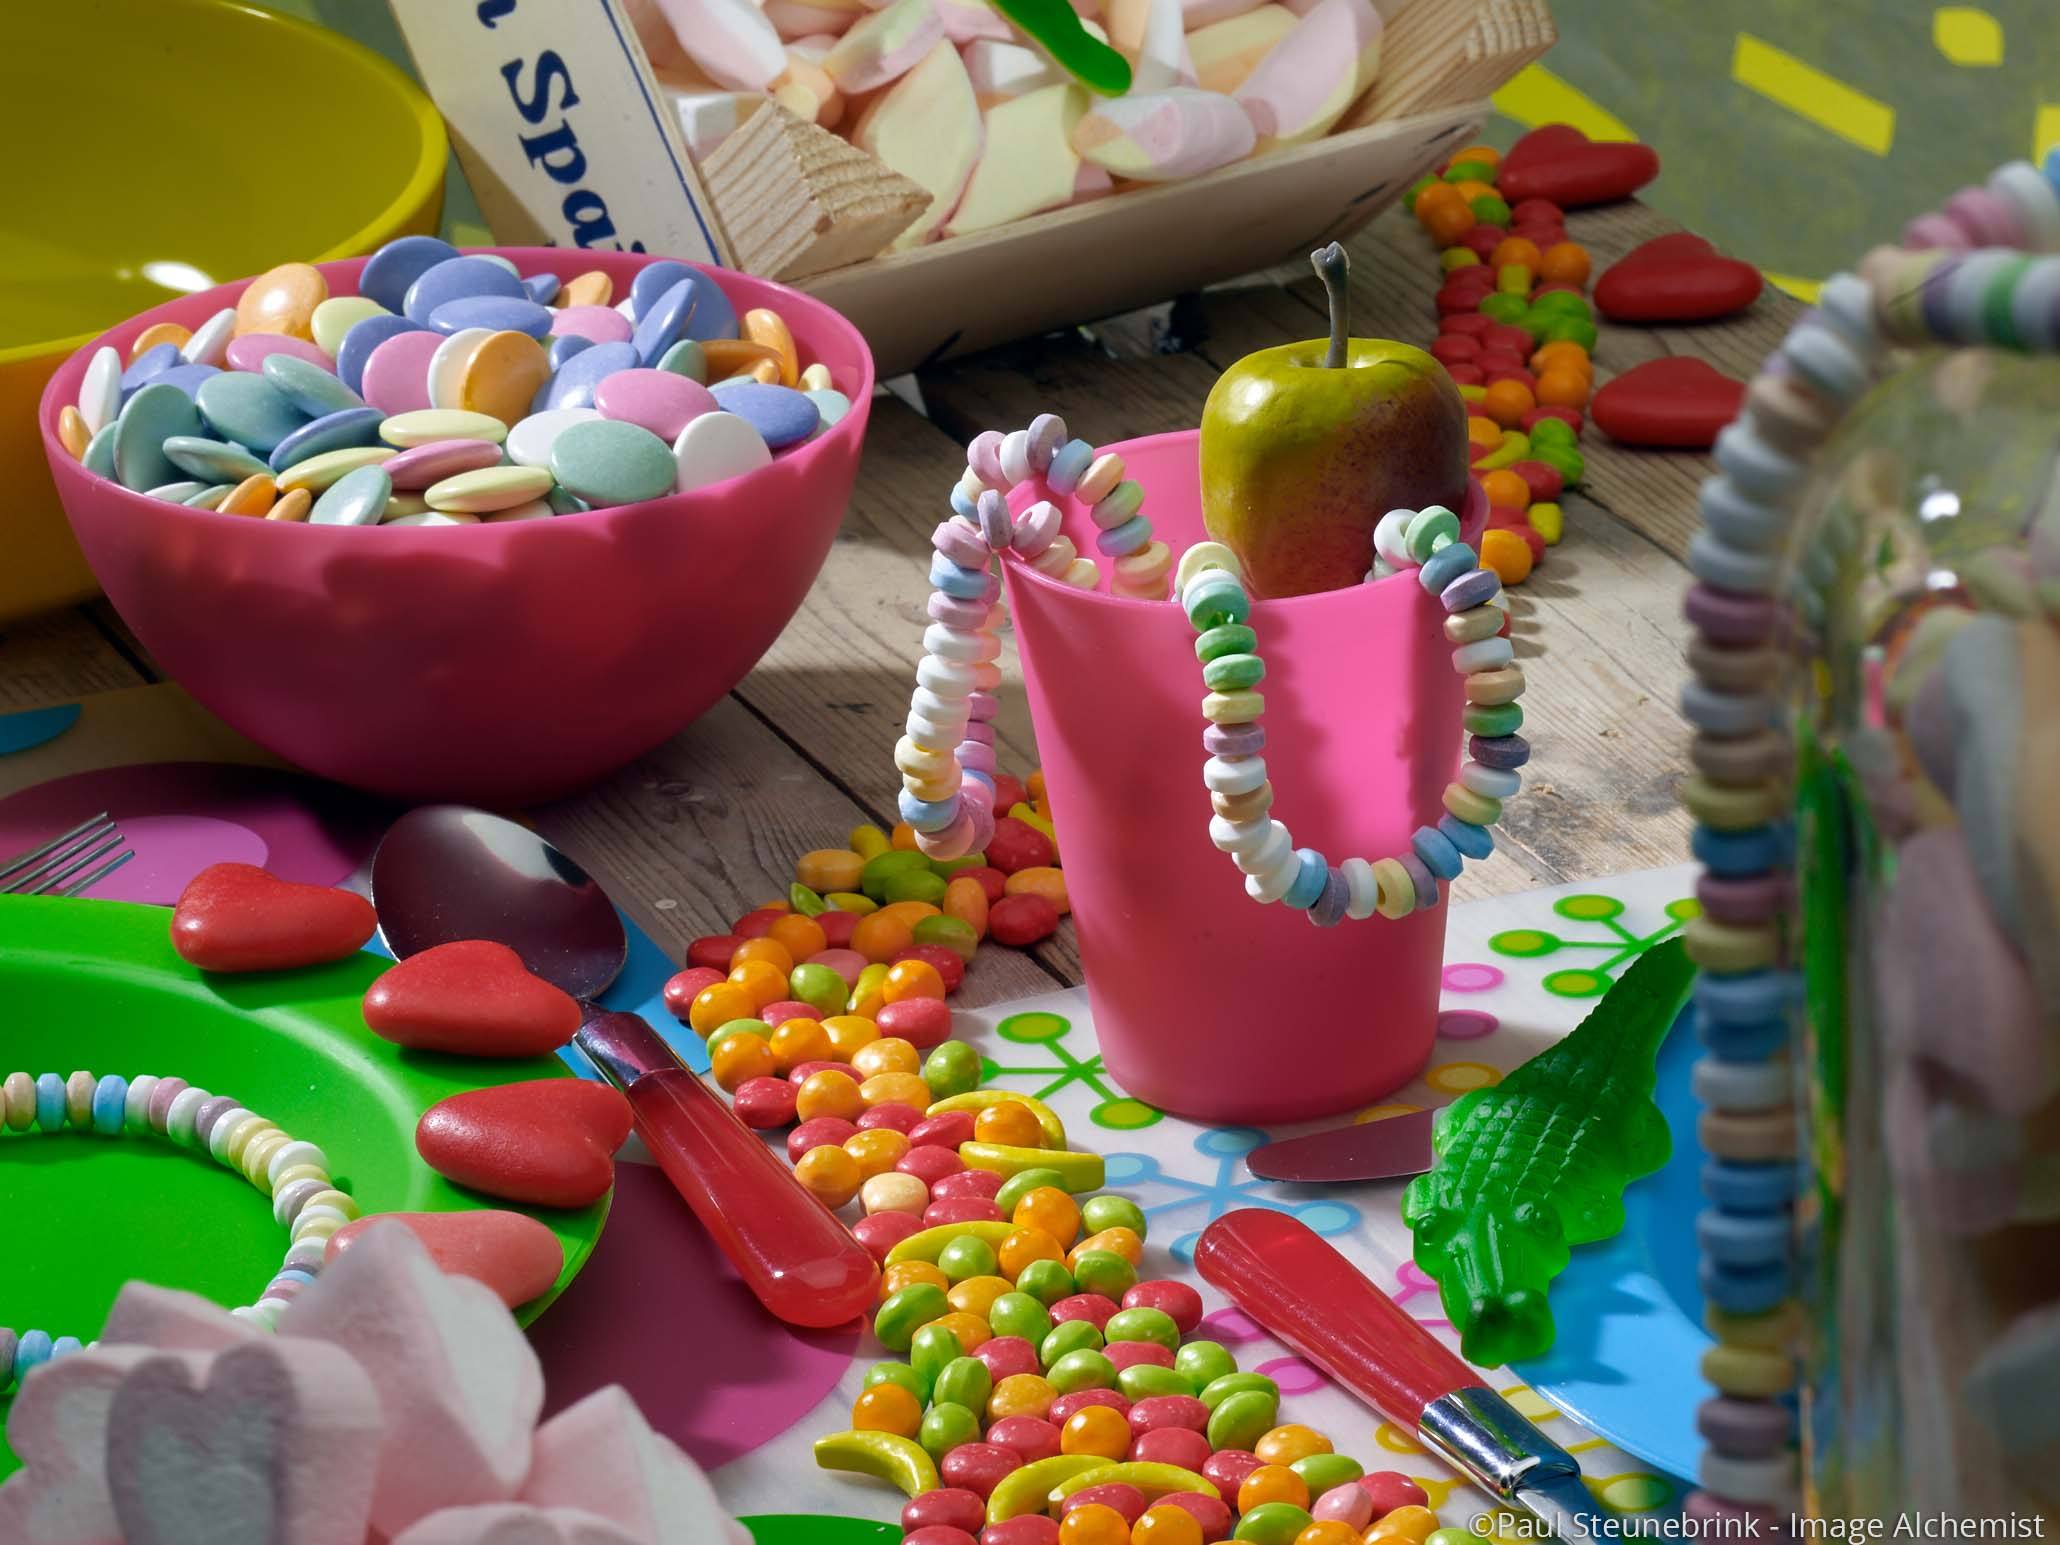
In the image full of highly colored candy, we are going to make a few color edits to demonstrate how the tool works. In the before/after comparison below you see the end result with Color Editor adjustments at the right. Not all adjustments are necessarily ‘better’ but are primarily made for demonstration purposes.
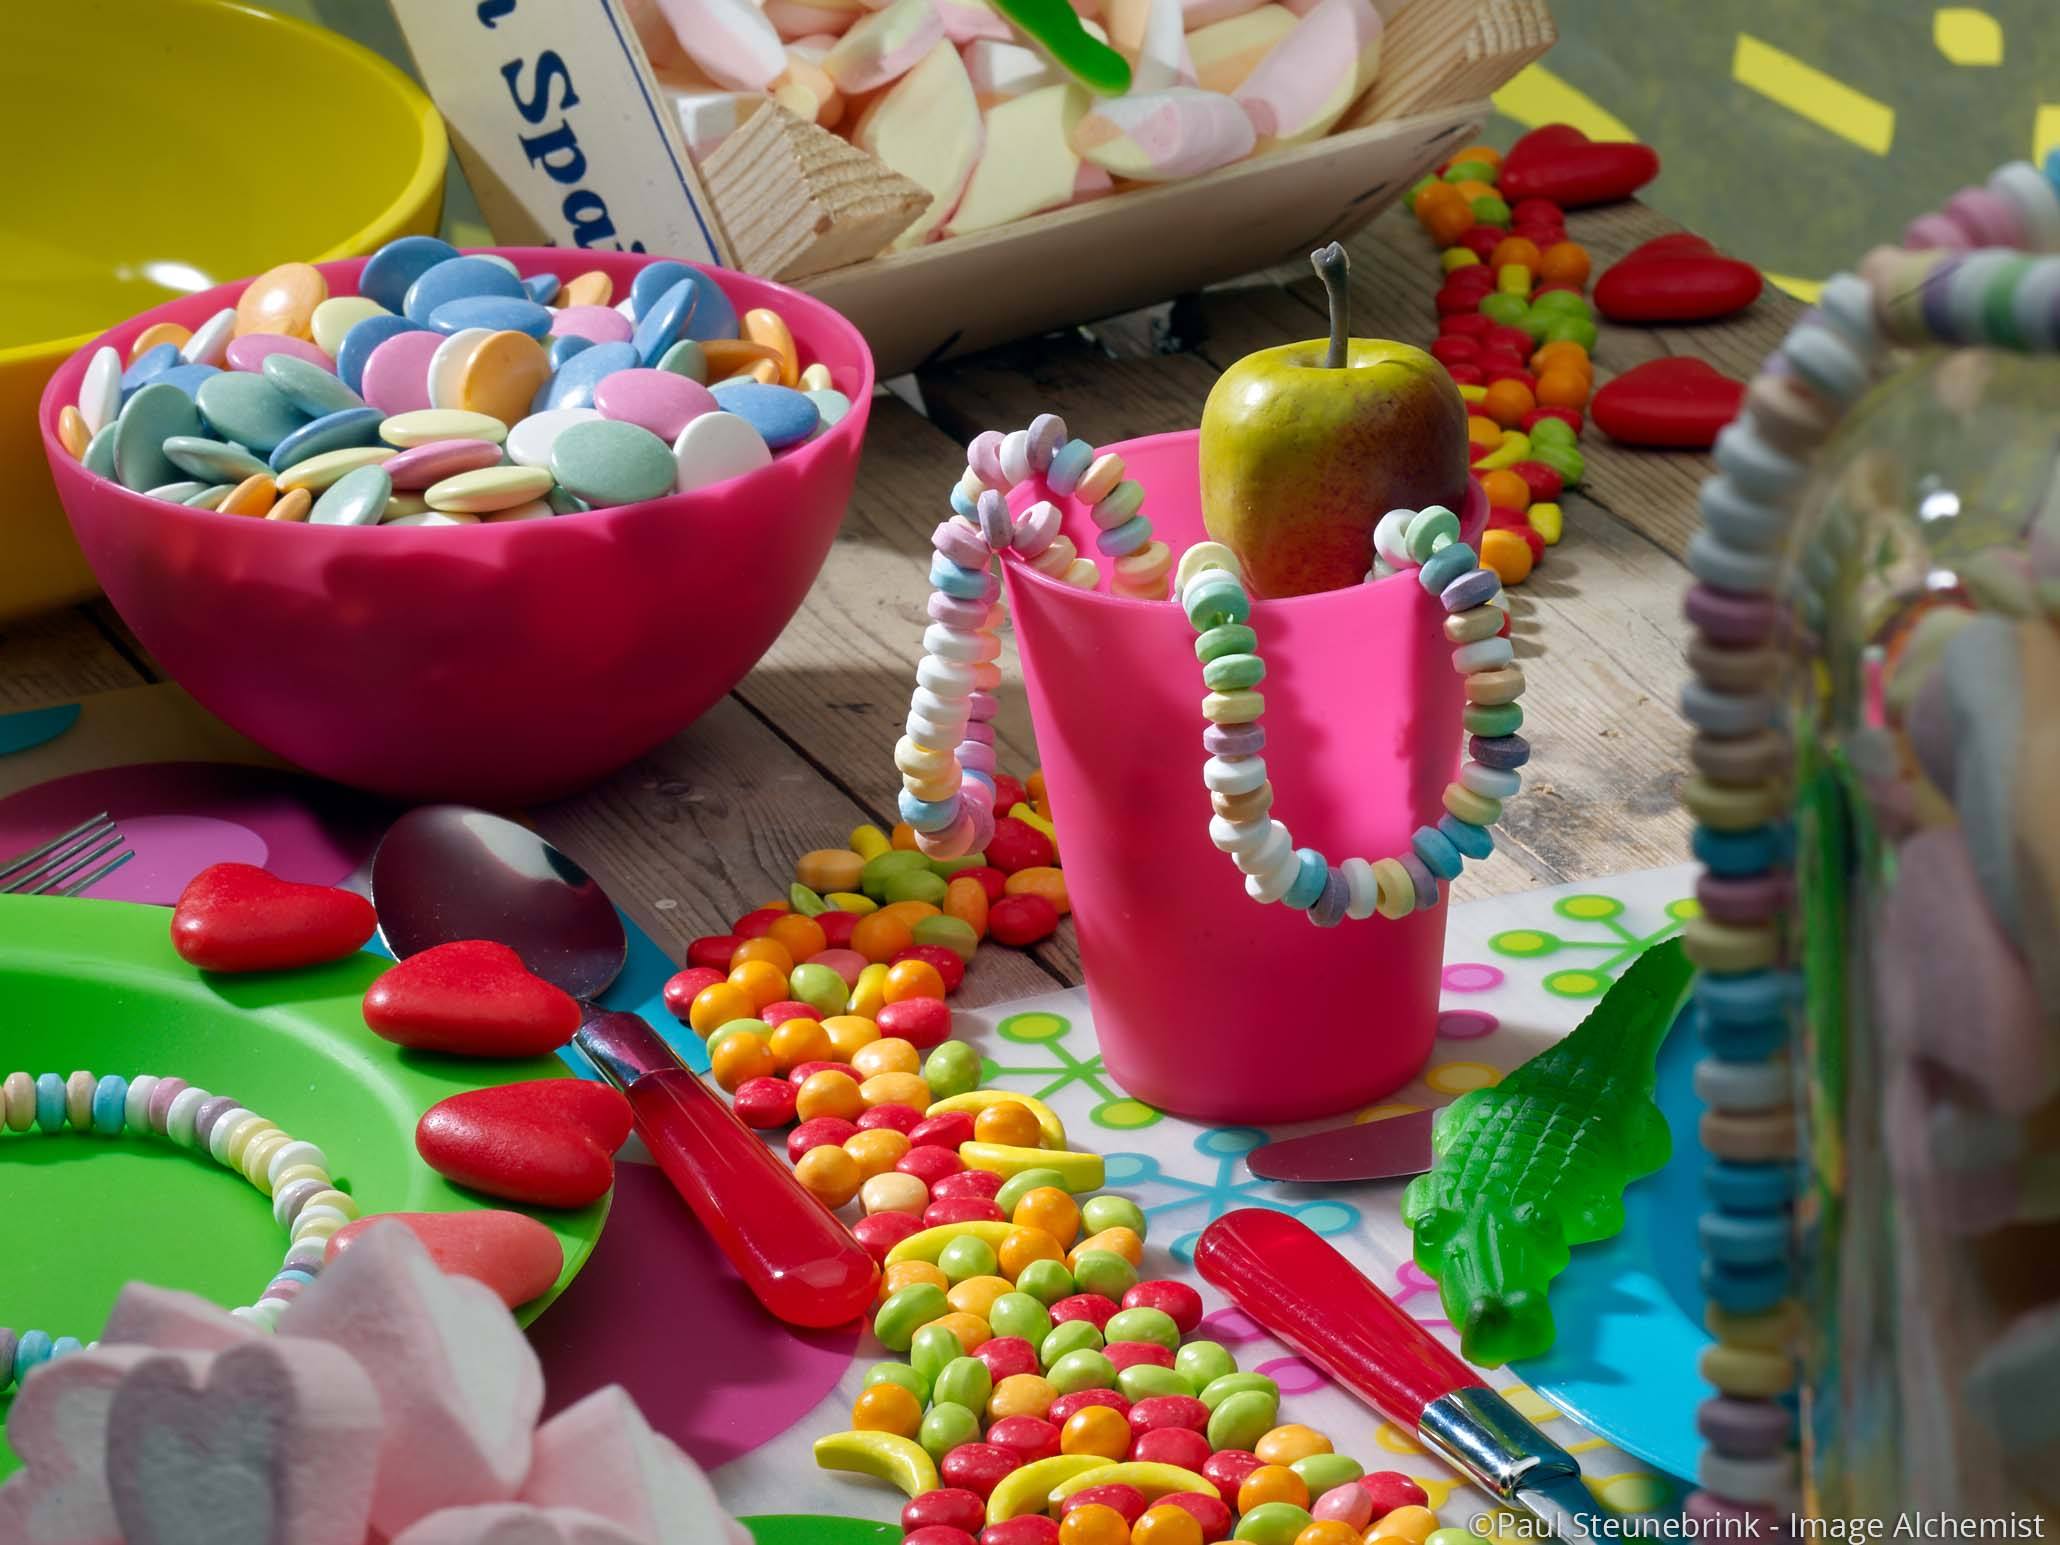

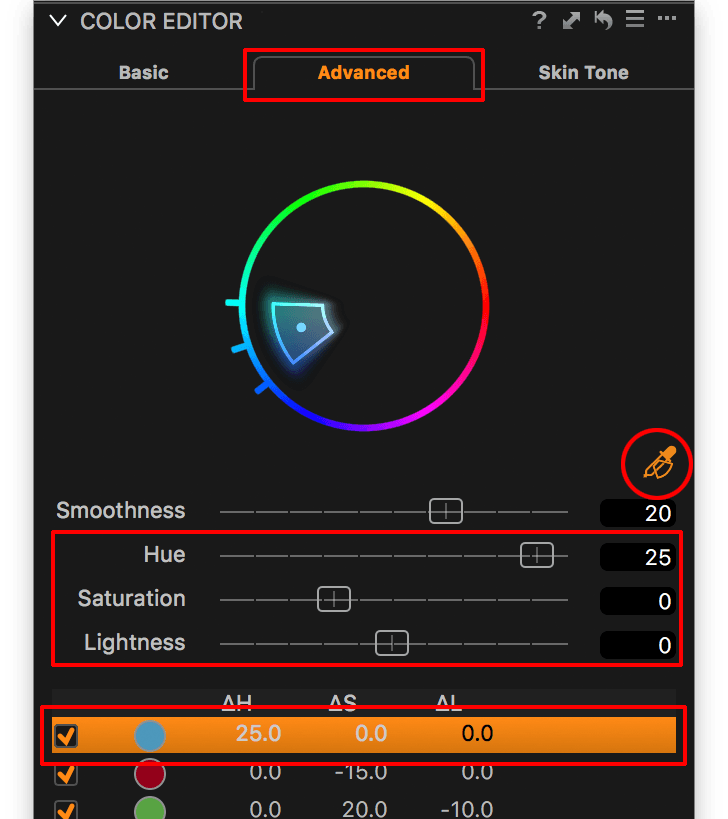
I start with the blue plate in the foreground right, with the crocodile on it. It is greenish-blue and I like to make it blue. This is typically a Hue rotation job. I move the Hue slider for the blue sample to +25.
Next, I make the red of the spoon and sugar hearts less saturated. I select the spoon and lower the Saturation slider to -15.
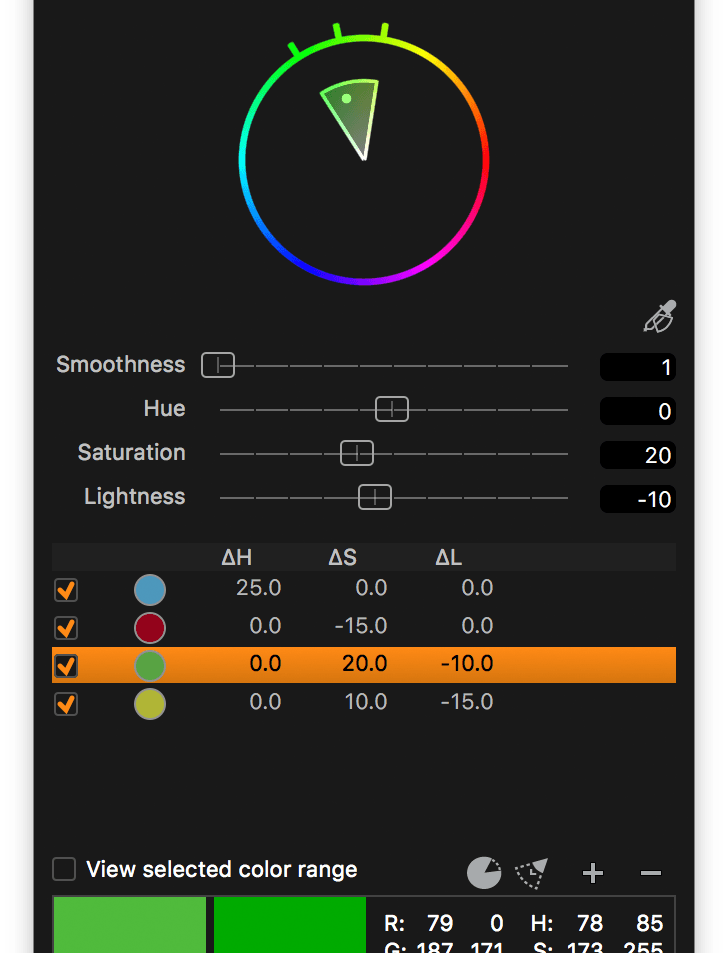
The green in the image and the plate at the left, in particular, is a bit too bright and lacking some saturation. I select the green plate at the left, and increase Saturation to +20 and lower the Lightness to -10 as you can see in the screenshot above.
Last, I select the yellow spot in the background. I increased the Saturation to +10 and lowered the Lightness to -15.
Notice the list below the delta H/S/L which reflects the adjustments for each of the color samples.
Neighboring Colors
You now are familiar with how to use the Color Editor, one of the most powerful tools in Capture One. It was not that hard, was it? But mind you, there is more and I will show you.
I started saying that using the Color Editor is a two-step process. Well, let’s make it three because I add one intermediate step:
- select a color to create a color sample,
- adapt the color sample,
- edit the selected color.
A color sample is like a slice of a pie. And just with real pies, we can make the slice smaller and bigger. This affects whether the sampled colors and its neighboring colors are affected by the adjustments or not.
For example, you sample a blue object. But the slice op the pie ranges from a bit greenish blue to a bit reddish blue.
There are several ways to adapt the color sample and to review which part of the image is affected by the color sample.
Smoothness Slider
The Smoothness slider is not an adjustment like the Hue, Saturation and Lightness sliders. With Smoothness you determine whether there is a sharp cutoff between the colors that are part of the sample and those who are not.
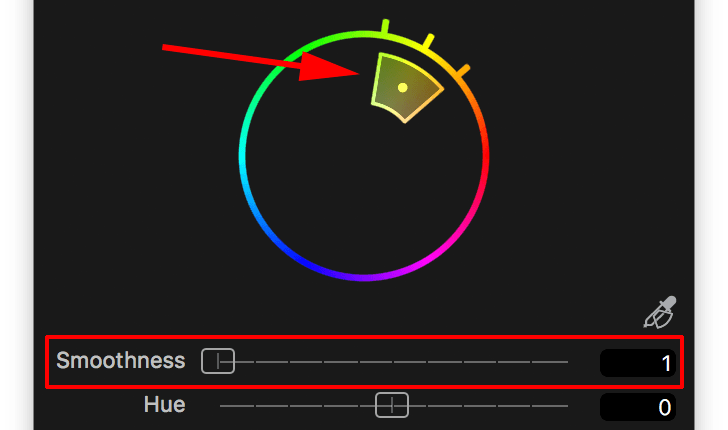
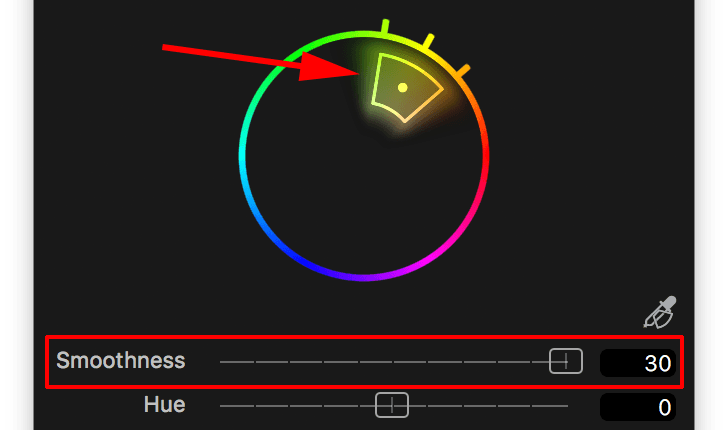
The default Smoothness for the Advanced Color Editor is 20, the range is from 1 to 30 and the selected value is reflected in the graphics of the Color Wheel.
Manual Adjust Sample
Apart from changing the Smoothness of the selected color with the slider, you can do a lot more with it to change its shape and as a result the effect of your edits. I suggest you make a color sample on your computer with the Color Editor tool and select a color with the color picker to see it for yourself.
Next, hover your mouse over the edges of the sample, the center point (the dot in the sample) and the three handles on the circle. You see the mouse cursor change into a symbol that clearly tells you what you can do when you drag the mouse.
Saturation Range
When you select a color for the color sample, only a part of the Saturation Range is included in that sample. Sometimes you like to include the complete saturation range to the sample, from little to fully saturated. Obviously, you can drag the borders of that sample with the mouse, but there is a quicker solution.
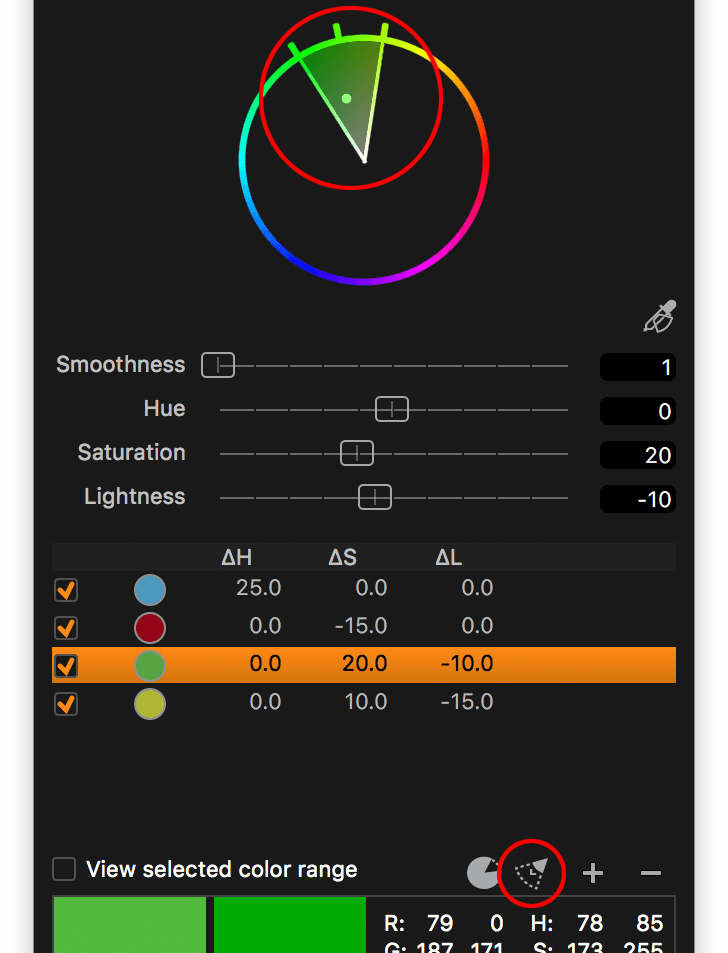
The Advanced and Skin Tone Color Editor have a Span Full Saturation Range switch for that can do this for you. Note that you can not switch it off once you enabled it for a sample unless you directly undo the action.
View Color Range
You now learned that you can change a lot about the color sample to precisely select a color to edit, but you want to be able to review the effect of your selection efforts. Fortunately, that is very simple.
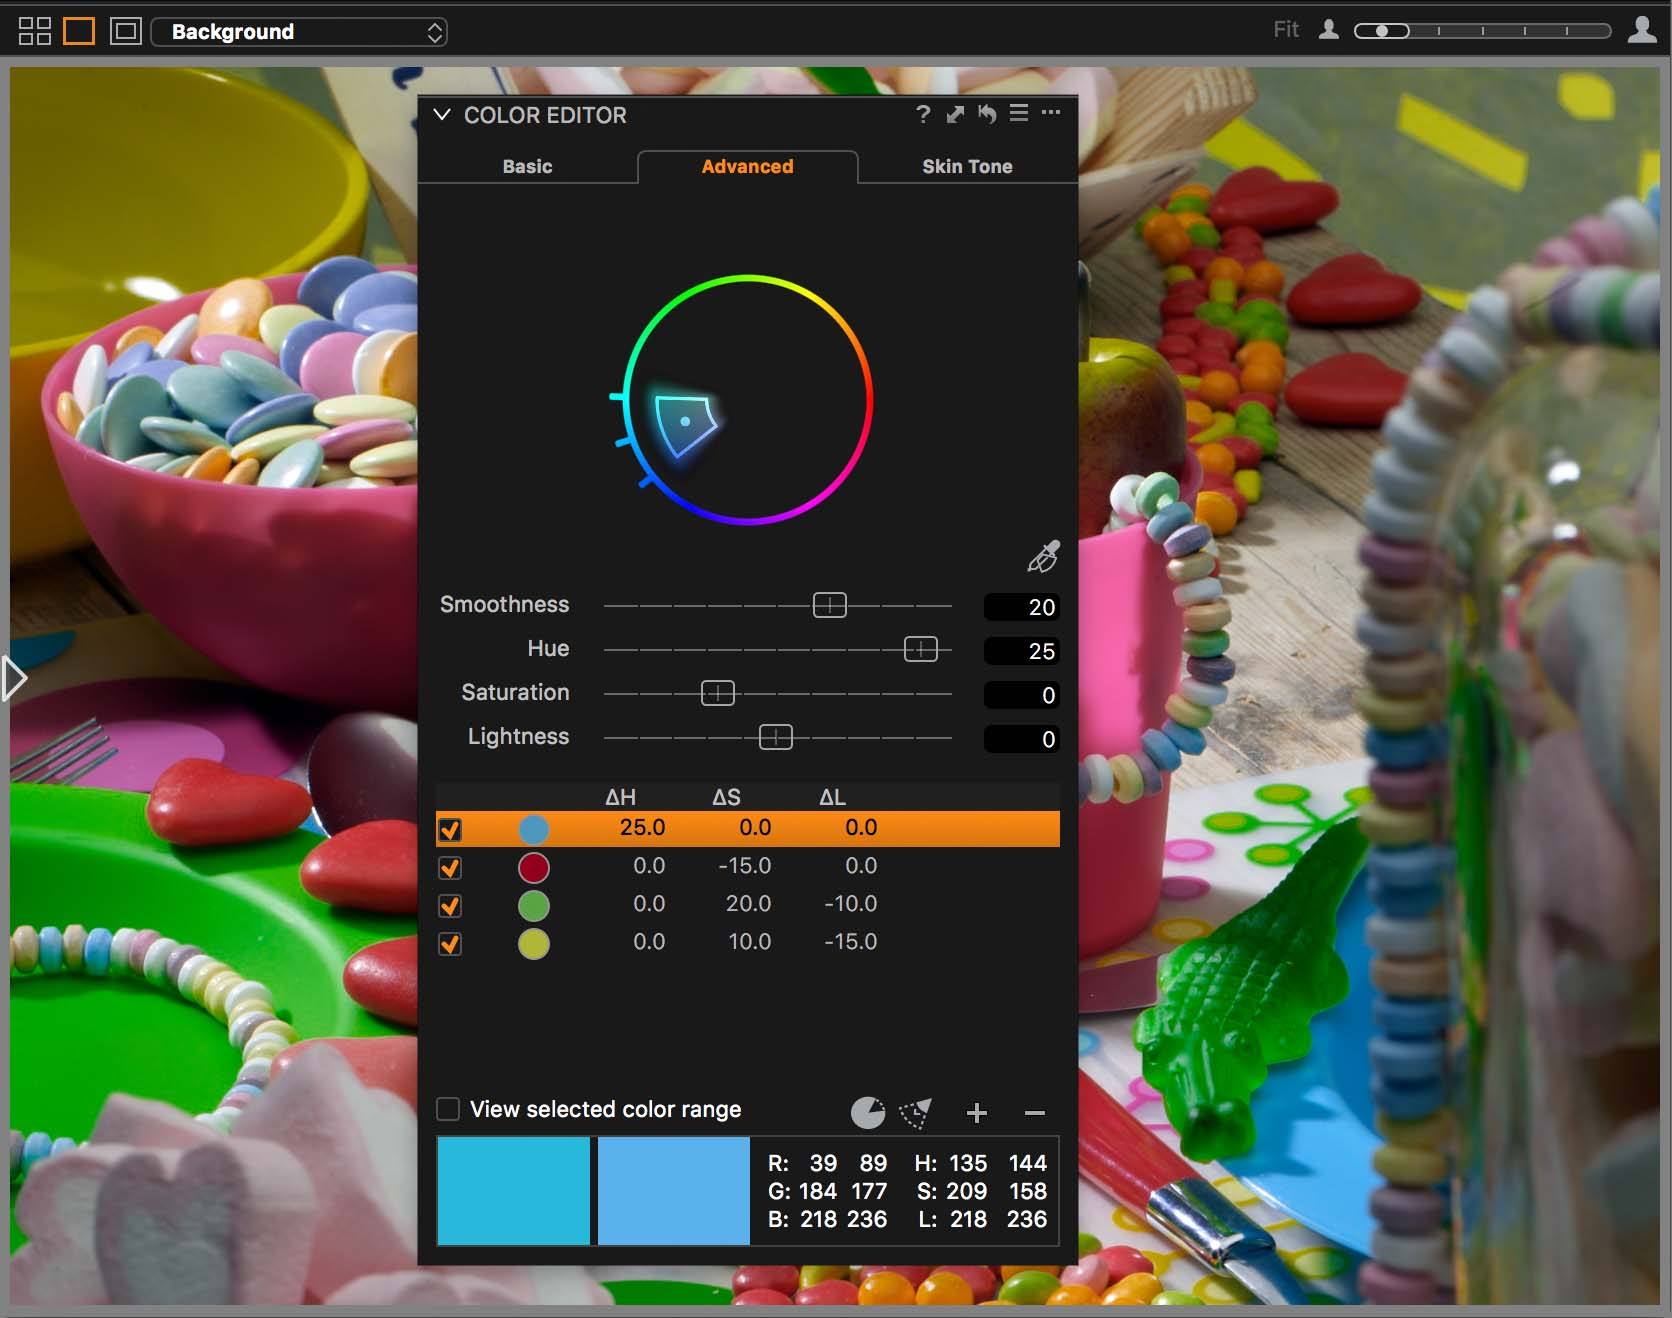
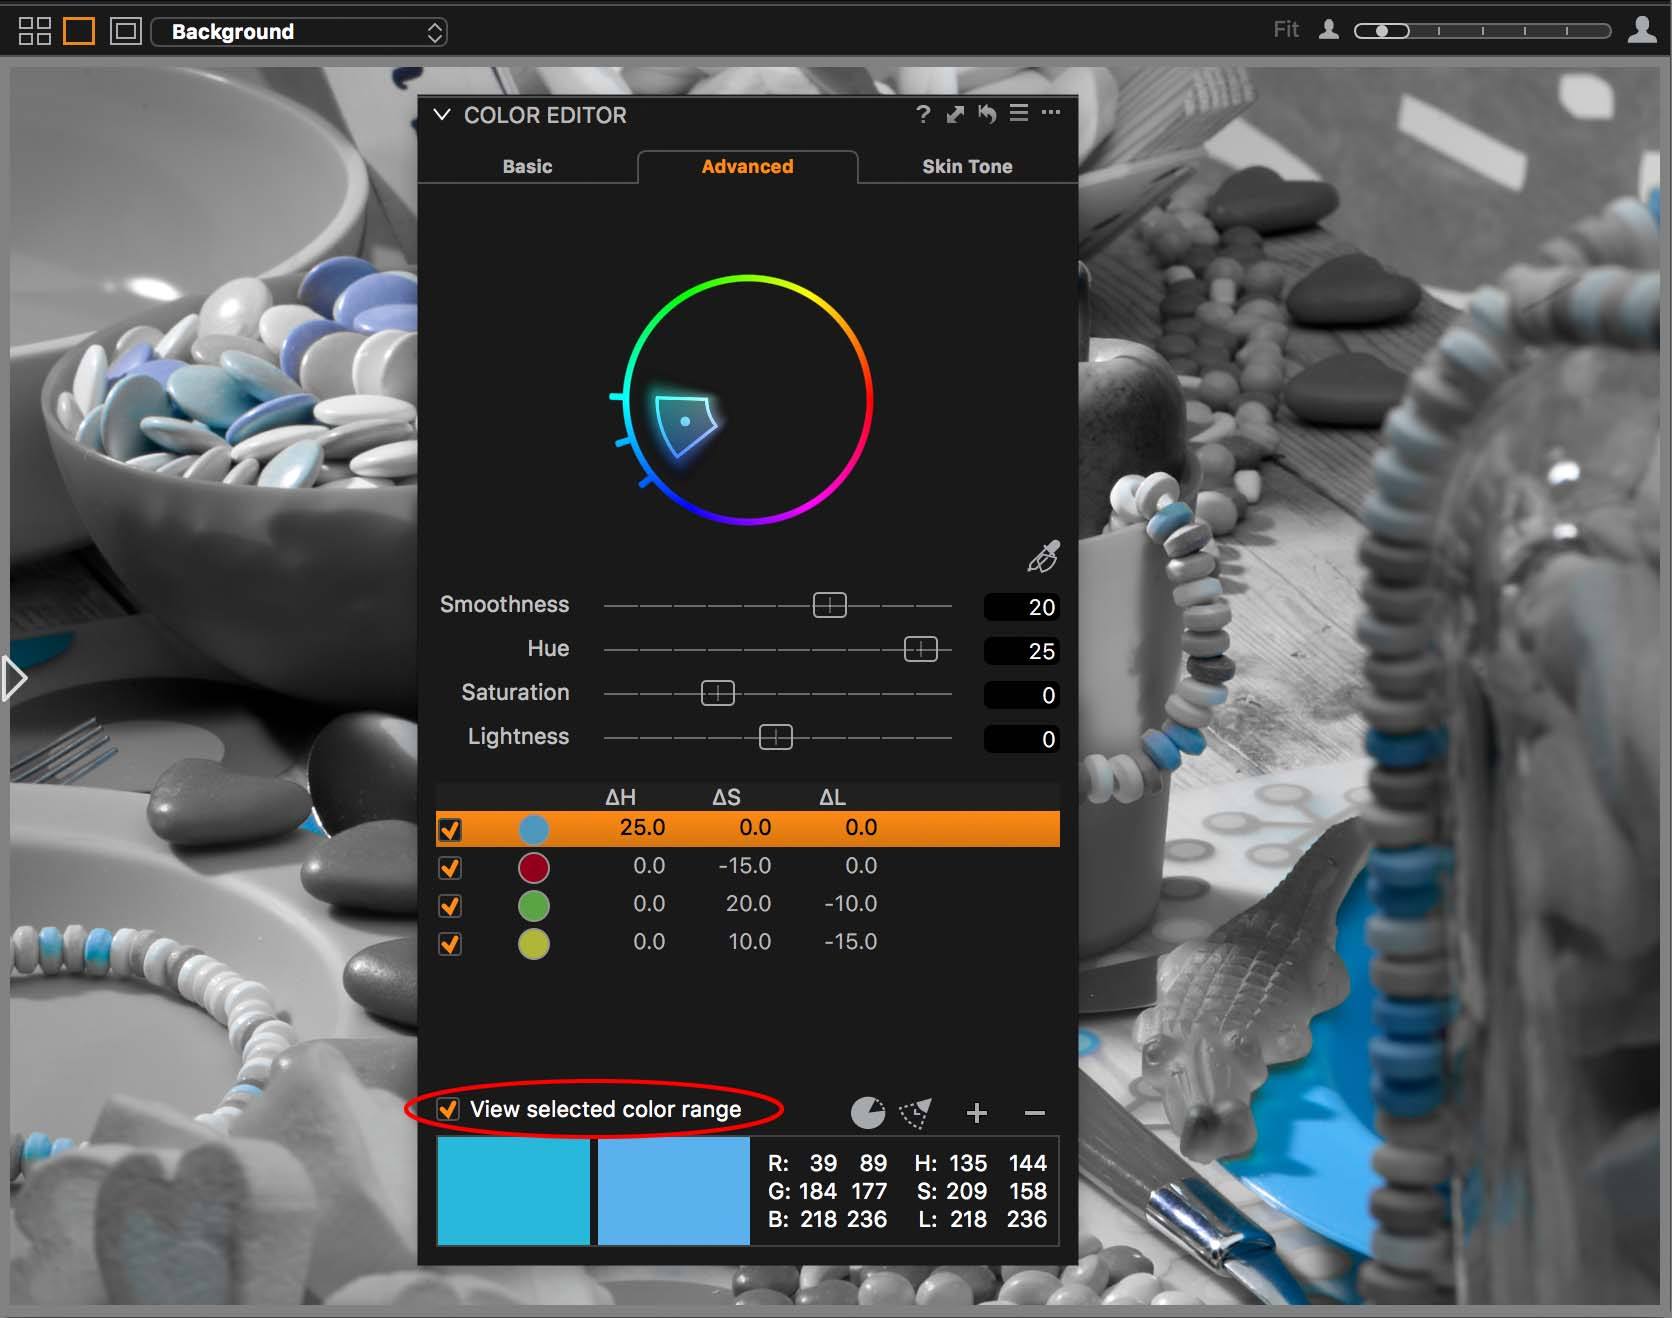
Each of the three Color Editors has the option View Selected Color Range as a checkbox bottom left. This will show you the selected colors in the sample in their current status (in color), and all remaining colors in greyscale.
Note that this is only a tool and affects the display in the Viewer. When you process the image the entire image is in color.
Invert
Sometimes it is better to select what you don’t want. Next, you invert your selection. For example, you select a red object in the Viewer. Next, invert the selection. Now all colors except red are selected.
Maybe you like to darken or desaturate all colors except one. Easy task: select that one color, invert and desaturate.
More
When you have made multiple color samples with their respective adjustments, you might want to see what each is doing. For each sample, it is easy to switch it on/off through the checkbox in front of it.
Removing a sample is also easy. Select the color sample and click on the “-” sign bottom right.
You can also add a sample with the “+” sign bottom right. This selects the entire wheel. You now can use Hue, Saturation, and Lightness sliders to change the overall color of your image.
You can also evaluate the color adjustment per sample. View the two-color blocks at the bottom left of the tool. These show the before/after state. At the right, you see the respective RGB and HSL values of the color sample before and after the adjustment.
Skin Tone Practice
When you understand the Advanced editor, you understand the Skin Tone editor too. But what are the differences?
The Skin Tone editor has the following extras over the Advanced editor:
- Uniformity sliders for Hue, Saturation, and Lightness
However, the Skin Tone editor has a few limitations compared to the Advanced editor:
- one color sample at a time
- no Invert Slice function
- the smaller range for sliders
It is obvious that the Skin Tone editor is for bringing colors together with the three Uniformity sliders. You can choose whether you like to bring colors together based on Hue, Saturation, or Lightness or a combination thereof.
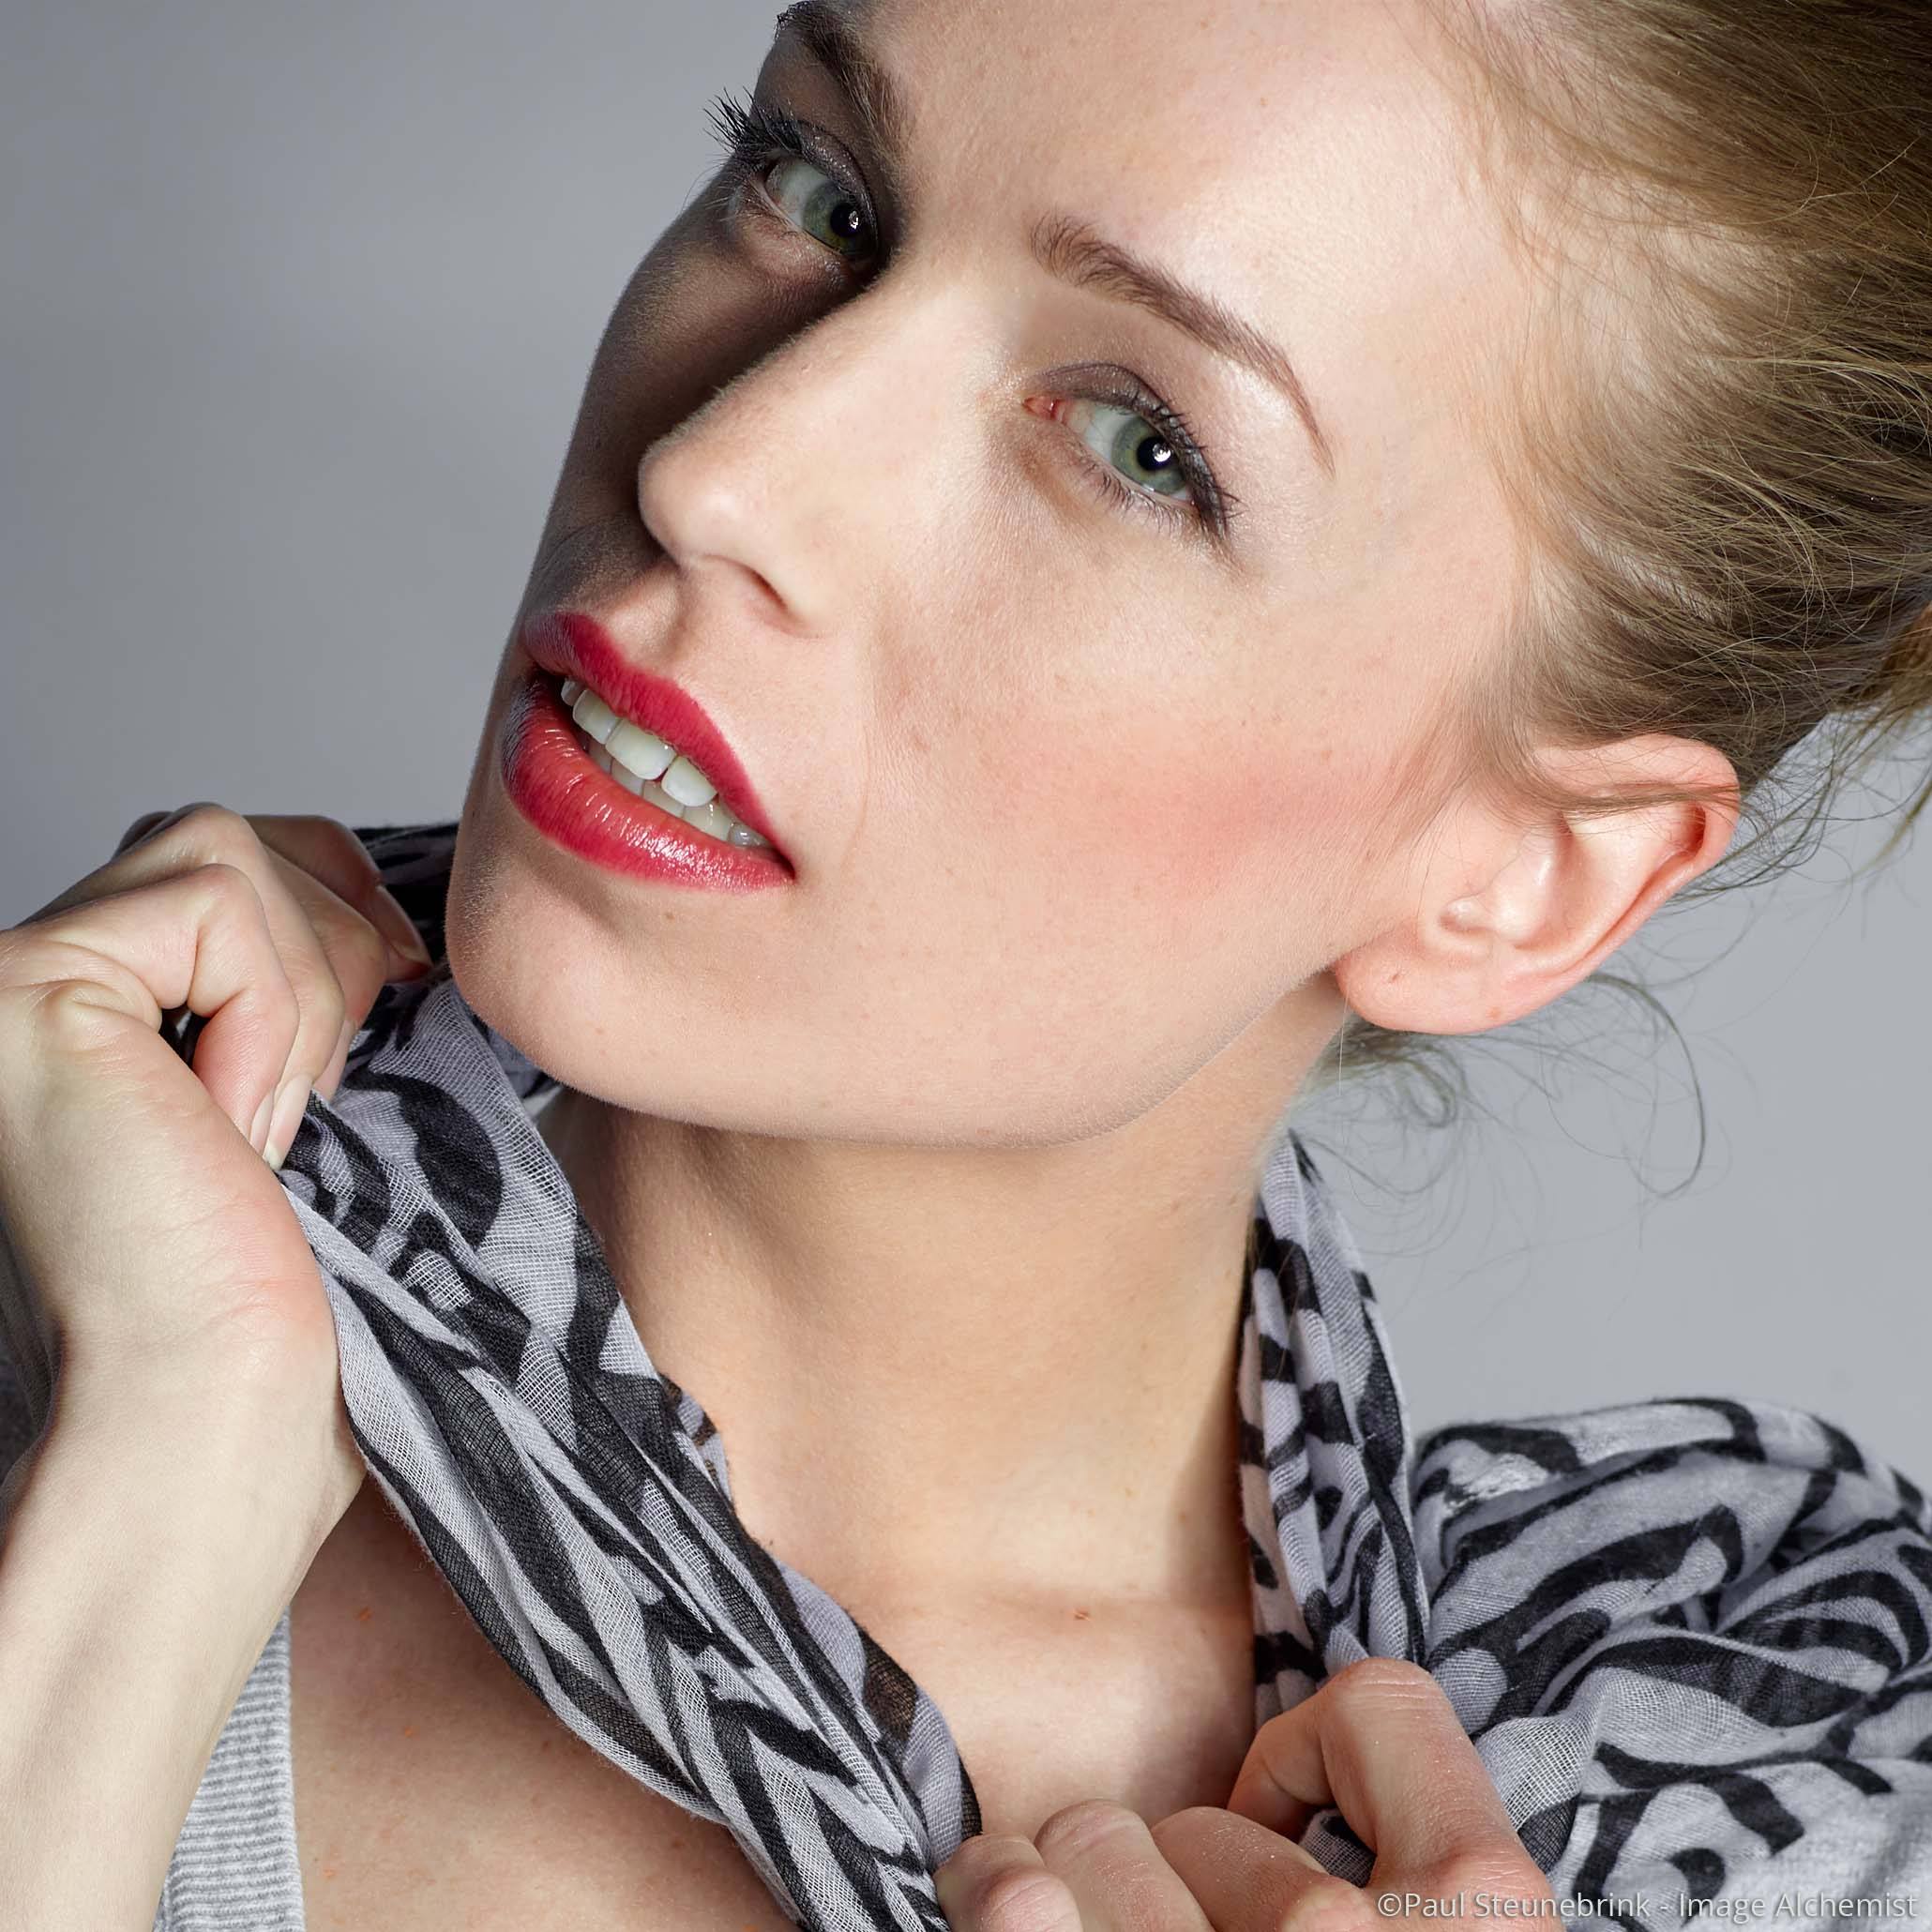
It is a great feature to experiment with and the results can be very rewarding.
Cursor Tools
As I explained earlier each editor has its specific cursor tool, the color picker. You can select the right picker from the Cursor Tools bar in the Toolbar.
Notice that both the Advanced and Skin Tone editor have a separate color picker for local adjustments as well. Also, note that the Pick Color Correction picker is for the Advanced editor.
Presets And Actions
In the top right corner, you find the tool’s Preset and Action menus. Here you find several options that broaden the usability of the Color Editor tool. The following three items are of particular interest.
- Save and Apply Presets
- Save as ICC profile
- Create Masked Layer from the selection
I will discuss each into more detail below.
Presets
You can save any adjustment you make with each of the Color Editors for later use. When you save the Preset, give it a meaningful name that begins with the name of the editor you save.
Using the Preset is useful when you make adjustments that compensate for any overall color quality of your image. For example, some think their camera profile is too saturated for all colors or only a few. The Color Editor is not only a great tool to compensate for this, but a Preset makes it easy to apply this repeatedly.
As the screenshot above shows, you can select the editor for which you like to store the adjustments. Please note, however, that when you apply a Color Editor preset, all previous adjustments are replaced or overwritten.
For example, you make a Skin Tone editor adjustment. Next, you apply a preset that has only saved adjustments from the Advanced editor. The result is that the Skin Tone adjustments are lost.
Save As ICC Profile
This feature is a hidden secret for many and a real gem.
Take the example of oversaturated colors or a color cast in your images from a particular camera and built-in Capture One camera profile. Instead of saving an adjustment to a Preset, you save it as an ICC profile.
The save dialog will provide a default name like PhaseOneP40+-Color Corrected and you change this in PhaseOneP40+-Less Saturated. It is stored for you in the right location and with the right name automatically.
Next, instead of using the Color Editor tool, you apply the profile in the Base Characteristics tool. From a workflow point of view, this is a faster option than a Preset. You can even make the new profile the new default for that camera in the Base Characteristics tool.
Create Masked Layer
Imagine an image with a blue sky and trees with branches in the foreground. You would like to darken the sky. Creating a mask on an adjustment layer is fairly complex because of the branches. Fortunately, there is a much easier way.
Click with the Color Editor in the blue sky to make a sample. Next, go to Action menu > Create Masked Layer from selection. This will create a new layer with a mask based upon the color selection. Last, change the Exposure or other adjustment for that layer.
As you will understand from this example, converting a color selection into a masked layer opens endless new possibilities.
Thank you
For reading. Please feel free to leave a comment. Like us on Facebook or subscribe to our newsletter to stay informed about new blogs.
Best Regards,
Image Alchemist








Color Editor will not expand so I can’t use it. Too bad, looks like a useful feature.
Hi Monte,
The issue with the Color Editor not expanding mostly occurs on Windows due to an incompatible screen ruling setting on your system. The Color Editor as floating tool mostly works well. Contact me or Phase One support directly if you need any assistance.
Best, Paul Steunebrink / Image Alchemist
Hi, is there a way to select an exact color based by a RGB Color Codes ?
For example i want to work on #0000FF.
Thanks
Hi Cosmin,
I think the new Normalise tool in Capture One 11.1 is very helpful for that. Have you already tried this?
Best, Paul Steunebrink / Image Alchemist
Is there anyway to use this to shift colours for Infrared processing? i.e. as in PS’s Channel Mixer?
I’ve found it’s good at preserving, and even cooling more, the white balance from the camera shots.
I’m using Capture One 12 Express (For Fujifilm)
Hi Geoff,
You could try the Color Editor, and shift colors with the Hue slider, either for a specific color (pie chart) or the entire color wheel. The Pro mode has the Advanced Color Editor, with more options. For more information on this tool, please reference Capture One Color Editor
Best, Paul Steunebrink / Image Alchemist.