Capture One Preferences (part 3)
Unlock the secrets behind the Capture One Preferences and learn how to master the program. Make it behave to your liking for best performance, speed and flexibility. This is Part 3 in a series of 3.
Capture One Preferences
The Capture One Preferences allow you to control the program’s behavior and fully tailor it to your needs. Understanding Preferences can be hard sometimes. You can easily feel overwhelmed by the many features you are not yet familiar with.
The Capture One Preferences are organized in a series of tabs. In this blog, I will discuss each tab, one by one, as well as the different sections on each tab.
This is Part 3 in a series of 3. Continue reading or skip to Preferences Part 1 or Part 2.
Preferences Part 3
Topics in Capture One Preferences – Part 3 are:
- Crop tab
- Focus tab
- Warnings tab
- Update tab
Crop Tab
At the Crop tab, you control two functions of Capture One Pro. One is – obviously – the Crop tool. The other function affects the Grid and Guides in the Viewer.
A total of eleven items are spread over three sections: Mask, Grid, and Guides.
Mask
The Crop tool masks what will be cut off. With the settings in the Mask section, you determine when you see the crop mask, how it looks, and what is shown next to the mask.
With the Show option you determine when you see the crop mask: Always, Except During Drag, Never. Although Always is the default, the Except During Drag option is worth trying.
With the Opacity and Brightness sliders, you determine how the Mask looks. The Opacity slider varies the mask from totally transparent or invisible (value 0) to fully opaque (value 100). The Brightness slider changes the color of the mask from white (0) to black (100).
Although the default is good most of the time, very bright or dark subjects may require a different setting.
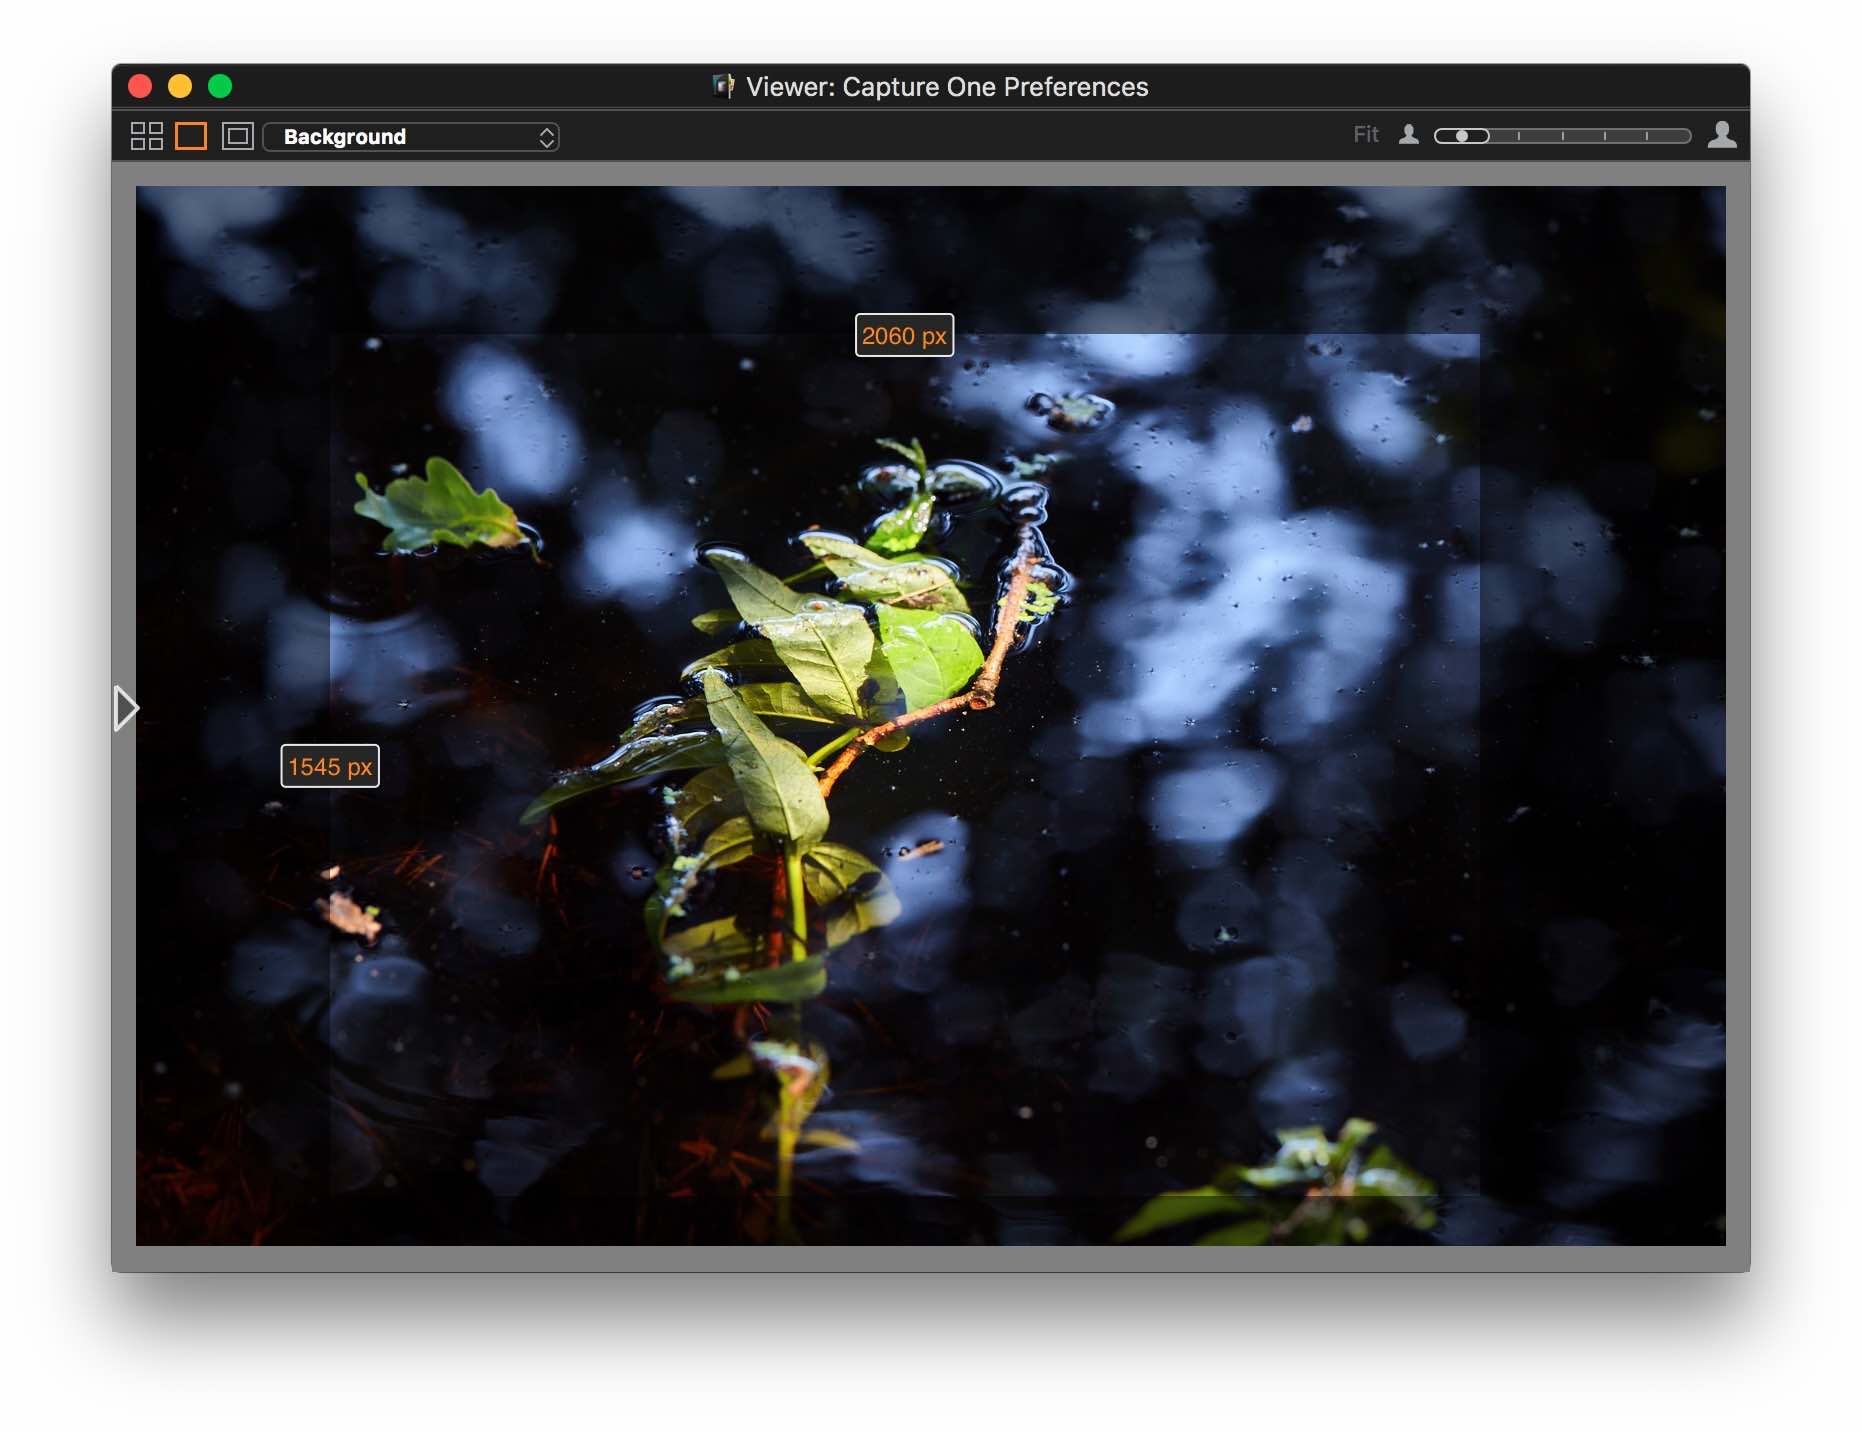
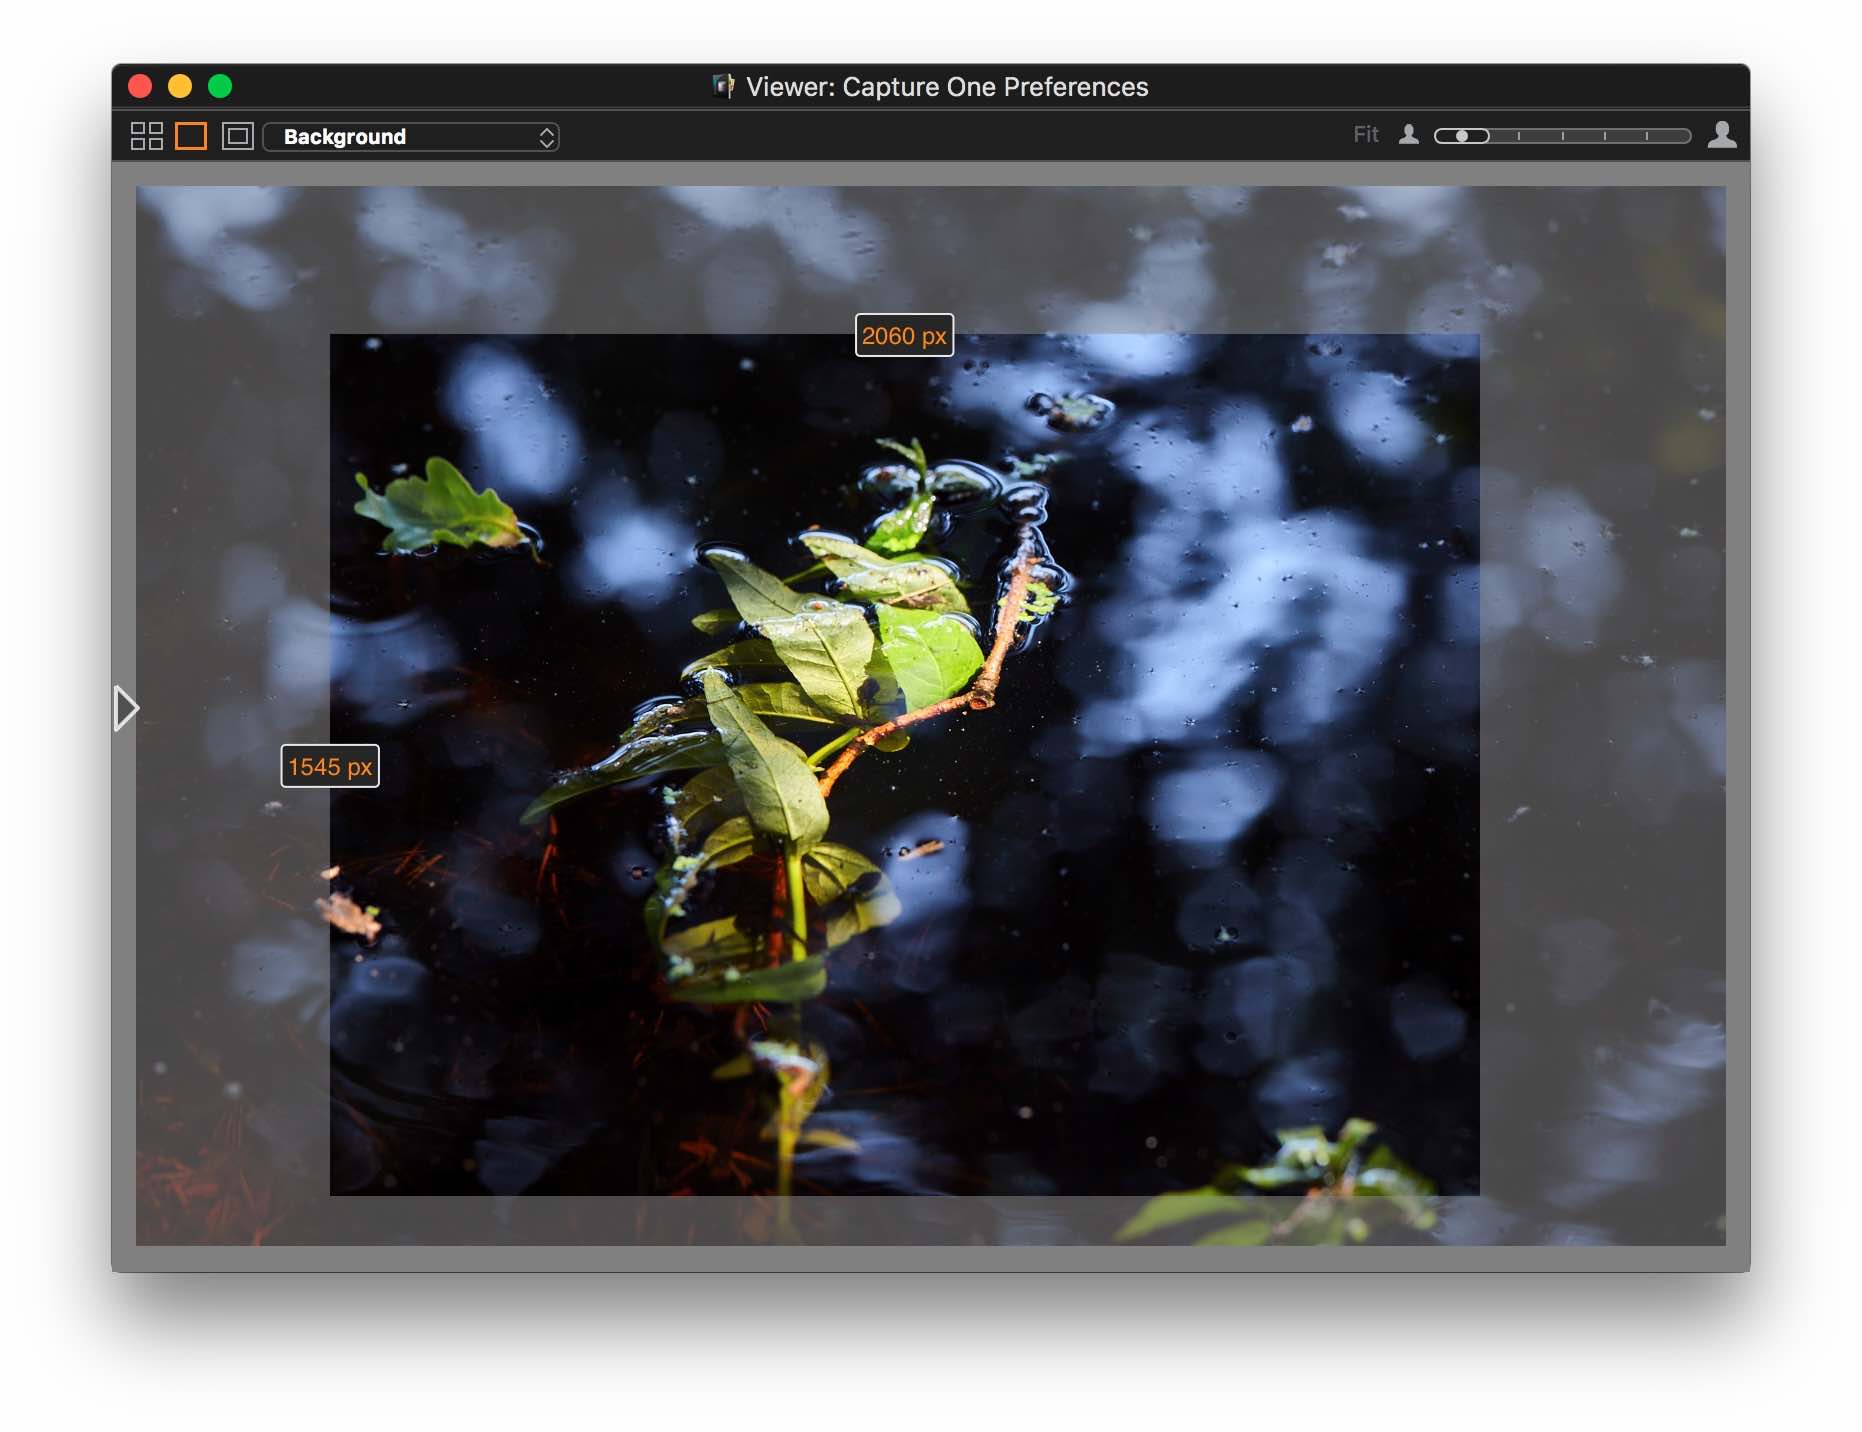
See the example above with the dark background I cropped. The default color is virtually invisible (before), while at 50 (grey) it starts making sense (after).
Show Frame And Labels
With the last two drop-down lists in this section, you control what is shown with the crop mask with the Show Frame and Show Labels settings.
The Show Frame setting allows you to enable a frame around the crop, next to or instead of the crop mask. Normally you do not see the frame, and I like it that way as it is a bit distracting. The Show Frame > When No Mask setting is responsible for that because we mostly have a mask, hence no Frame.
When the crop mask is hidden, as explained above, the Frame appears. Also, you can have the Show Frame option to Always to see the Frame independent from the crop mask visibility.
With the two images below in the before/after comparison, I switched from crop mask to frame.
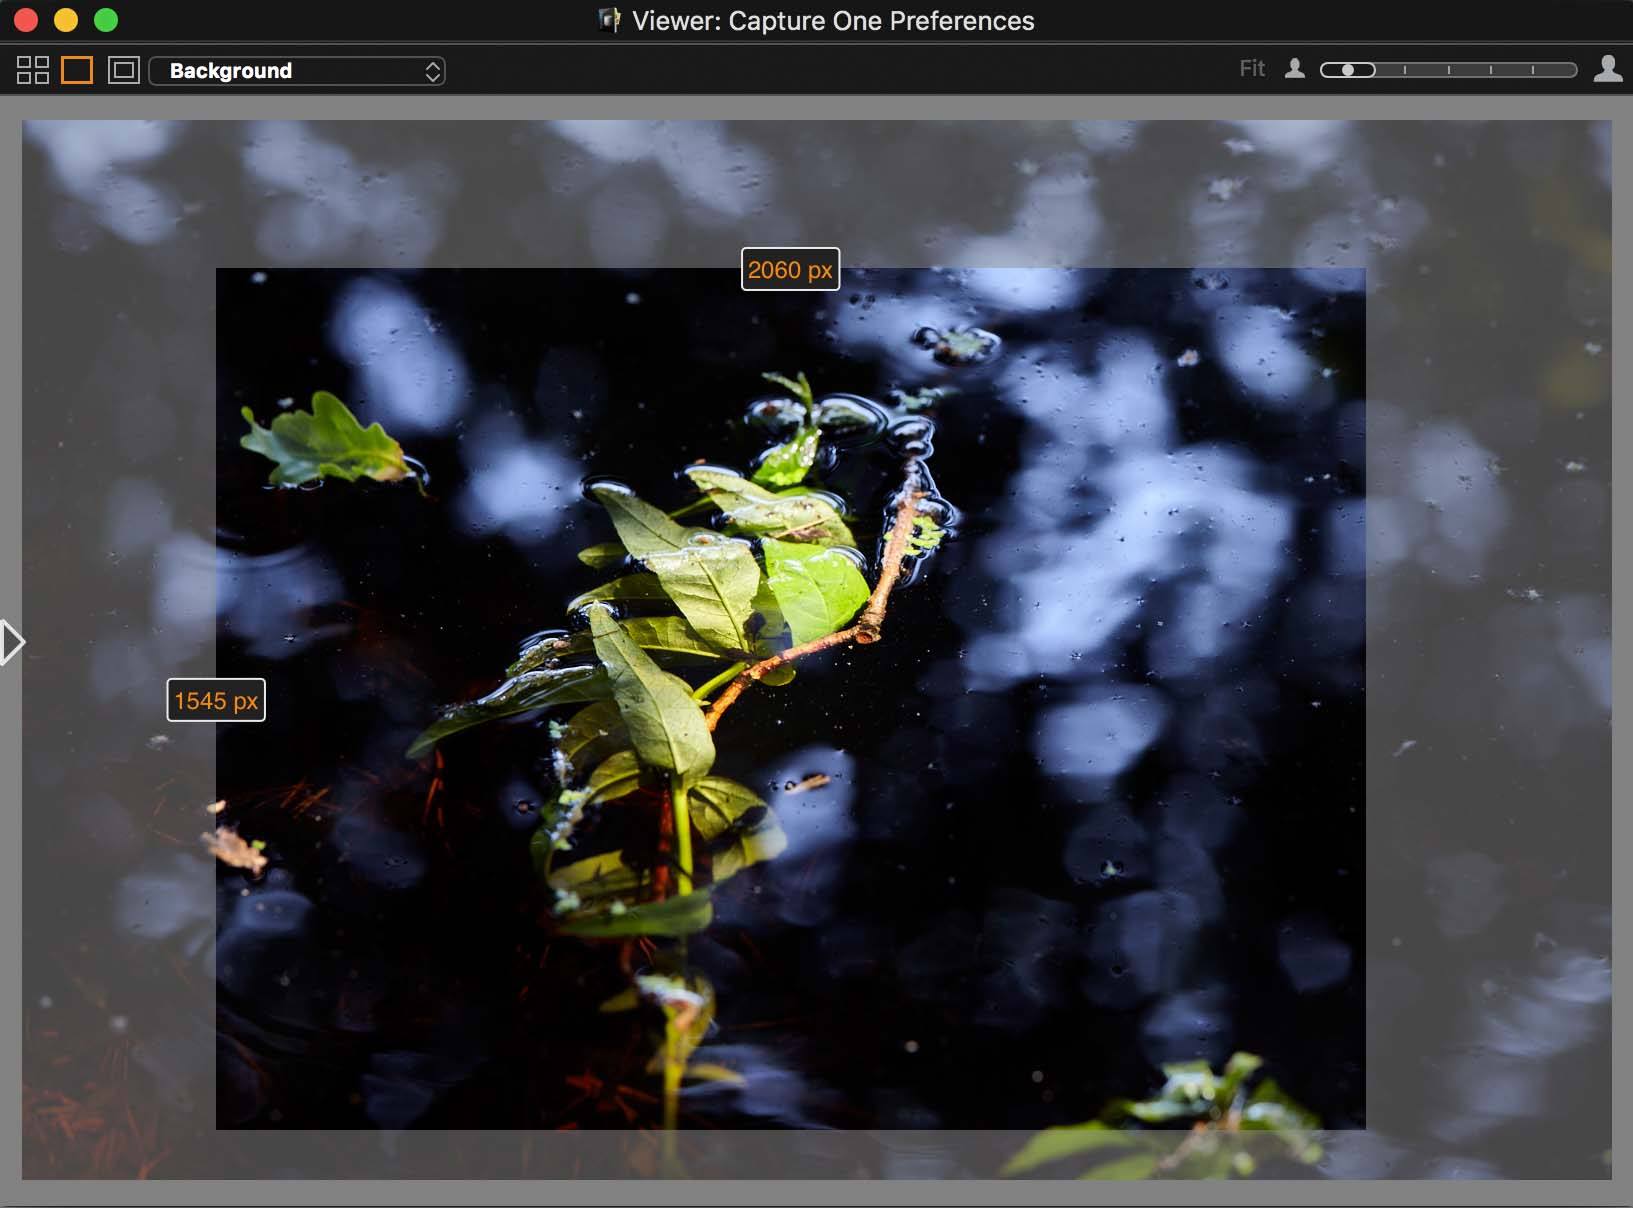
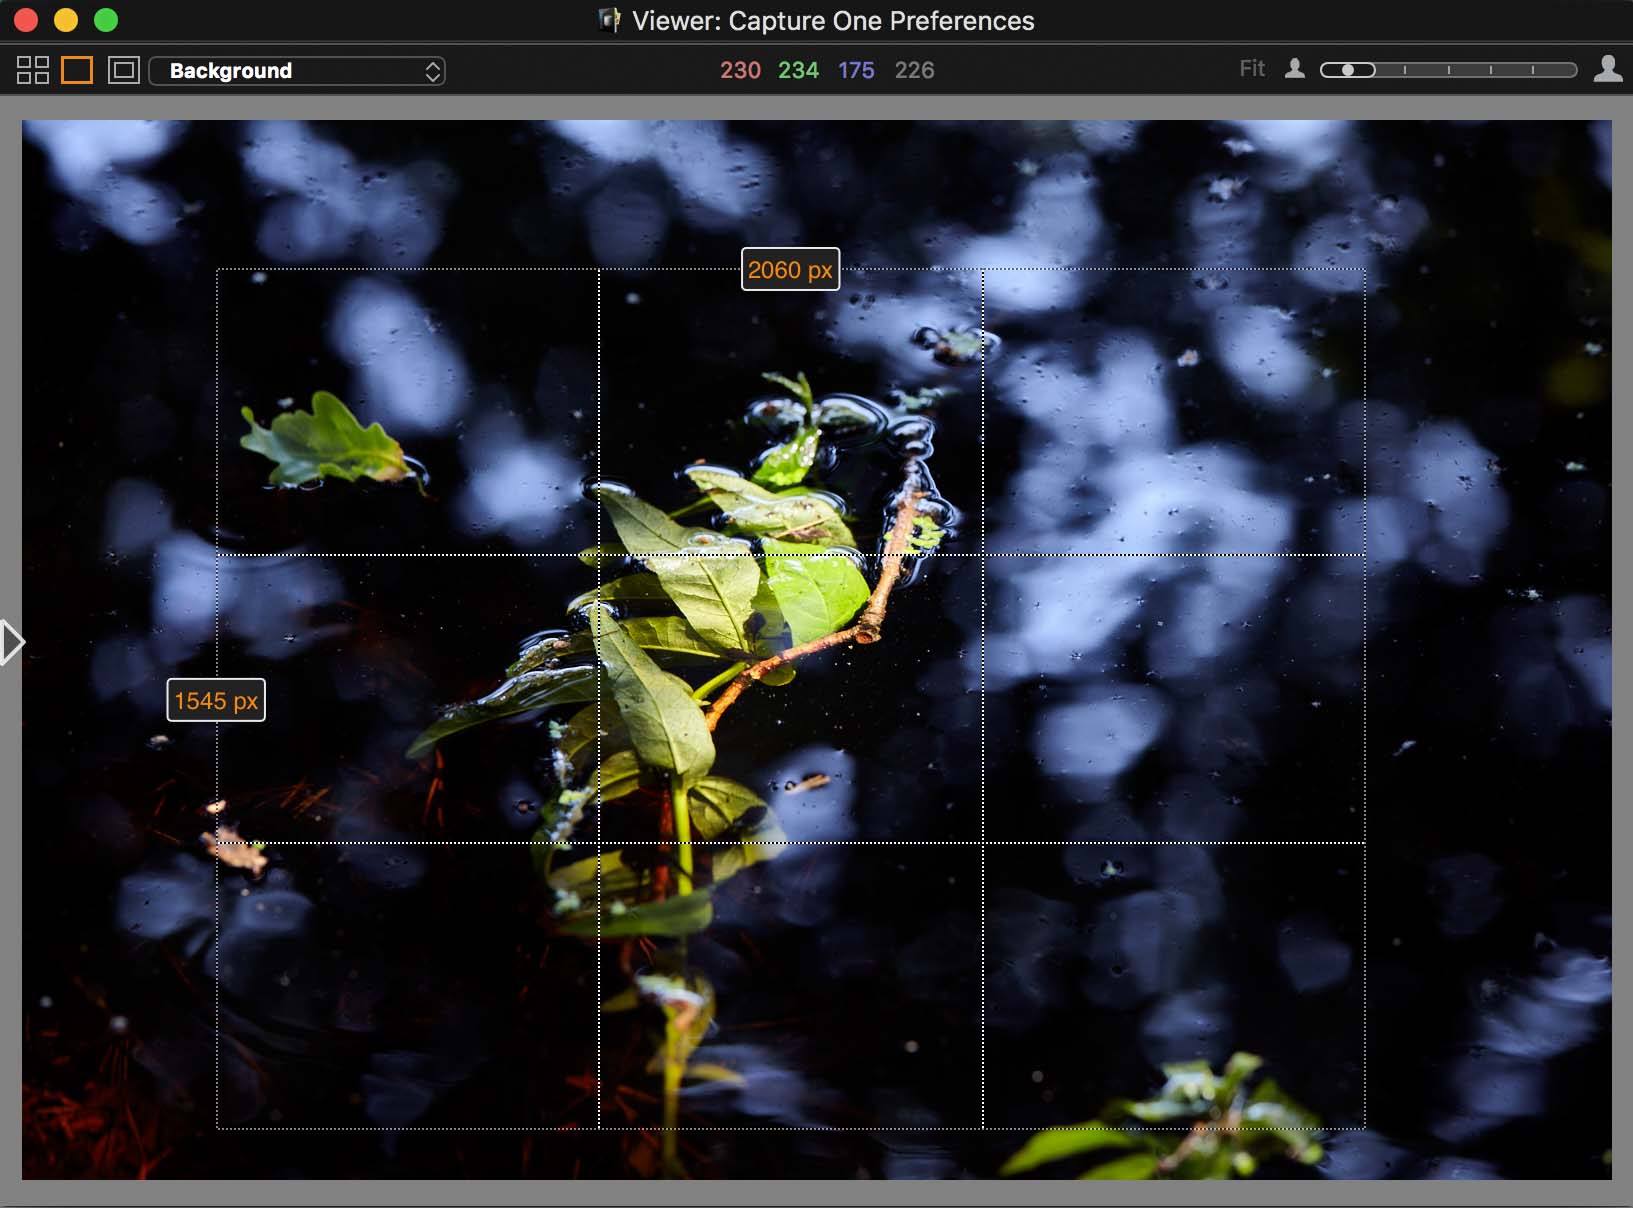
A Label at both the long and short edge of the crop shows the image size in pixels, centimeters, or inch. The selected Process Recipe in the Process Recipes tool determines which unit is displayed.
So do you want to see the Labels, or not? Available options are Always, During Drag Only, and Never?
As you can see you can fully customize your Crop experience!
Grid
The Grid is what you normally see during cropping. In the Grid section you set when the Grid is shown, what type of Grid you see, and its color.
In the Show option, you set when the Grid appears. There are three settings: When Grid and Guides On, During Drag Only or Never.
The first setting here is interesting. In the View menu, you find Show Grid and Guides. This is what is meant with When Grid and Guides On. We will see in a moment that you control both the Grid as the Guides based on what you set here.
What Type of Grid do you like? Notice that a Grid is a great help in creating a composition during cropping.
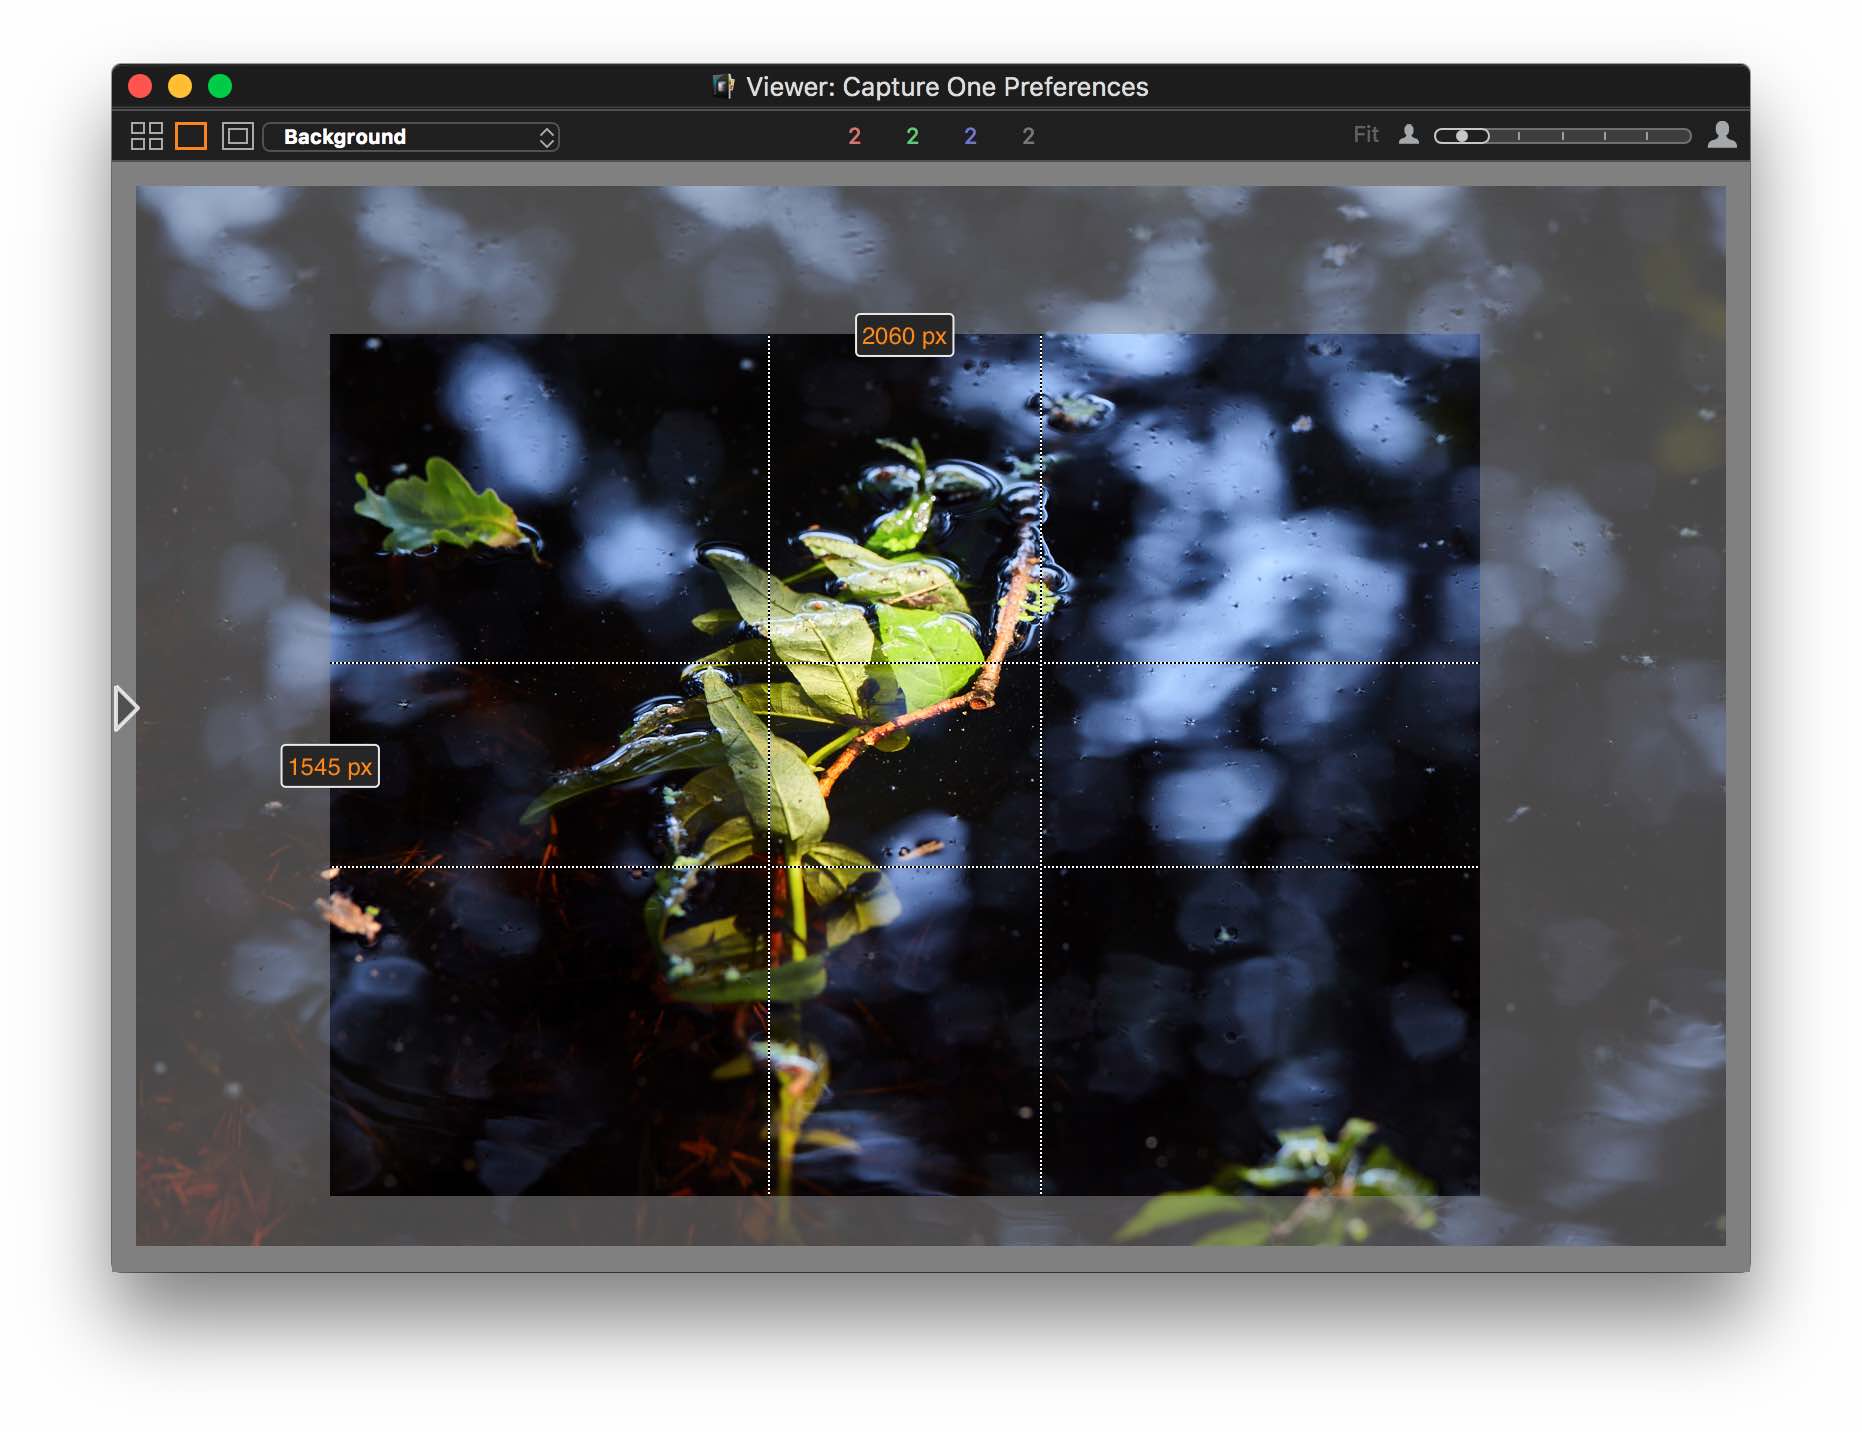
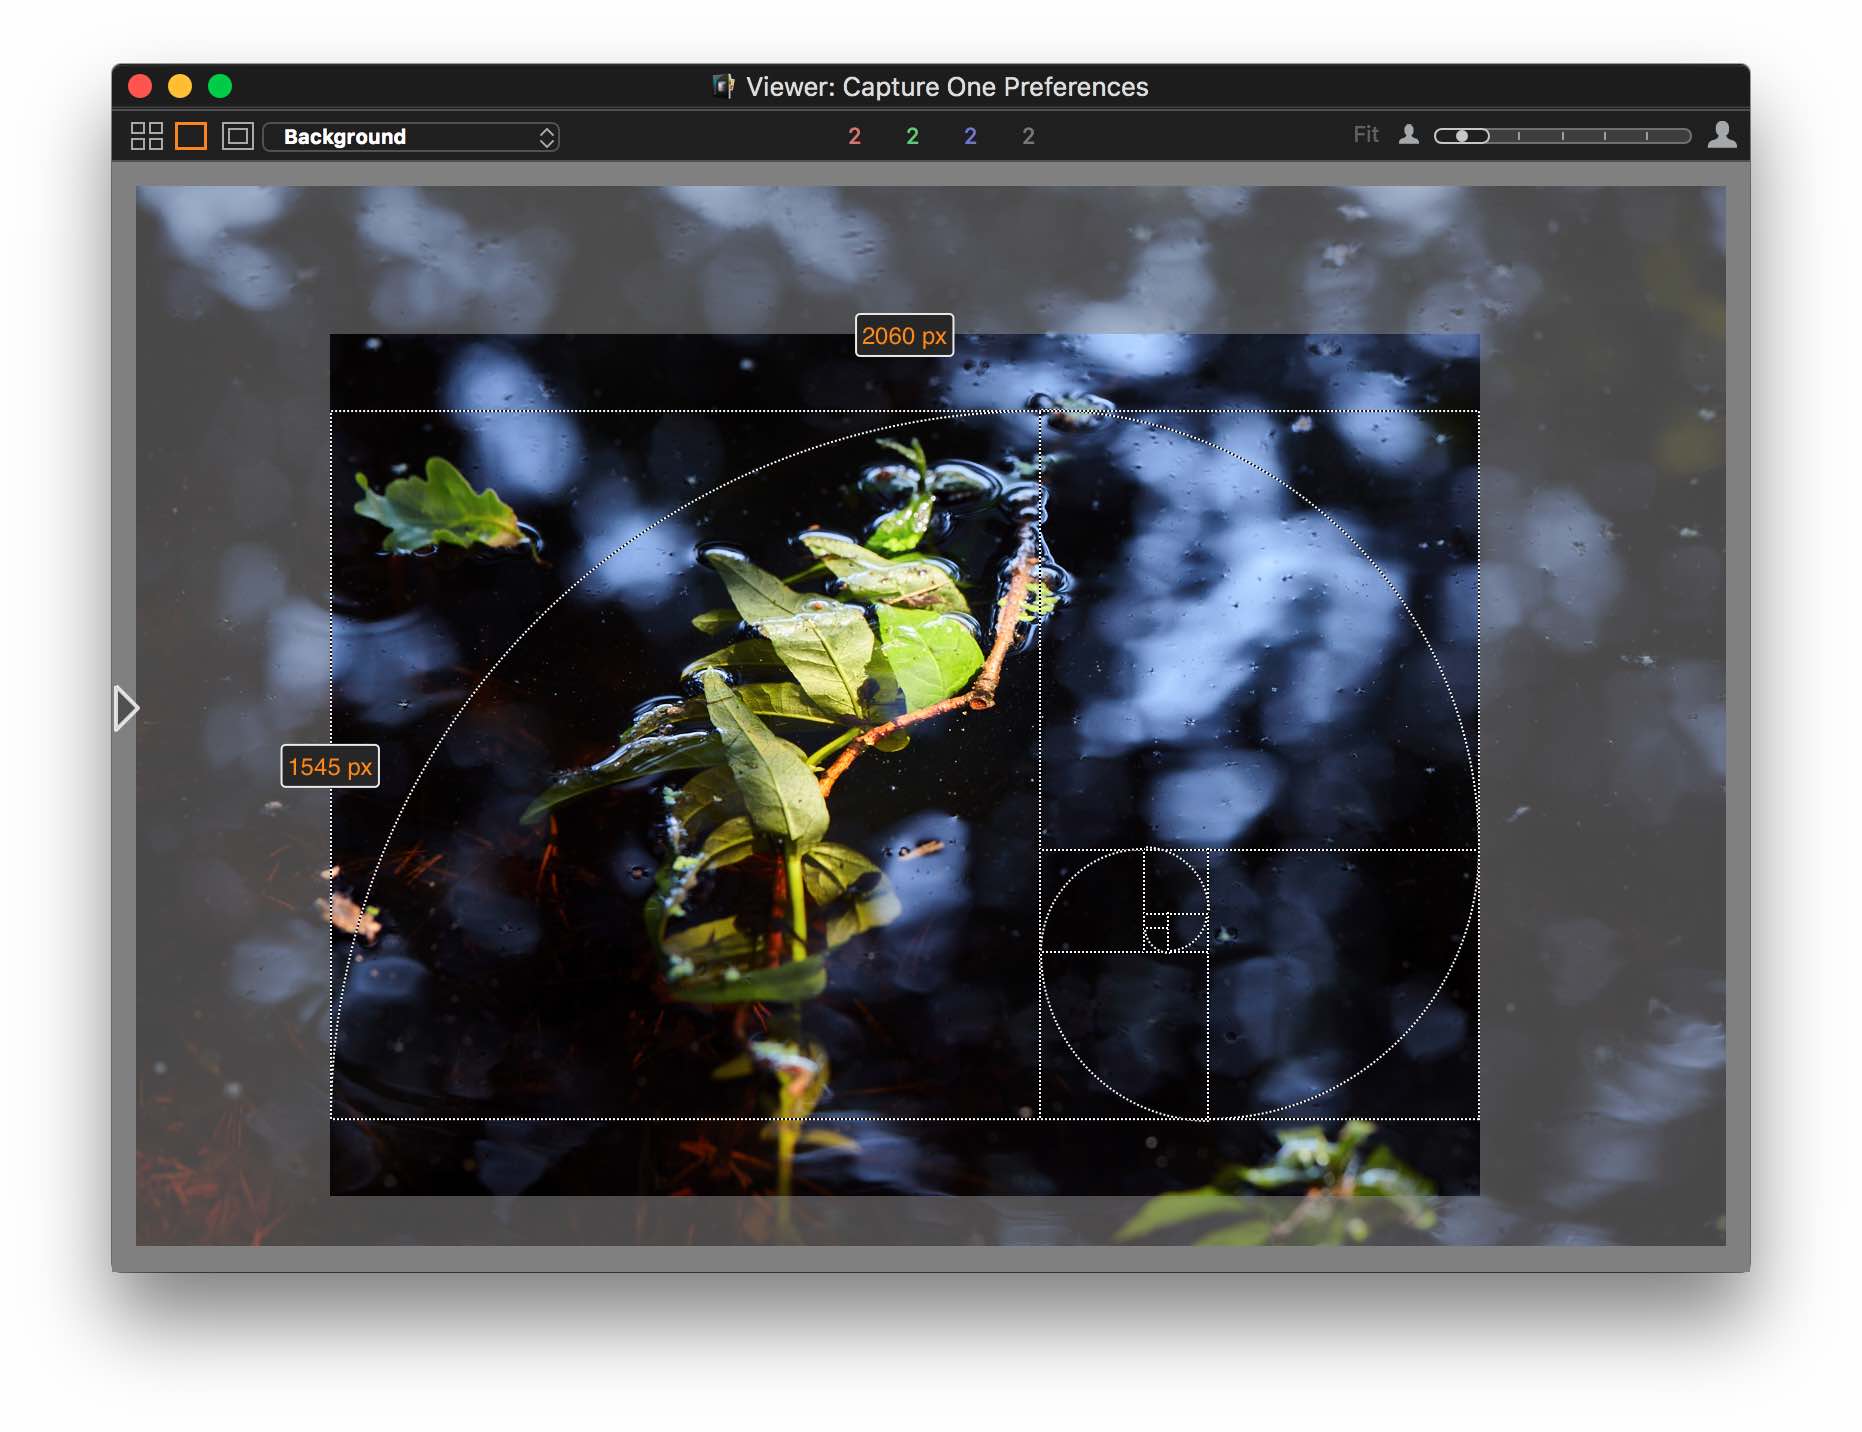
In the before/after comparison above you see the Golden Ratio and the Fibonacci Spiral. Other options are Rectangular, 3×3, 3×4, Center Cross. It is up to you. Some types have additional options which will appear automatically.
The Color of the Grid should not match the colors in the image, because it makes it harder to see the Grid. Choose your favorite color once, and change that occasionally when necessary.
Guides
The last section on the Crop tab is Guides. Guides are horizontal and vertical lines that are displayed in the Viewer. It can help you align a horizon or vertical line of a building.
You make the Guides visible with the Show Grid and Guides toggle in the View menu I mentioned earlier. That is right. You determine which one or both respond to that switch. If you do not need Guides, only Grid, you disable its display here with Show set from When Grid and Guides On to Never.
Last but not least, you can change the Color of Guides just like you did for Grid.
Please note that you can create as many horizontal and vertical guides in the Viewer as you like, lock them and clear them too. This is all done from the View menu.
Focus Tab
On the Focus tab, you find a single section, the Focus Mask. This Mask is a contrast color that you can switch on and off from the View menu or the toolbar. The Focus Mask appears in the Viewer and highlights the sharpest areas.
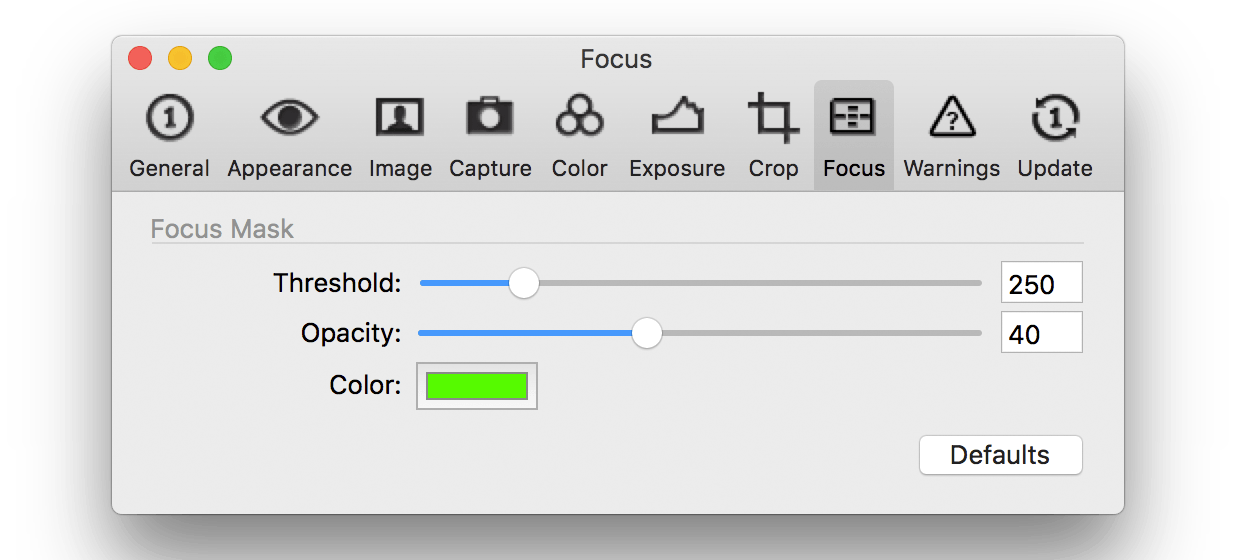
It is a very useful tool both during or after the shoot to help you to select the images that are properly focussed. Here in the Preferences, you control the properties of the Focus Mask.
Focus Mask
In the Focus Mask section, you set the Threshold for the mask to kick in. The best value depends on your camera. The default value 250 is a good starting point for medium format cameras.
With DSLRs, you typically use a higher Threshold value. Increasing the threshold decreases the range of sharpness the mask shows, and vice versa.
You might want to control the Opacity of the mask as well as the Color, the be able to differentiate it from your subject.
Warnings Tab
Capture One can warn you for a lot of dangers, but maybe you don’t like them all, the warnings I mean. You can control all kinds of messages from the Warnings tab. The settings related to warnings are grouped into three sections: Files and Folders, Adjustments, and Output.
Note that this Preferences tab is not the only occasion to manage Capture One warnings. You are probably familiar with the checkbox in a lot of dialogs that say Don’t warn me again. Indeed, ticking that box removes a tick here. Even accidentally activating the Don’t warn me again checkbox can be undone here.
Files And Folders
Warnings you manage in this section are related to moving, deleting, and removing images, as well as resetting sorting. Sometimes a warning is only displayed when an action affects multiple images, not just one.
Adjustments
The warnings related to adjustments involve resetting, copying and applying adjustments. As with other warnings, some are only displayed when multiple images are involved.
Output
Under Output, you see a number of warnings with a line of small text: If Edit All Selected Variants is off and multiple variants are selected.
This means that Capture One will only warn you when you process, print, export or create a web contact sheet for multiple selected variants but you (accidentally?) have not enabled the Edit All Selected Variants toggle. Without warning only the Primary Variant is processed, not all selected variants.
Windows Warnings
Just to acknowledge that the Preferences Warnings tab on Windows is slightly different in items and wording but in general, serves the same purpose as on macOS.
Update Tab
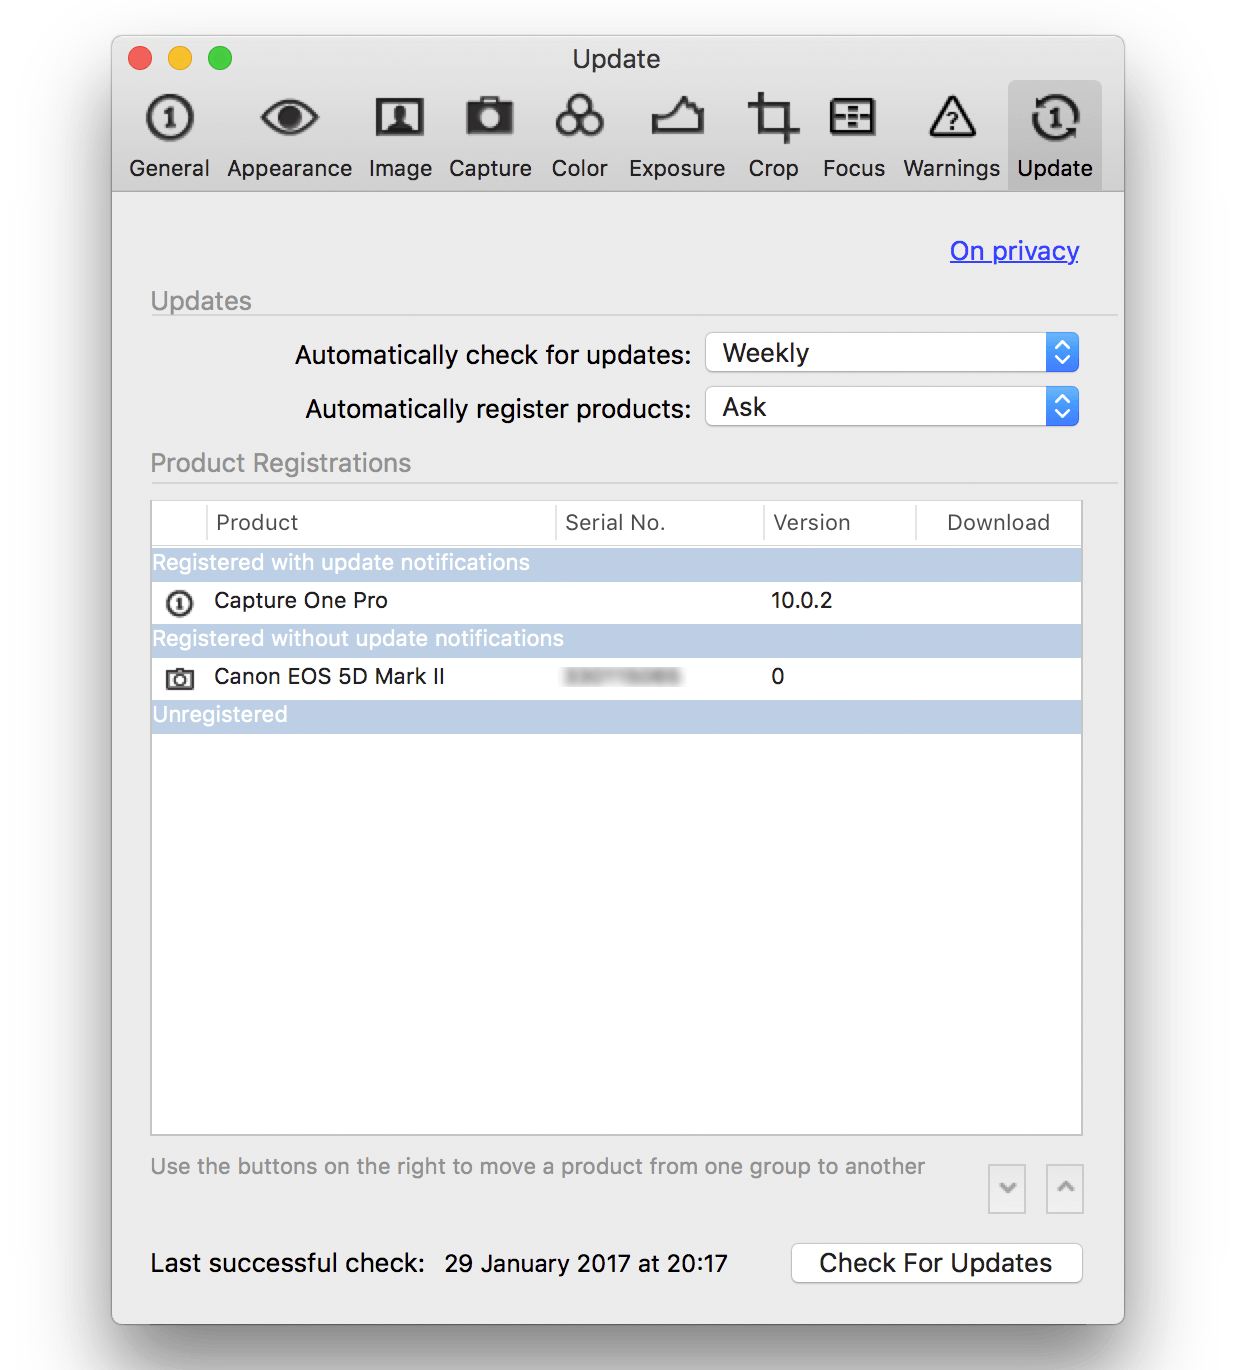
The Update tab seems to be the simplest to explain but is this true? You see two sections here, Updates and Product Registrations.
Oh, and there is a message plus a button at the bottom. Let us have a look at each of them.
Updates
Phase One releases updates and upgrades frequently to add new camera and lens support, new features, and to repair bugs. Capture One can regularly check for new releases. I encourage you not only to perform the check but also keep up to date with the latest release.
The Automatically check for updates setting allows you to set a predefined interval of Day, Week, Month or Never.
The Automatically register products setting applies to connected camera gear for tethered shooting. You might have seen a dialog popup when you first connect a camera to your system. This comes from this Preference setting which default is Ask. The alternatives are Always and Never.
Registering a product is interesting for Team Phase One hardware due to notification of updates. I find registering a DSLR not adding much value.
At the bottom right of the screen, you see two arrow symbols, up and down. With these small buttons, you can alternate the status of a camera between registered and unregistered groups. Select the camera first on the list. Note that you can also remove a registration: keep clicking down. This is great if you are a digital tech and work with many different cameras and different clients.
Product Registrations
This brings me to the section on product registrations. Apart from the obvious Capture One registration with version number and potential update number, you can also see camera registrations. Two options here, with and without update notifications.

If you are a digital tech and connect many different (loan) cameras it makes sense not to register any camera. However, if you borrow Phase One gear you might use this Capture One Updates tab to check whether the system at hand is up to date.
Managing Preferences
All the Capture One Preferences are stored in a single file. Managing your preferences includes the following activities.
- replacing a corrupt preference file as a way to recover the program’s erratic behavior
- copying a preference file between systems as a way to smoothen your workflow
- backing up your preference file for recovery
To be able to manage the Capture One Preferences, you need to locate the preference file. I will show you how to find it on both macOS and Windows.
Tip: before you start deleting or copying the preference file, it is best to close Capture One first.
Preferences on macOS
On macOS, the preference files of all programs you use are stored in your user profile. This means somewhere below your user’s Home folder. The full path is:
[user_name]/Library/Preferences
Note that the user’s Library folder is hidden by default. In my post on Installing Presets and Styles, I explain how to get into that hidden folder.
Next, look up the preference file. The file name for Capture One 10 is:
com.phaseone.captureone10.plist
Earlier versions of Capture One have a similar preference file with their version number in the file name stored in the same folder.
Depending on what you want to achieve, you can now copy, delete, or restore the preference file.
Preferences on Windows
On Windows, the Capture One preference file is stored in your user profile. This means somewhere below your user’s Home folder. The full path is:
C:\Users\[user_name]\AppData\Local\Phase_One\CaptureOne.exe_StrongName...\[version.build#]
Note that the user’s AppData folder is hidden by default. In my post on Installing Presets and Styles, I explain how to get into that hidden folder.
Next, look up the preference file. The file name for Capture One is:
user.config
The name is identical for all versions since Capture One 4 but the version number and build is stored in the name of the folder that contains the preference file.
Depending on what you want to achieve, you can now copy, delete, or restore the preference file.
The End Or Not?
Here ends Part 3 and also the last part of posts on Capture One Preferences. You can continue reading in both earlier posts Preferences Part 1 or Part 2.
Thank you
For reading. Please feel free to leave a comment. Like us on Facebook or subscribe to our newsletter to stay informed about new blogs.
Best Regards,
Image Alchemist










Hello.
Just wanted to send a thank you for putting this together.
I just started using Capture One and this information helped me a great deal.
Thank you, Gideon, you’re most welcome.
Enjoy Capture One!
Best, Paul Steunebrink / Image Alchemist
What a good place to get information on Capture 1!! question: when we add a vertical and or horizontal red line over our image, the lines can be moved, and a small rectangle displays a pixel number. Can we change he pixel value for centimeters instead
Thanks
Guy
Hi Guy,
As far as I know – and I just tried – there is no option to have the readout of the guidline position in another unit then pixels.
Best, Paul Steunebrink / Image Alchemist
About focus mask threshold, i do not understand the logic related to DSLR requesting higher threshold value:
As non medium camera will normally have less pixels than medium format, i would think you need to lower the threshold value, not increase it as there will be more focus variation between pixels compared to a medium format picture of the same scene.
Am i wrong?
Hi François,
I understand your logic, but this is the way how Capture One has implemented it. You could follow this logic: lower resolution makes it harder to separate in-focus from not in-focus, hence the higher threshold to make the separation.
Best, Paul Steunebrink / Image Alchemist