Capture One Pro 12 Review
This Capture One Pro 12 review shows you the new features and improvements. The Linear and Radial Gradient Mask tools and the ability of masking by Luminance are great new features. The user interface and menu structure got a make-over. Third party developers can add features through Plugins. You can upgrade from all previous versions. Download the latest release here.
Capture One Pro 12 Review
What is new in Capture One Pro 12? Discover the new and improved features:
- two gradient mask tools
- mask by luminance
- plugins architecture
- new and reshuffled menus
- redesigned user interface/user experience
- camera, lens correction, macOS 10.14 support
- Fujifilm Film Simulations
- additional built-in Styles
- expanded AppleScript support
- upgrade from all previous versions
Please read on for more information in the sections below.
Better Masking
Capture One Pro 12 adds three new ways of masking:
- Linear Gradient Mask tool
- Radial Gradient Mask tool
- Luma Range feature
Both Gradient Mask tools are ways to create a new mask, in addition to the existing Brush and Eraser tools.
The Gradient Mask tools introduce a new type of mask, the Parametric Mask, which I also explain below.
The Luma Range feature changes an existing mask.
Linear Gradient Mask Tool
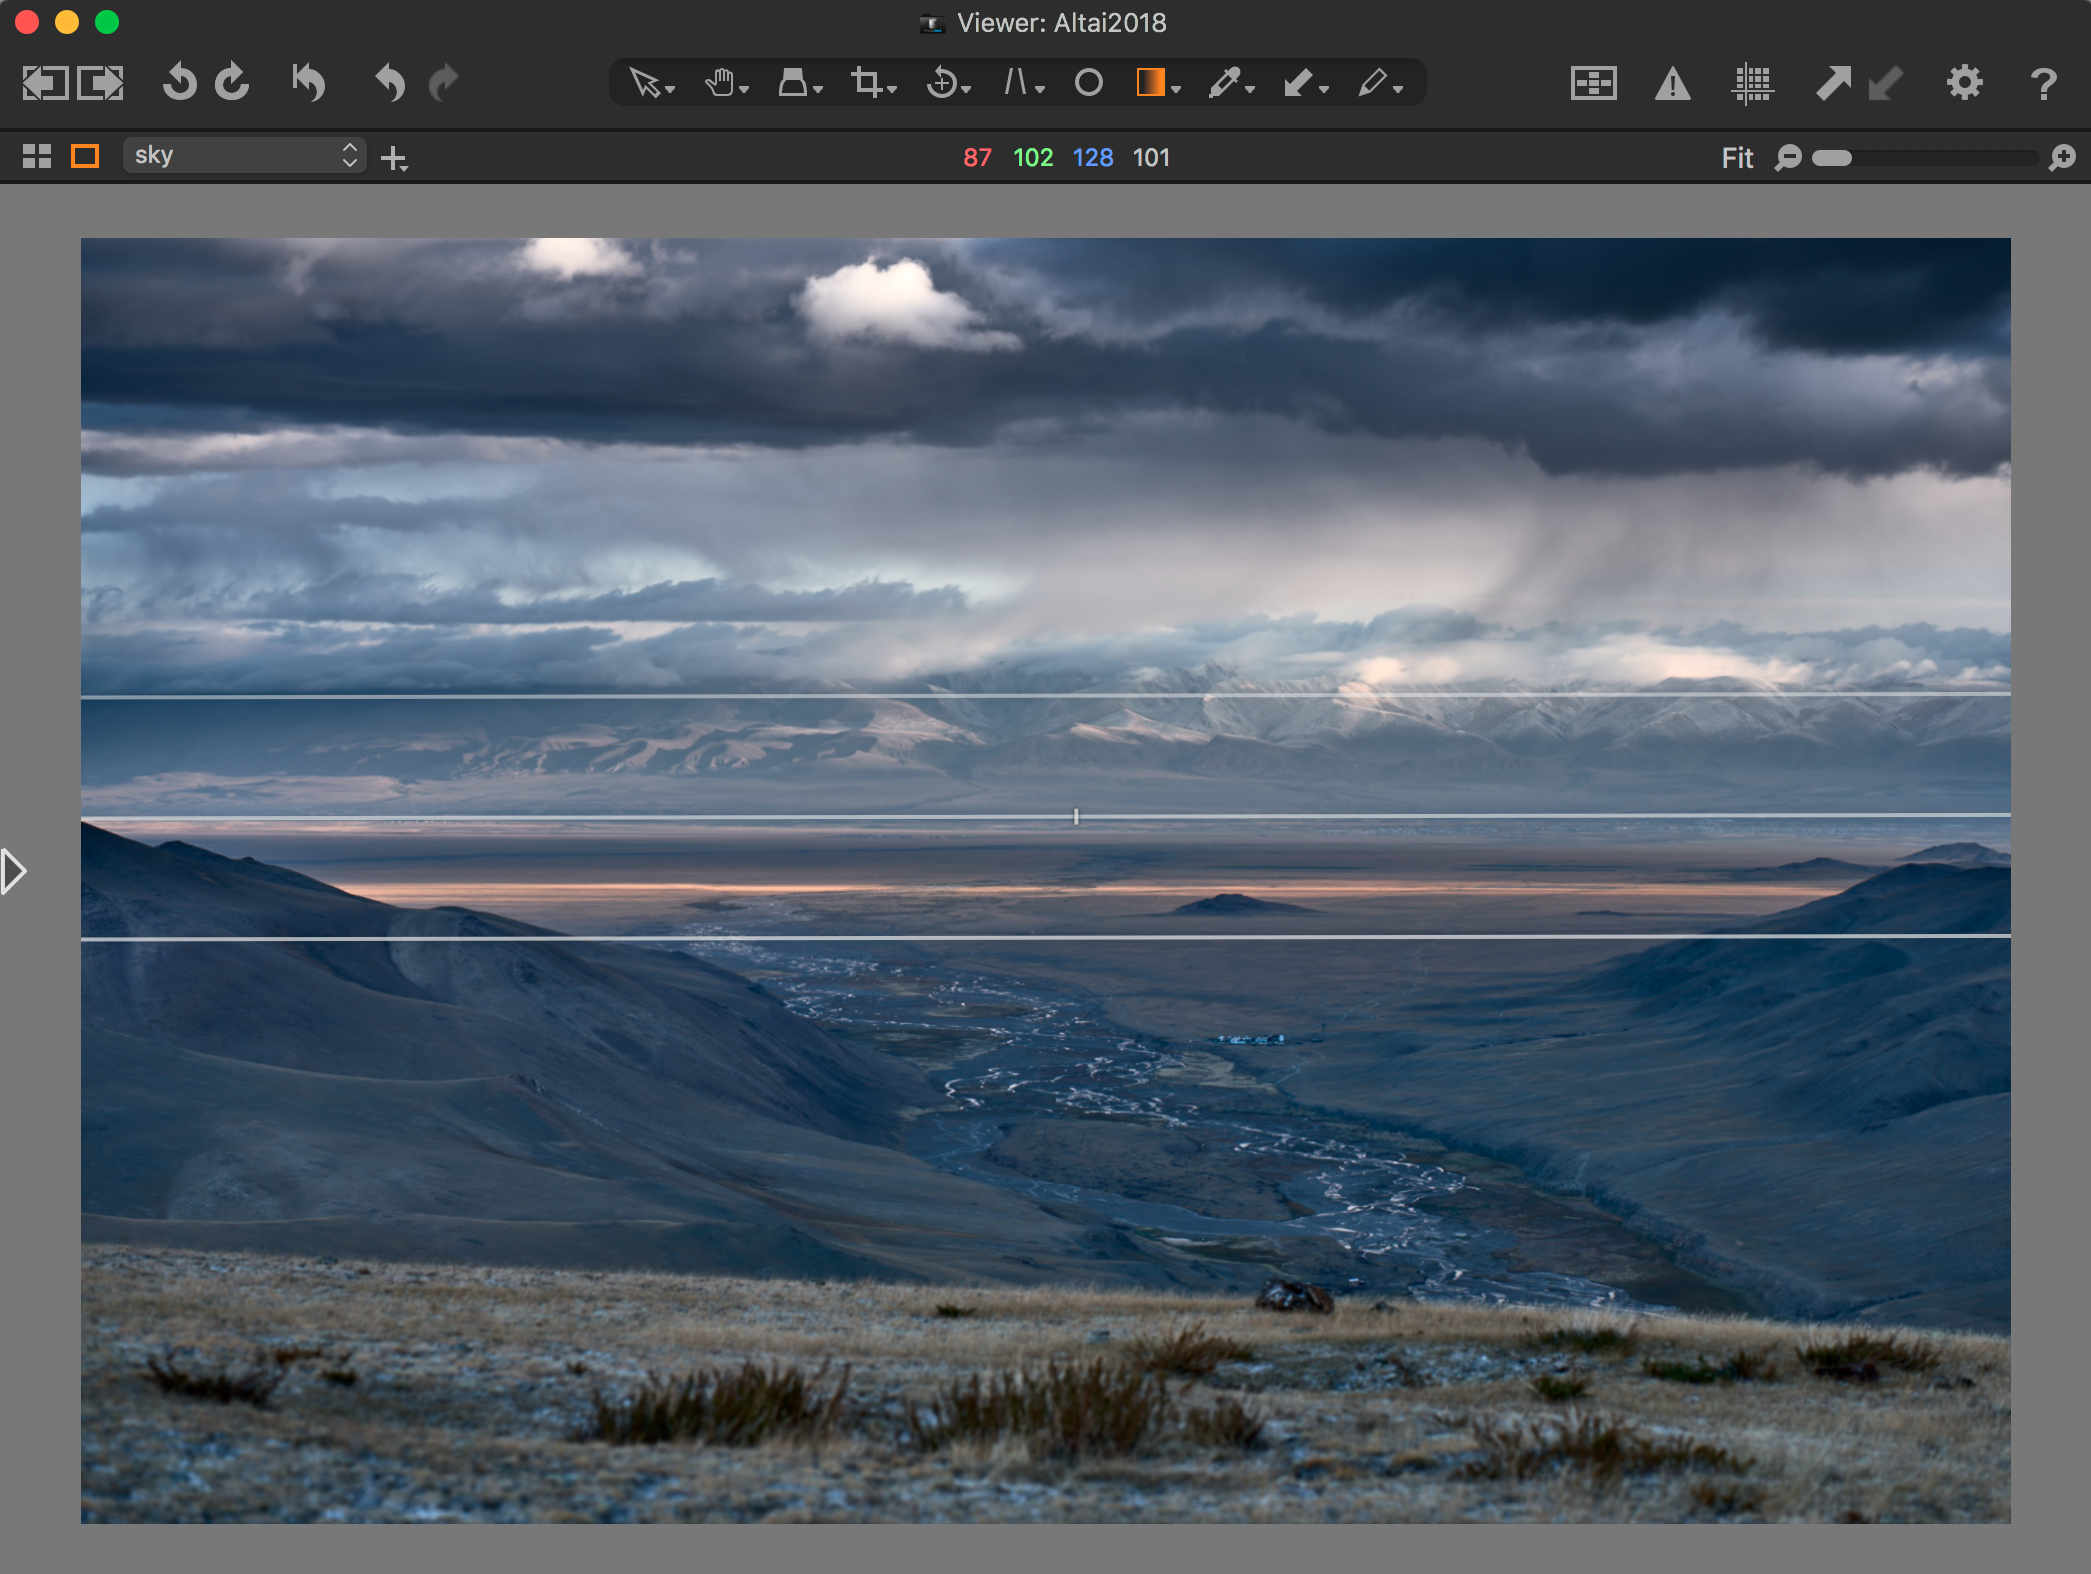
The new Linear Gradient Mask tool replaces the Gradient in previous versions. The advantage of the new tool is that you can change its parameters after your initial draw. Having to draw your Gradient repeatedly until you are satisfied is now a thing of the past.
You control where the gradient starts, where it ends, and how the transition flows. Rotation is also possible and you can move the rotation point. Obviously, you use the mouse to control all the parameters.
In combination with the key modifiers Shift and Alt, you get more options to modify. You can invert the mask by dragging one of the outer lines over the opposite line.
Radial Gradient Mask tool
The Radial Gradient Mask tool creates a circular or elliptic mask. Your control of the parameters of the mask after its initial creation is very similar to the Linear Gradient, with some differences because it is Radial, not Linear.
You can use the mouse without or with key-modifiers Shift, Alt and Command (Shift, Alt, Control for Windows).
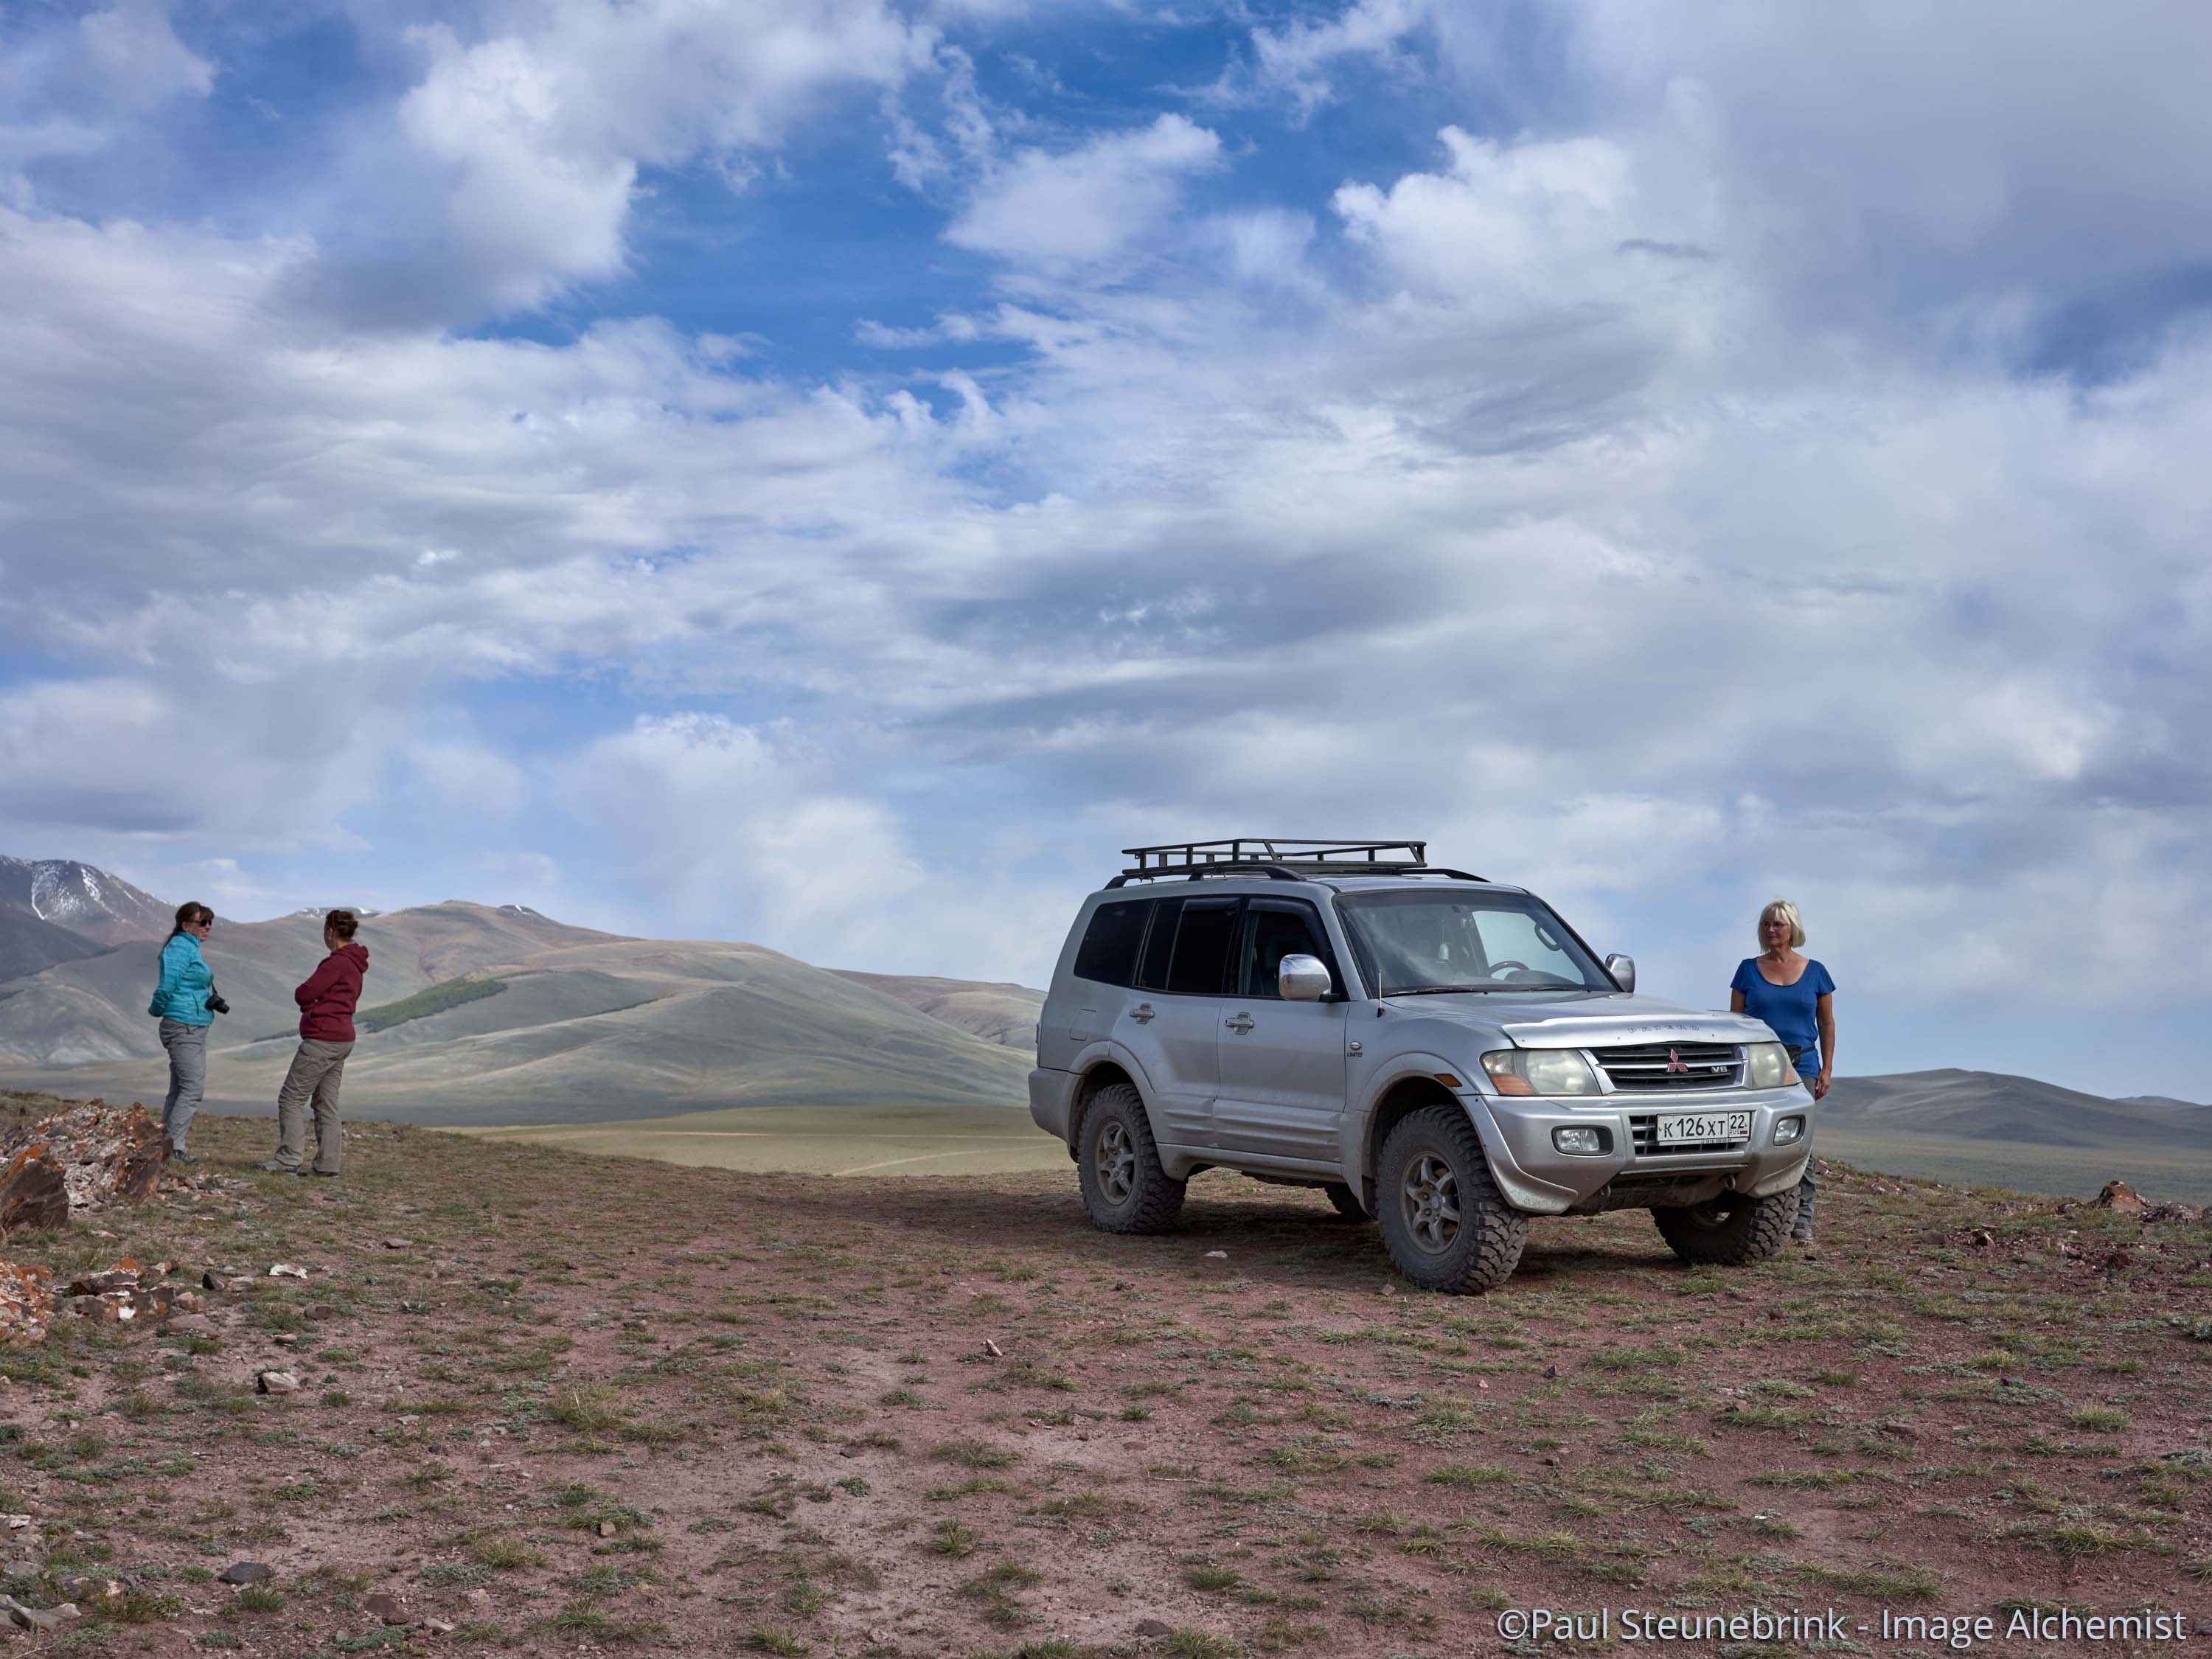
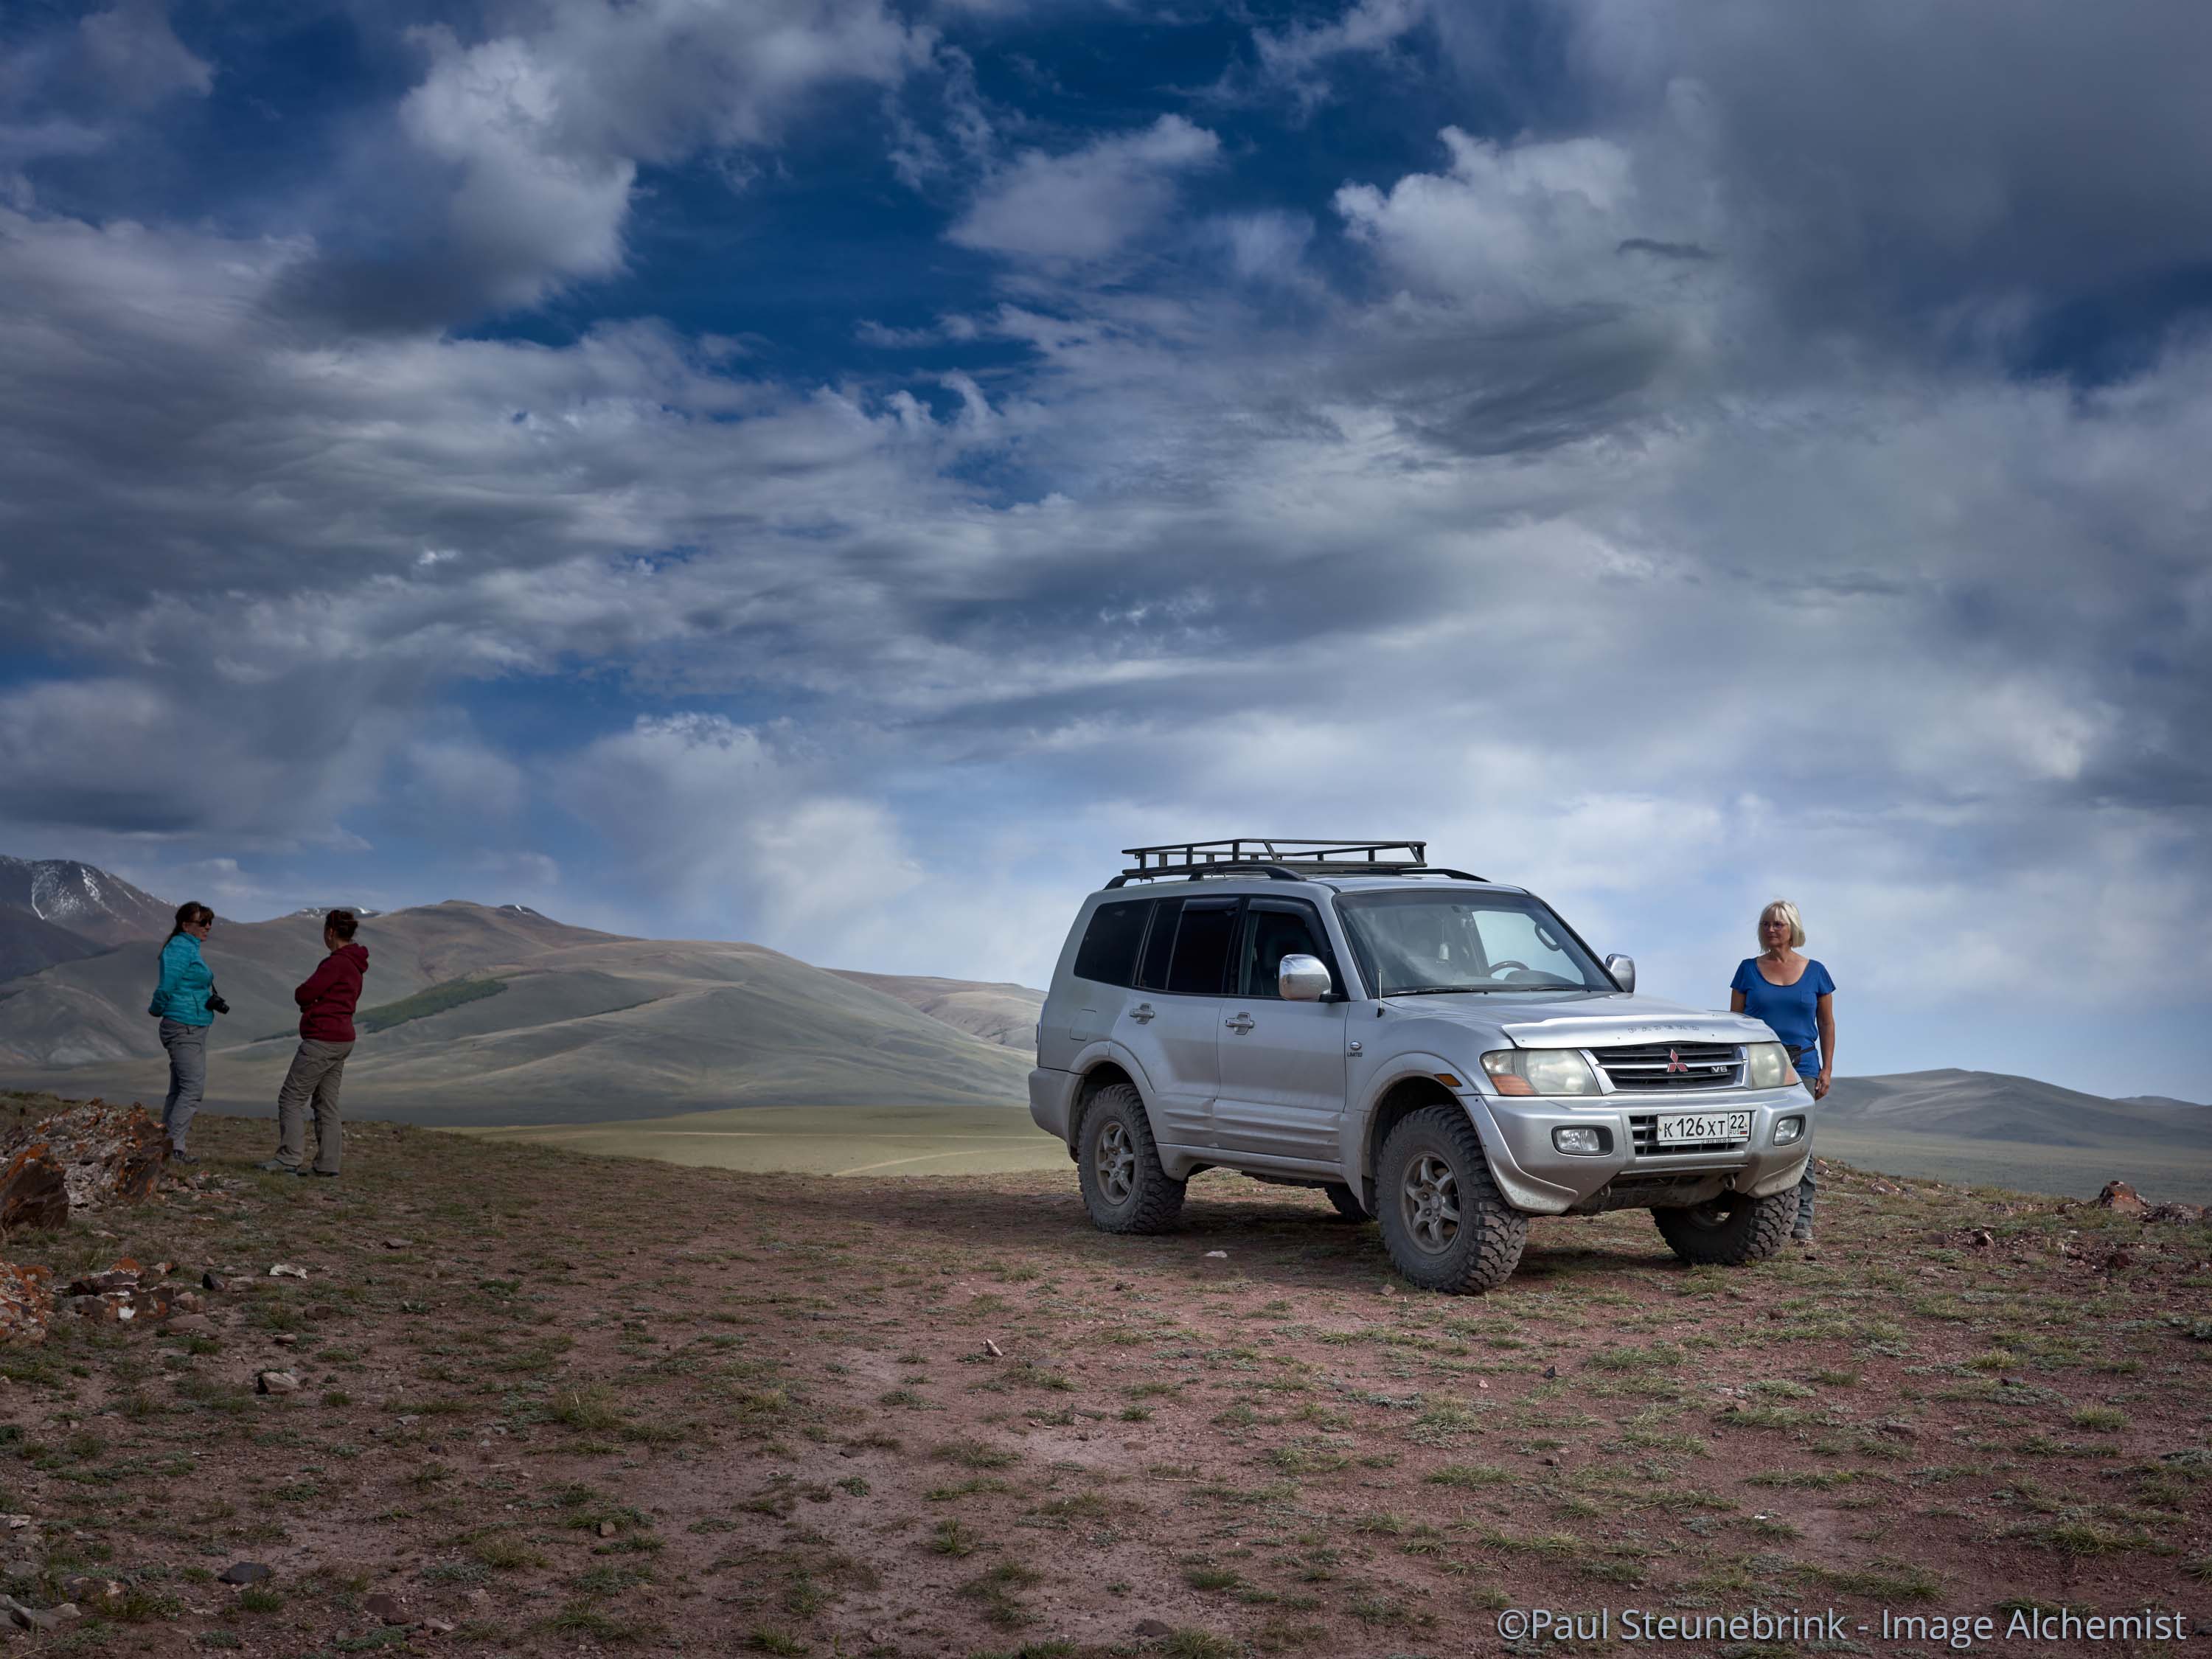
In the before/after comparison, you see the effect of the Radial Gradient Mask on the image.
Why Rasterize A Parametric Mask?
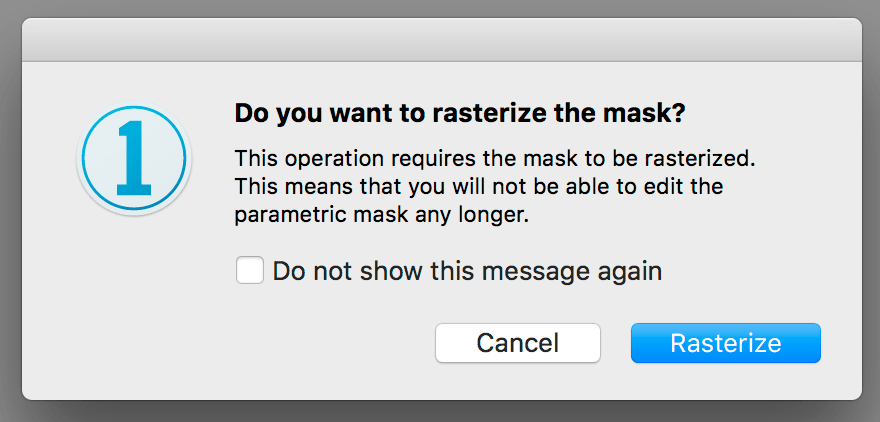
Although both Gradient Mask tools are very flexible, you sometimes want to add an area to the mask or remove a part. However, when you attempt to change a Gradient Mask you get the warning below.
Because both Gradient Mask tools create a mask based on parameters you can edit them endlessly. These tools create a Parametric Mask.
Both Brush and Erase tools work on a raster or Rasterized Mask. Fortunately, you can convert a Parametric Mask into a Rasterized Mask. Please note that this is an irreversible step.
Luma Range Masking
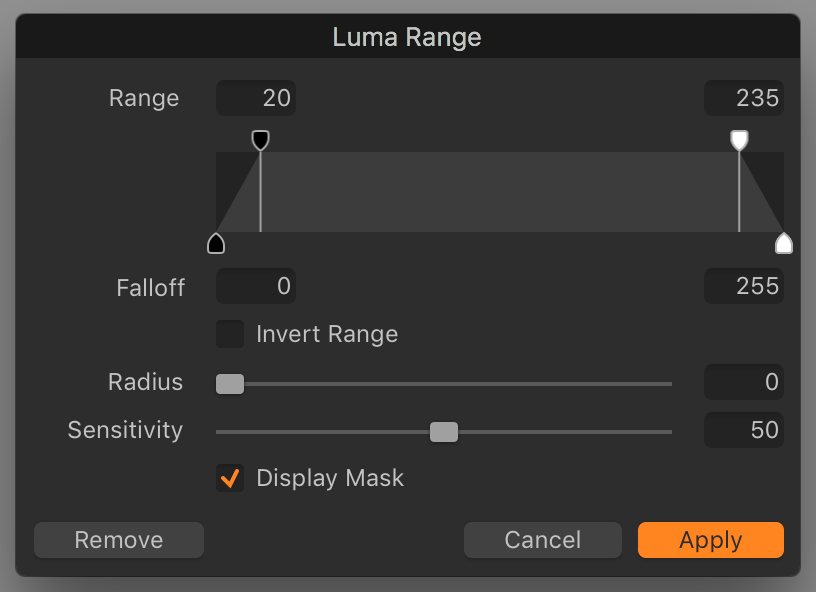
Users asked for a tool to create a mask by luminosity. Enter the Luma Range feature. Luma Range masking takes a user-defined range of luminance levels to edit an existing mask.
You can create a mask with the Brush and Eraser tools first, create a Filled Layer or use one of the Gradient Mask tools.
Next, apply the Luma Range to that mask. After applying a Luma Range, you can change the mask with the Eraser. In case you like to add areas with the Brush, rasterize the mask first.
Note: Hopefully, a future update will smoothen this workflow and eliminate the step to rasterize.
Plugins
The Plugin feature lets third-party developers add features to Capture One Pro. This is great news for the user. Hopefully, a healthy ecosystem of Plugins will surround Capture One in the near future.
The new Publish command in the Image menu is an example of where future plugins will enrich the user experience. The Get Plugins menu directs you to the Capture One Plugins webpage. There are several plugins available from different developers.
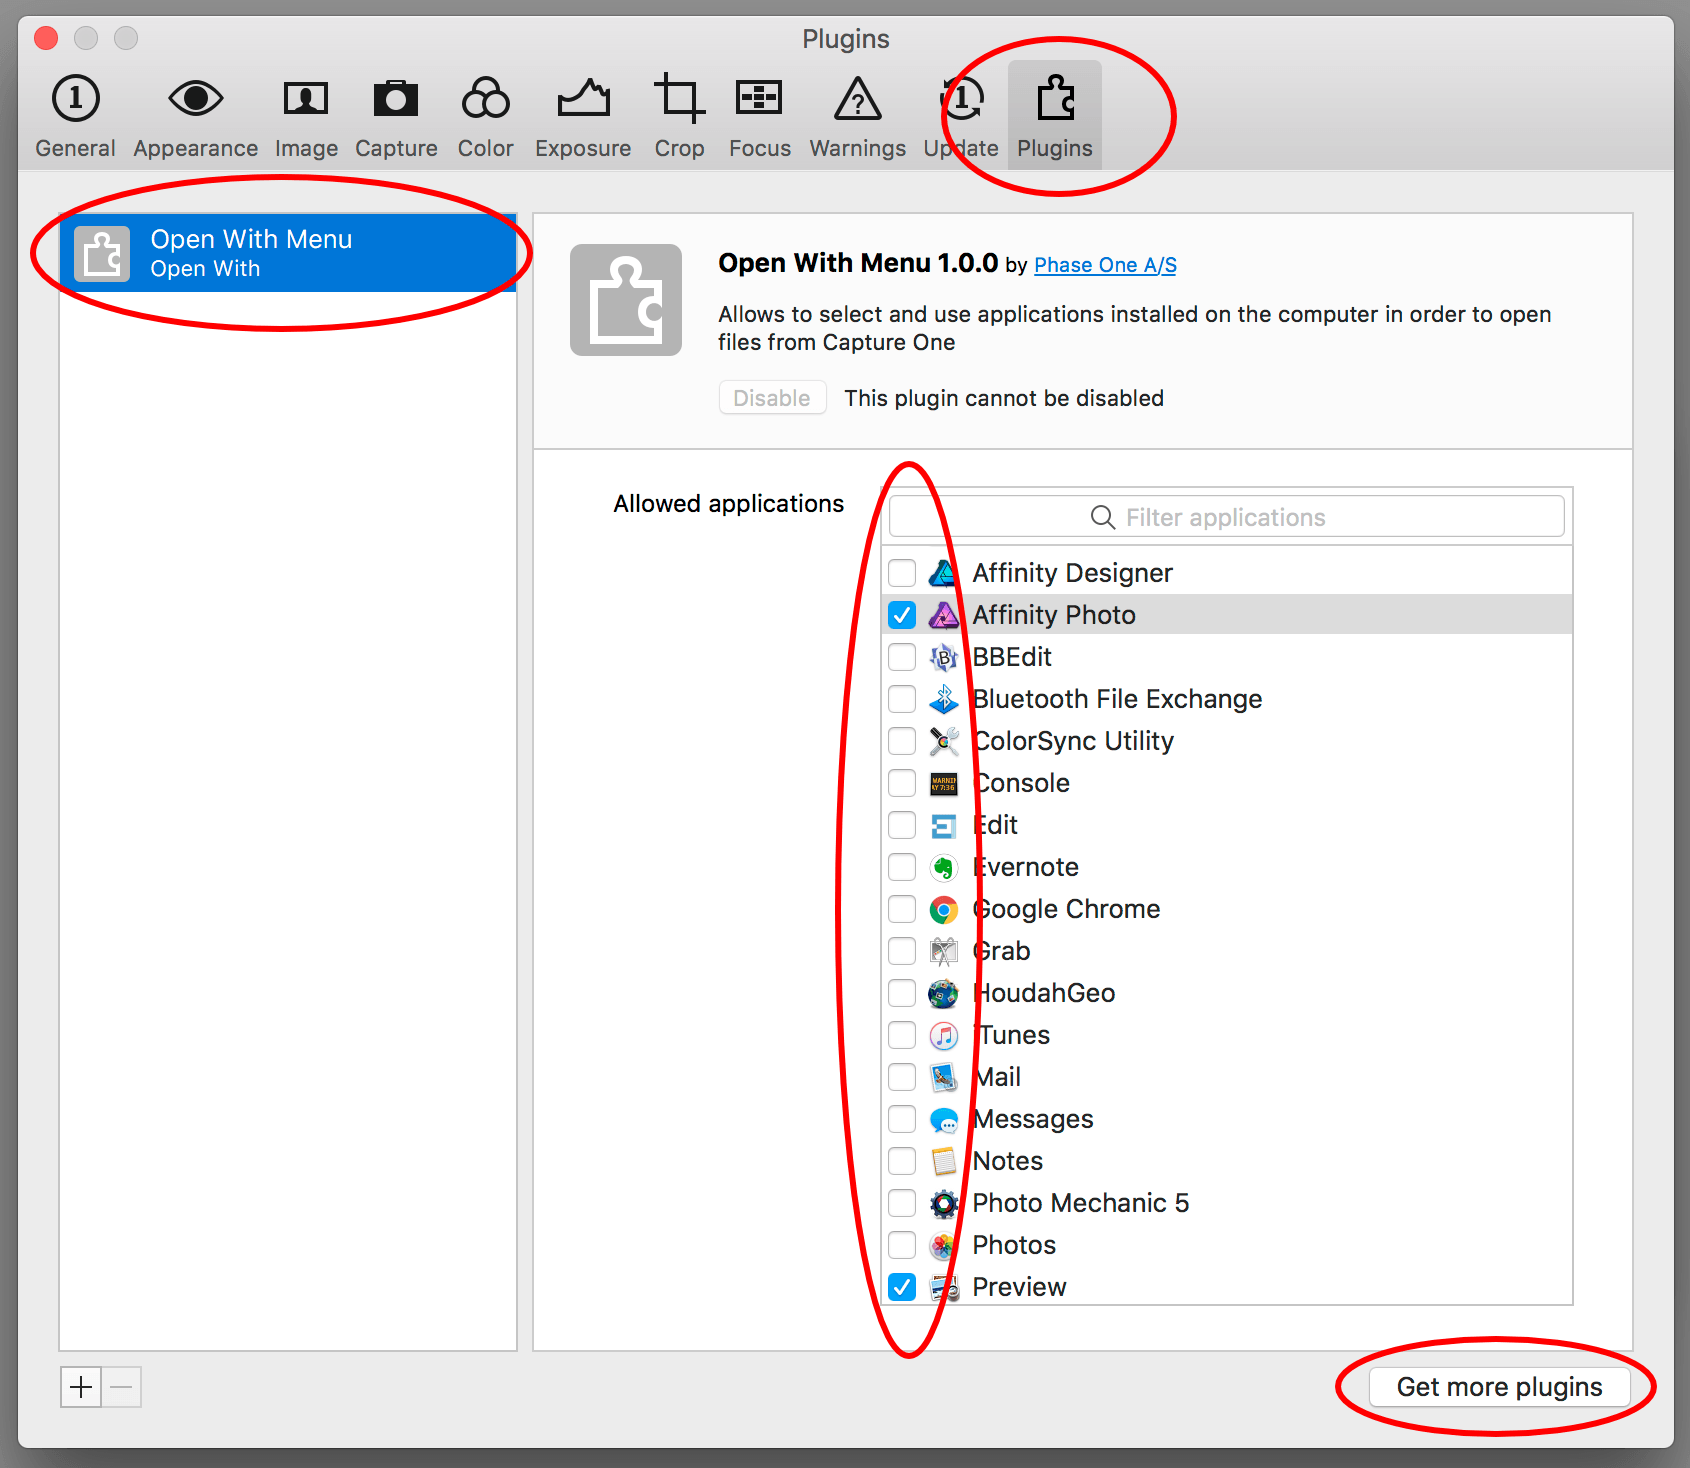
Note that the Edit With and Open With commands on the same menu is now controlled by the Open With Menu plugin. You configure this and other plugins via the new Preferences > Plugins tab.
Under Allowed applications, you check and uncheck boxes to determine which applications show up in the menu. For more plugins, you click on the Get more plugins button.
A plugin focus stacking with Helicon Focus is available on the release of Capture One Pro 12.
Menus
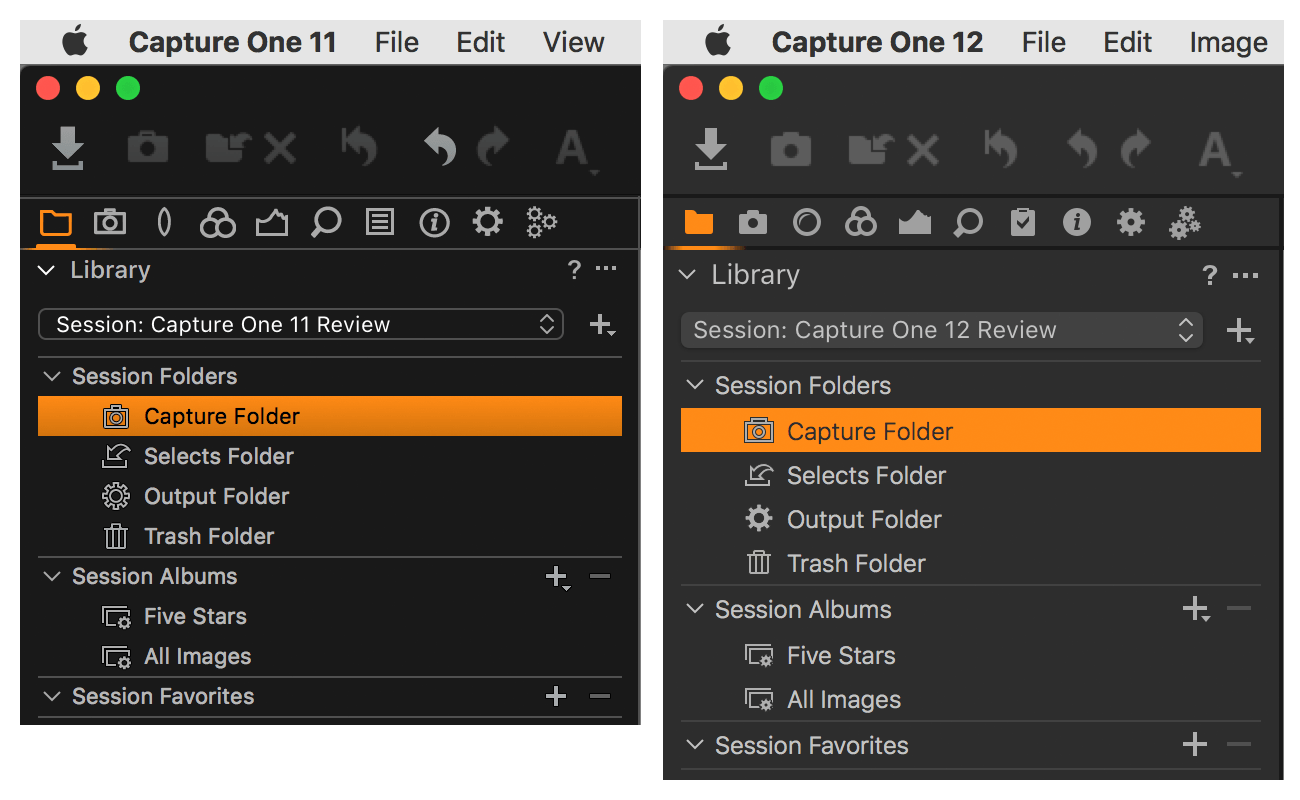
The menus are reorganized and expanded. Below you see the main menu of both Capture One Pro 11 and 12.

The main differences are:
- the View menu has moved to the right, and now sits between the Camera and Window menu
- the Image menu has moved to the left, taking the spot of the View menu
- two new menus, Layer and Select are added between the Adjustments and Camera menu
- the Edit menu is much shorter now; many items have moved to the Image and Select menus
The new Layer menu contains all Layer related commands. Now you can easily create shortcuts for these commands.
User Interface
The redesigned user interface is now easier to read and gives less eyestrain and fatigue. The new interface follows the flat user interface style of both macOS and Windows.
Highlights of the new design are:
- larger font type
- lower contrast
- redesigned icons
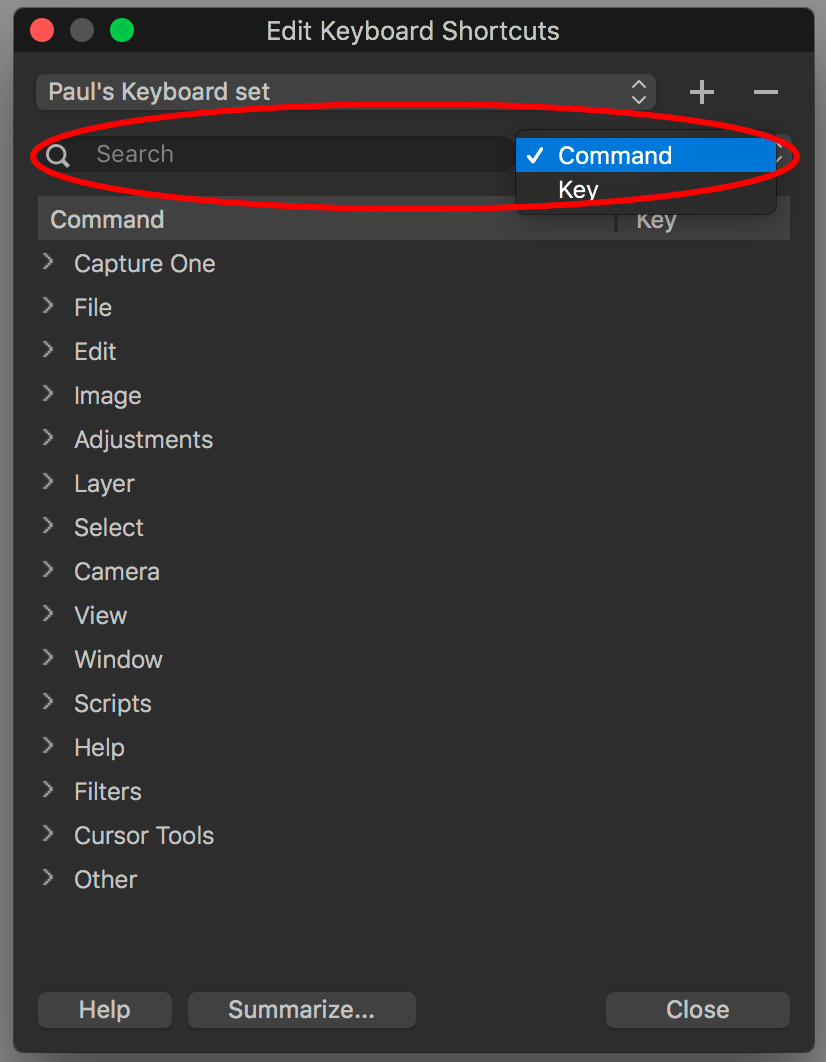
The Keyboard Shortcut manager has moved to the Edit menu like the Windows version always had.
New is a Search option for either a key or a command.
User Experience
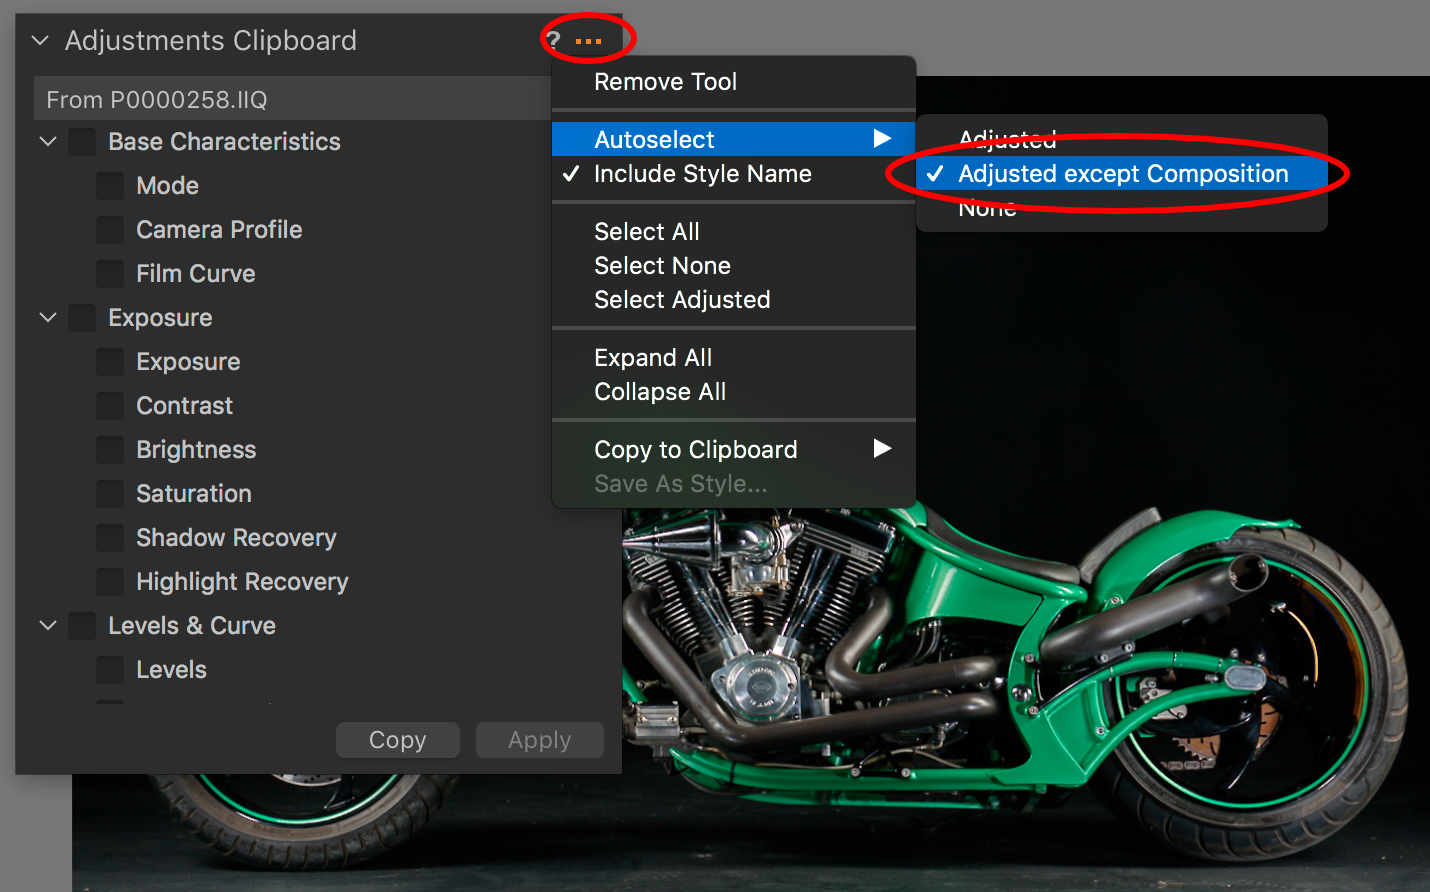
Phase One mentions several changes in the User Experience, or how the program behaves, in the release notes. One interesting change is a new Autoselect setting for how the clipboard behaves: Adjusted except Composition.
When you copy adjustments via the Adjustments Clipboard, the clipboard automatically enables adjustments that will be applied to other images. It is the Autoselect setting of the clipboard that determines that behavior. The default is Adjusted. This means that what is adjusted in the source image will be applied to the target image(s).
There is now a new Autoselect setting: Adjusted except Composition. This effectively means that Crop, Rotation, Flip, and Keystone are not automatically selected and transferred to other images. This is great for a workflow where you first crop and rotate your images and later make adjustments like exposure, white balance and more.
Fujifilm Film Simulations
Selected Fujifilm camera has a built-in simulation for a series for conventional photographic film emulsions. Typical products in that area are Astia, Provia, and Velvia, to name just a few. However, these simulations are applied to the in-camera processed JPEGs.
Photographers had the desire to have these simulations combined with RAW images in Capture One.
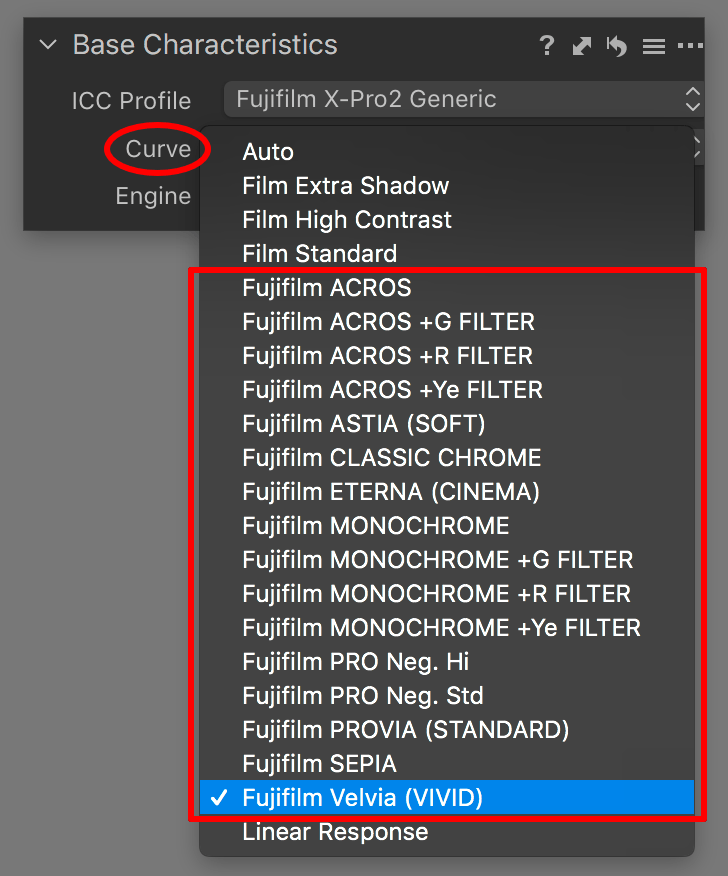
Fortunately, Fujifilm and Phase One recently started a strategic relationship. Apart from the branded Capture One Pro Fujifilm, which includes tethering capabilities, there is now a series of 16 film simulations available for selected Fujifilm cameras.
You find the Fujifilm Film Simulations in the Base Characteristics tool as Film Curves. You select your Curve and you have the simulation applied on your RAW file.
Camera, Lens, macOS Support
Capture One 12 is the first version that supports macOS 10.14 Mojave. So if you use this version of macOS or plan to upgrade to it, make sure you upgrade to Capture One 12 as well.
In addition, the following cameras models are now supported in the 12.0 release:
- Canon EOS M50
- Canon EOS R
- Nikon Z6
- Nikon Z7
Miscellaneous
Capture One 12 extends AppleScript support (macOS only).
In the Styles and Presets tool, you find a new group of built-in Styles: IQ Styles. This group supports the Styles feature of the new Phase One IQ4 medium format system and its Infinity Platform.
Fortunately, all the Styles in this group are available for use with other file formats.
Products And Pricing
The Capture One Pro portfolio expands rapidly with branded products like Pro Sony and Pro Fujifilm. In addition, you can choose between both perpetual licenses (version-bound) and subscriptions (time-bound).
Upgrading
There are now more upgrade options for perpetual licenses. The limitation of upgrading from up to 2 versions back (10/11 > 12) is lifted. You now have the option to upgrade from Capture One Pro 9 and older to 12.
Pricing
Upgrade pricing now varies based on the version you upgrade from. Users who upgrade from Capture One Pro 11 pay the lowest fee. Capture One Pro 10 upgraders pay a bit more. Upgrading from version 9 and older is possible now for a slightly higher upgrade price.
This policy is fair for both frequent and less frequent upgraders, and nobody is out of luck anymore.
Thank you
For reading. Please feel free to leave a comment. Like us on Facebook or subscribe to our newsletter to stay informed about new blogs.
Best Regards,
Image Alchemist











I have the Helicon Focus software and I’ve placed the .coplugin file in the C1P 12 plugins folder butit is not seen by C1P. What am I missing?
Hi Brian,
I suggest you open the Preferences, Plugins tab. Check whether it is listed in the right pane. If not, click on the + sign bottom left to add it. If that does not help, please email me.
Best, Paul Steunebrink / Image Alchemist
Hi,
I think you are the expert who will be able to help me.
I have a picutre of a rug with colored geometric figures on it. I want to change a blue rectangle into a red brick color, so a radical color change, not a subtle one. How do I do that to change the color within a selected mask? Apparently a maximum of 30 hue difference is allowed..
Hi Yves,
You can use the Color Editor, Advanced tab for this. Select the color, turn the Hue to the max, and repeat the process unit you have the right color.
Best, Paul Steunebrink/Image Alchemist
Your page is virtually useless. You talk about the gradient mask feature, yet at no point actually show how to access it. Must be a college course unto itself to even find where it is. Think I’ll stick with Lightroom.
Hi Frank,
Thank you for your comment. It is true that reviews are no tutorials. Reviews discuss the ‘what’ and tutorials the ‘how’.
Best, Paul Steunebrink / Image Alchemist