Catalogs Continued
In my earlier blog Catalogs Explained you got the initial taste of the catalog in Capture One. In this second blog for the intermediate experienced user we will dig a few steps deeper. Import and user collections are revisited. The catalog database file, verification and backup are covered. We also talk about Offline Files. These topics should cover over 75% of your need-to-now on catalogs in Capture One. So, let’s get ready for Catalogs Continued!

Catalogs Continued
As discussed in my earlier blog Catalogs Explained, you’ve already understood that with Catalogs you have to import. Importing is primarily a way to link an image to the Catalog. While importing your images, Capture One gives you a bulk of options to streamline your workflow as much as possible.
To prevent those many options becomes a burden, Capture One retains all the settings in the import windows for the next occasion. Here is an overview of the most important options.
Import Images
The first two sections in the Import Images dialog, Import From and Import To, are probably the most obvious parts of the import dialog regarding their purpose. In particular the first, Import From, needs little explanation. You need a source to import from.
This can be either your camera’s memory card in your card reader or an existing folder on your hard drive. In the latter case, you might select a parent folder and check the Include Subfolders checkbox to include all subfolders. When you select a folder, the previously selected folder remains listed up to ten folders, as long as they are online.
Import To
The second section, Import To, can be a bit confusing at first sight. You want to import the image to the Catalog, right? Yes, but Capture One gives you two options (or three actually). You can store files in their Current Location.
This is used most often for images that are already on your disk, properly organized, and you want Capture One only to create a link to the image for reference. The term referenced images come from this selection.
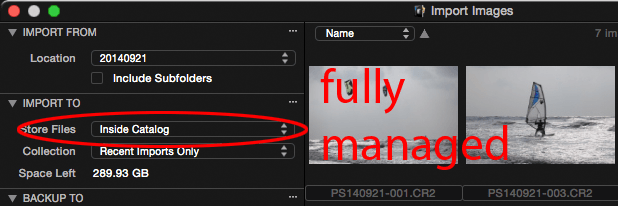
The second option copies images to the Catalog folder that also contains the previews and adjustments, hence the name Inside Catalog. This is a great option when you send your Catalog with original images to another user or computer. You only have to copy one folder! It works even great on a shared Dropbox folder.
The disadvantage is that your Catalog grows fast in size. This option is often referred to as fully managed images and can be used for both existing images on your disk or for new images imported from your memory card.
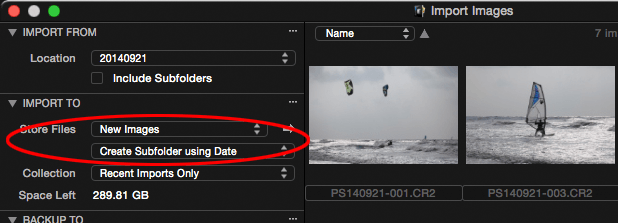
The third option Choose Folder allows you to perform a two-step process in one stroke. It copies the images first from the source location to a target location. Next, it imports the images, referenced.
Copy And Import
This scenario often applies if you import from a memory card and need to copy the images first to a location on disk. In addition Capture One allows you to create a subfolder by date or name. Don’t be fooled, it is the import date, not the image date.
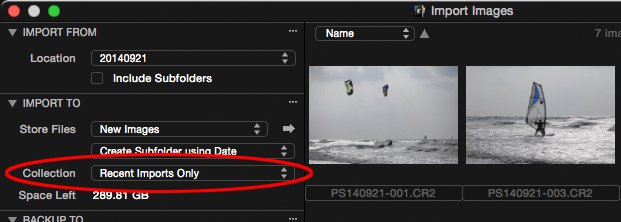
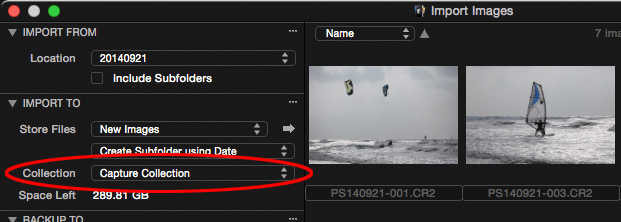
Where the Store Files field discussed above manages what happens in the physical disk world outside the Catalog, the Collection field in the Import To section handles the logical part inside the Catalog. What you select here affects the Catalog Collections and User Collections sections in the Library.
Import To Collection
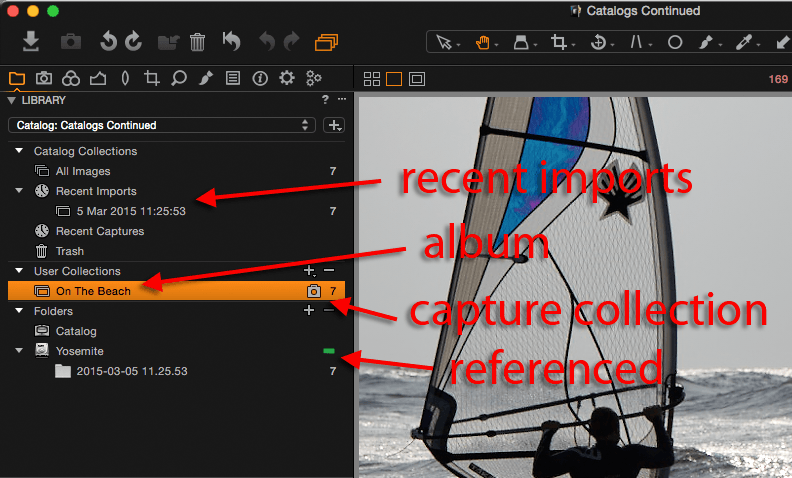
Here, you have three options. First, the default is that the import creates a collection in the Recent Imports section of the Catalog Collection section in the Library. This is always the case and can not be switched off.
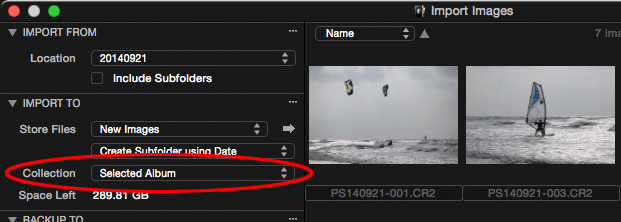
Second, you can streamline your workflow by additionally importing your images into a pre-created and pre-selected Album, instead of moving them later into that Album. This is a nice feature, but you must create and select the Album before you open the Import Images window.
Note that Capture One will also – and always – create a collection under Recent Imports, discussed above.
The third option, Capture Collection, refers to tethering, so what is it doing in the import dialog? The Capture Collection is a special property that you can assign to an Album.
That Album will receive all tethered shots. When you shoot both tethered and on a card during a particular job or assignment, you can make Capture One import from the card into that same Album that you use for tethering.
You can recognize the Capture Collection from the camera icon in the Albums name. I will end the explanation on import here, as the Catalog specific options are covered now.
Next, we look at User Collections in Catalogs Continued.
User Collections
Once your images are imported, you can start to organize them in a way that is fully independent of the physical location of the original image files. During import, you are aware of where the image files are located. After import, you don’t care, so to speak, and start organizing your images the way you want. Beware, the possibilities are pretty endless.
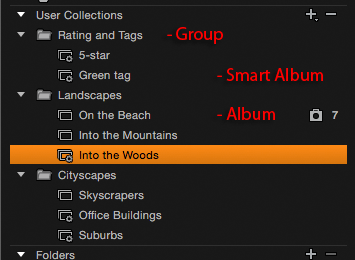
This is done in the User Collections section of the Library. In contrast to the Catalog Collections, you are in control here. In the User Collections section, you can create Albums, Smart Albums, Groups and Projects. Let’s start with Albums. I discussed Albums and Smart Albums already in my previous post Catalogs Explained, so I go briefly into this now.
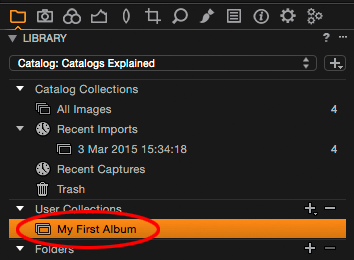
You can store images in an Album. Just drag-and-drop images from the Browser in the album. You can put one image in multiple Albums. Albums actually only contain links to an image so there is no copying involved. Editing an image in one album changes other representations of the image in other collections as well.
Smart Album
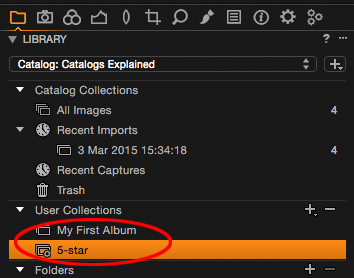
The same is true for Smart Albums but now you define one or more filtering rules. Based on these rules for that album, images are automatically selected and placed into the Smart Album. For example, if a rule determines that images must have a 5-star rating, all five-star images are automatically placed in that smart album. Change the rating and the image is removed automatically and instantly.
Tip: when you define the search rules for a Smart Album, you can use the presets. There are presets built-in for rating and color tags.
Group
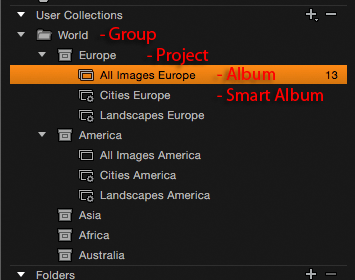
So what do Groups bring to the table? A Group is just a container object that can hold (Smart) Albums. With Groups, you can manage your Albums if their number grows over time and you lose oversight. Note that a Group can also contain another Group for managing a very large number of user collections. A Group can also contain a Project, discussed below.
Bonus feature: you can sort Groups and Project by the name. Just right-click on it.
Project
Last but not least: Projects. A project is like a Group in that it can contain (Smart) Albums and Groups. A Project can not contain another Project. So far, so good. But here’s the catch: a Project is a search boundary. You can only search and filter images that are placed (in Albums) inside the Project container.
A Smart Album for 5-star rated images, for example, placed inside a project, with not show all images in the Catalog with a 5-star rating. It will only show images in Albums inside the Project container with a 5-star rating. A Project is a very powerful feature that you best learn to understand with a small Catalog for testing.
Database file, backup, verification
The nerve system and the metaphorical Achilles heel of the Catalog is its database. The Catalog database contains all links to both the outside world (seen from the Catalog) like disks as well as the inside word of user collections and image adjustments. No need to say that a backup of the database is paramount.
Check your preference settings (General tab) on the frequency of your database backup. Note that the database is just a small file so frequent backups will not eat your disk space. You can also manually invoke a backup from the File menu.
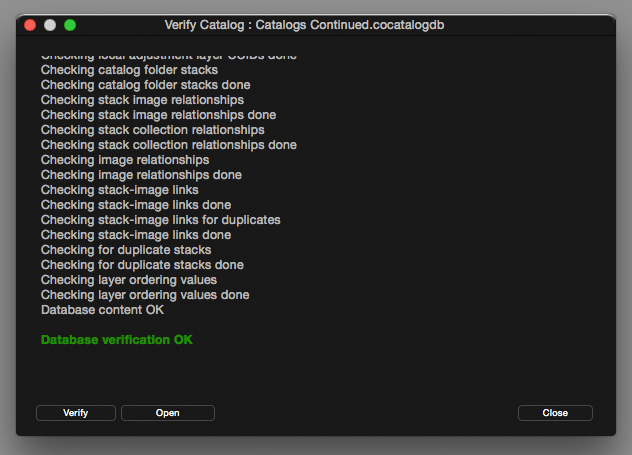
Capture One also comes with a verification feature, which checks the database for inconsistencies and will attempt to repair them. Note that opening a Catalog and during backup verification takes place as well.
Folders, Disks and Offline Files
The physical location of imported images is represented in the Folders section of the Library. Images are either stored in the Catalog object (fully managed images) or you find your disk and folders listed (referenced images). So let’s zoom in on the Library > Folders section.
In the screen image above you can see 4 images stored in the Catalog folder. These are imported Inside Catalog, hence they are fully managed. Yes, now it comes together!
You also see 2 disks: Yosemite, which is internal, and No Name, an external disk. Images are imported from their Current Location, hence they are referenced. The green label next to the disks refers to their online state.
In the next image, you see some changes in the state of disks and folders of the referenced images. One Yosemite folder has an exclamation mark. This folder was moved outside Capture One and as a result, the images in that folder are in an Offline state. You can relocate the folder from the Library and all will be online again.
The No Name disk, however, was removed, like when you leave your external disk home while traveling. The red label indicates its Offline state as are all images imported from that disk. Once the external disk is connected again, Capture One will automatically change its state to online. There is no need to take further action, no need to relocate.
A detail of the Viewer shows the offline state of an image. No need to worry, as you can browse and edit (almost all edits) the image.
Catalogs Continued Ends or Not?
Catalogs Continued, our second post in this series end here. Want more? You were able to swallow this blog but are not saturated yet? Squeeze out the last bit on Catalogs? Get to the next level in the third blog in this sequence: Catalogs In-Depth (part 1)!
Thank You
For reading. Please feel free to leave a comment. Like us on Facebook or subscribe to our newsletter to stay informed about new blogs.
Best Regards,
Image Alchemist











Thanks!
Thank you too, Alex, for visiting. Stay tuned for more!
Thank you for the tutorials that you have posted.
This site now is on my favorite for edit my photos.
Regards
Antonio
Thank for these guides. Very helpful. I’m looking forward to hearing more about Projects, like why to use a Project instead of a Group, if the only difference is that they limit the search scope. I’m yet to realise why this is so useful, but I’m sure I will!
In Aperture you could save images in Projects. Albums were optional. Capture One seems to require you to create both Projects and Albums..
Good question, the Projects versus Group comparison. The theory is simpel (search scope), the application in day-to-day practise maybe not. This is certainly a detail to elaborate on in a future post.
This is very helpful, and clarifies some questions I have had about catalogs.
thanks for putting in the time and effort to develop your blog.
Thanks for this. I am new to C1 (coming from Aperture), and have two questions:
1. How can I delete images from user collections? So far, I have only found that I can delete from the “Catalog Collections”, i.e. from All files or from Recent Imports. When I say delete, I mean really delete, not just removal from an album.
Managing digital images well requires deleting. I cull my images in three stages: 1. in camera before importing; 2. immediately after importing; and 3. during regular use. For #3, once I have organized them into albums and projects, I want to be able to delete directly from the album and not just remove it from the album. Searching for each image in the Catalog Collection is quite tedious.
2. How can I move images from a Session to a Catalog?
Maybe you can cover these issues in the “In-Depth” article you have planned.
Thanks and best regards,
James
Hi James,
1. Your request is clear and currently I do not have a direct solution for you. A workaround is to tag or rate the images. Or provide a keyword in a preset, and filter on the keyword.
2. Topic is covered in the upcoming post.
Thanks.
Two questions:
1 – Is there anyway to merge two catalogs.
2 – I did an import from Lightroom into CO8 Pro. Unfortunately, only about half the Lightroom images imported before CO8 crashed. If I try again, will duplicate images import or will it skip what I already imported. I know I can sync to retrieve the missing references, but I will get the original files without the Lightroom adjustments.
Thanks.
A1 – You can merge CO8 catalogs by importing one CO catalog into another (File > Import Catalog > Capture One catalog); please see the blog Catalogs In-Depth (part 1) for details.
A2 – Note sure about duplicates. Best to test this with a small (10 images) Lr catalog, and import it twice in the same catalog. In you case of a crashed catalog import, I would start from scratch and import the Lr catalog in batches. In other words, cut your Lr catalog in smaller parts first.
How do I change the name of a Catalog?
Hi John,
You can rename a catalog from the Finder (macOS) or Explorer (Windows). First close Capture One to make sure the catalog is closed, next rename the catalog.
Best, Paul Steunebrink / Image Alchemist
Many thanks for that advice Paul. It had me stumped but, like so much in life it’s easy when you know how. Best wishes, John.
Hi Paul,
I understand that images can live in multiple albums. Is there a way to show in which different albums a particular image lives? I’m using a 30-day trial version of Capture One Pro 11 and can see “Show in Finder” and “Show in Library” but not “Show in Album(s)” when right clicking an image in the browser or viewer.
Hi Bo,
Good question. Unfortunately, there is currently no such feature in Capture One.
Best, Paul Steunebrink / Image Alchemist