Capture One Pro 20 Update Review
In this Capture One Pro 20 Update review, you learn about the new before/after feature, the much-improved healing and cloning tools, the new welcome wizard for new users, and the improved Lightroom Importer. For Nikon users, there is a lot of exciting news too.
Capture One Pro 20 Update Review
This Capture One 20 Update is the first point release of Capture One 20. The official version number of this release is Capture One 20 (13.1.0). The number between parenthesis – 13.1.0 – is the build number and designates the release. Capture One 20 is the overall product number and does not change with updates.
To get the latest release, download Capture One and experience all the new features yourself.
This point release offers significant improvements in several different areas:
- Image Editing
much improved heal and clone tools - Workflow
new Before/After feature - Quick Start
new Activation and Introduction wizard; improved Lightroom importer - User Interface
new logo and splash screen; workspace changes - Products
Capture One Nikon editions - New camera and lens support
camera raw file formats, lens profiles, and Nikon camera profiles
This review complements my Capture One Pro 20 Review from December 2019.
Heal and Clone Layers
There are several improvements with healing and cloning in Capture One. Because Capture One Express does not support layers, this change does not apply to the different Express modes.
New brushes
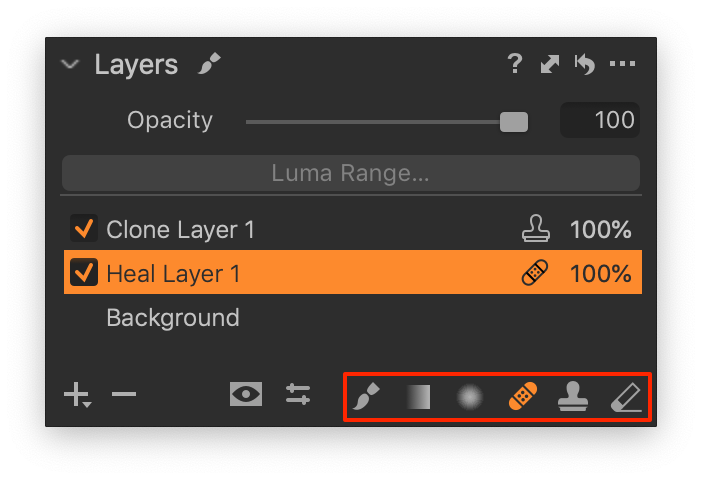
Capture One Pro 20 Update now offers a dedicated Heal Brush and Clone Brush. Using this brush automatically creates or selects a layer of the correct type. This change makes working with these brushes faster and easier.
You select the brush from the Layers tool or among the Cursor Tools, and with the shortcuts Q (Heal Brush) and S (Clone Brush).
The brushes also have a new appearance to help you to identify each after selecting, and while brushing.
Note that Spot Removal, with shortcut O, is grouped with the Heal and Clone Brush at the Cursor Tools.
Multiple source points
Both healing and cloning work with Source Points. A Source Point is where Capture One gets the pixels from, which it places elsewhere. An arrow now visualizes the relation between the Source Point and the mask.
In earlier versions, you were limited to one Source Point per layer. New in Capture One Pro 20 Update is that you can create multiple Source Points per Heal or Clone Layer.
When you extend the mask, you can either select an existing Source Point, let Capture One decide whether or not to create a new Source Point, or intentionally create a new one.
Note that Capture One is quite smart in choosing the right position of a Source Point. Of course, you can always move a Source Point.
Multiple Heal and Clone Layers
As with earlier versions of Capture One Pro, you still can create multiple Heal and Clone Layers, up to a maximum of 16 layers. When you have numerous of these layers, you can select one before making a stroke with a Heal or Clone Brush.
If none of these layers is selected, Capture One will automatically select the top-most corresponding layer for the brush when you make a stroke.
Differences between Heal and Clone Layers
With the first stroke of a Heal Brush, Capture One Pro 20 Update automatically creates a Heal Layer and selects a Source Point. You can drag the Source Point to a new location. With the Alt/Option key, you intentionally create a new Source Point.
On a Clone Layer, you always create your Source Point with the Alt/Option key first. If you forget to do that, Capture One will notify you.
Similarities between Heal and Clone Layers
You can delete a masked area and the linked Source Point. Select the Source Point – it becomes orange – and hit the Backspace-key (Mac) or the Delete-key (Windows).
You can use Layer Opacity, and brush settings like Flow and Opacity with the Heal and Clone Layers. In a Catalog, Healing and Cloning works only with online files, not offline.
Workflow
There are two workflow improvements in Capture One 20 Update that I like to highlight in this review. One feature is the Before/After comparison, and the second is the improved Lightroom Importer.
Before/After
Capture One needs a good Before/After comparison feature. How many of us asked for it, and for how long? Every Capture One diehard knows a few workarounds, and Capture One 10.1 brought the Master Temporary Reset (Alt+Reset). But finally, the wait is over.
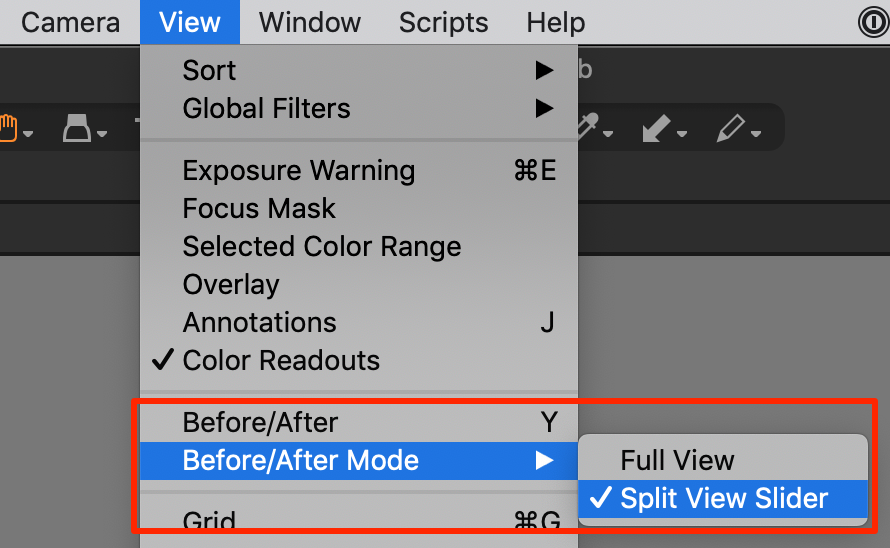
The Before/After feature in Capture One 20 Update is a fully-fledged comparison feature that allows reviewing an image without and with adjustments, either alternating or side-by-side in a split Viewer. So, how does it work?
You switch the Before/After mode on/off:
- View menu > Before/After
- shortcut Y
- new icon on the toolbar
The Before/After feature operates in one of the two ways: Full View or Split View Slider.
In Full View, you see the entire image in either the Before (original image) or After (adjusted) state. Pressing the Y-key or clicking the toolbar icon lets you quickly alternate between these two states. You recognize the Before state from its label in the top-left corner.
You can also switch to the Split View Slider mode. Again, you can do this from the View menu, pressing Shift-Y on the keyboard, or long-click the toolbar icon and select the desired mode.
The Split Viewer Slider mode splits the Viewer into two parts. Before at the left and After at the right, with a draggable slider in the middle.
Some Notes on Before/After
First, when you select multiple images with the Viewer in Multi-View mode, the Before/After feature works on all images simultaneously, in both Before/After methods. Using this feature with multiple images is great and fun to watch.
Second, you can edit your image while Before/After is enabled, but the result depends on the mode. In Full View mode, Before/After switches off. In Split View Slider mode, you see the edits in the After state of the photo.
However, changing the composition of the photo will always switch the Before/After feature off.
Quick Start
Any new Capture One user faces several challenges before being able to explore the program. Plus, it is no secret that a large influx of new Capture One users is coming from Adobe Lightroom.
With these two facts on the table, Capture One 20 Update helps you to get up and running as quickly and smoothly as possible. Two features enable a quick start:
- new Welcome Wizard for activation and introduction
- improved Lightroom Importer
Welcome Wizard
Any first-time user now gets the necessary help with the new Welcome Wizard. This wizard guides you in six screens through the toughest and interesting places in Capture One. The screens are:
- Welcome – login
- Activate your license – activation
- Add your photos – import photos
- Feel at home – choose a layout
- Accelerate your workflow – styles & presets
- Take color control – advanced color editor
Login and Activation
The login and activation screens offer a user-friendly way to log in and activate your installation. Since Capture One 20, all running modes, including trial and the free Express modes, require activation.
The Welcome Wizard skips the login and activation windows if your copy is already activated.
Add Photos
The second stage of the wizard lets you select a folder with your images or use sample images that it stores inside the Capture One program. Depending on your license, you get two Fujifilm, Nikon, or Sony raw files plus adjustments or the whole package if you have a Capture One Pro license. Currently, there are no images for the Capture One for Phase One license.
Once the wizard ends, Capture One opens with the Capture One Catalog, filled with the sample images, or the images of the folder you selected.
Feel Good
The next page in the wizard lets you make modifications to the default Workspace. The program’s appearance or Workspace is very flexible in Capture One, and the wizard offers the choice to have the Tools left/right and the Thumbnails side or bottom.
This way, Lightroom users can quickly mimic that program’s environment in Capture One Pro with Tools that are the right and Thumbnails at the bottom.
Take Control
The last two screens of the wizard highlight two critical features of Capture One: Styles & Presets for fast editing and the Advanced Color Editor for advanced color editing.
I would expect that the wizard highlights the Basic Color Editor with the intuitive Direct Color Editor feature – introduced in version 20.0 – because it is great for starters and experienced users alike.
Capture One has several Styles and Presets built-in, but you can download hundreds of Presets for free or the complete sets for a fee.
Lightroom Importer
Many new users that start working with Capture One are currently using Adobe Lightroom. Since the introduction of catalogs in Capture One 7 (2012), you could import a Lightroom catalog into a Capture One Catalog.
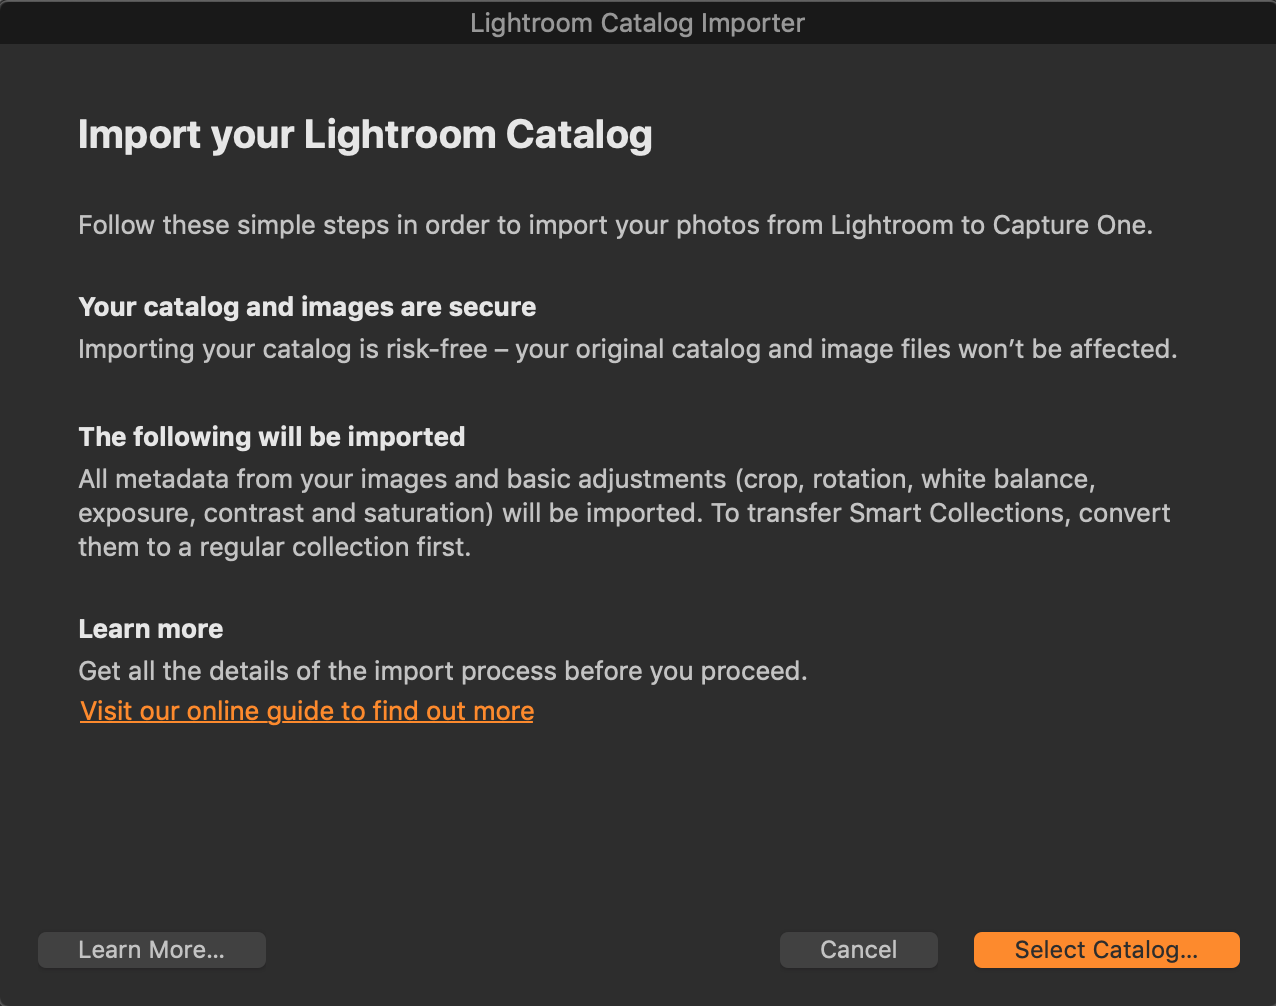
However, the process was not always as straightforward as it could be. Among others, images that were not imported, for various reasons, were not reported. You were unaware which images did not make it into Capture One. Now, the Lightroom Importer gives you a detailed report of skipped files.
A second new feature is that you can import Offline Files as Capture One 20 Update reads the Smart Previews from Lightroom.
The screen above is the first of three of the new Lightroom Importer. Note the link for more information on this screen.
User Interface
You can not miss the new Capture One logo. There is a “1” in it, and there the similarities end with the previous logo. I don’t know why they made such a bold move with a point release, but all indicates Capture One made a fresh start after the separation from Phase One since last January.
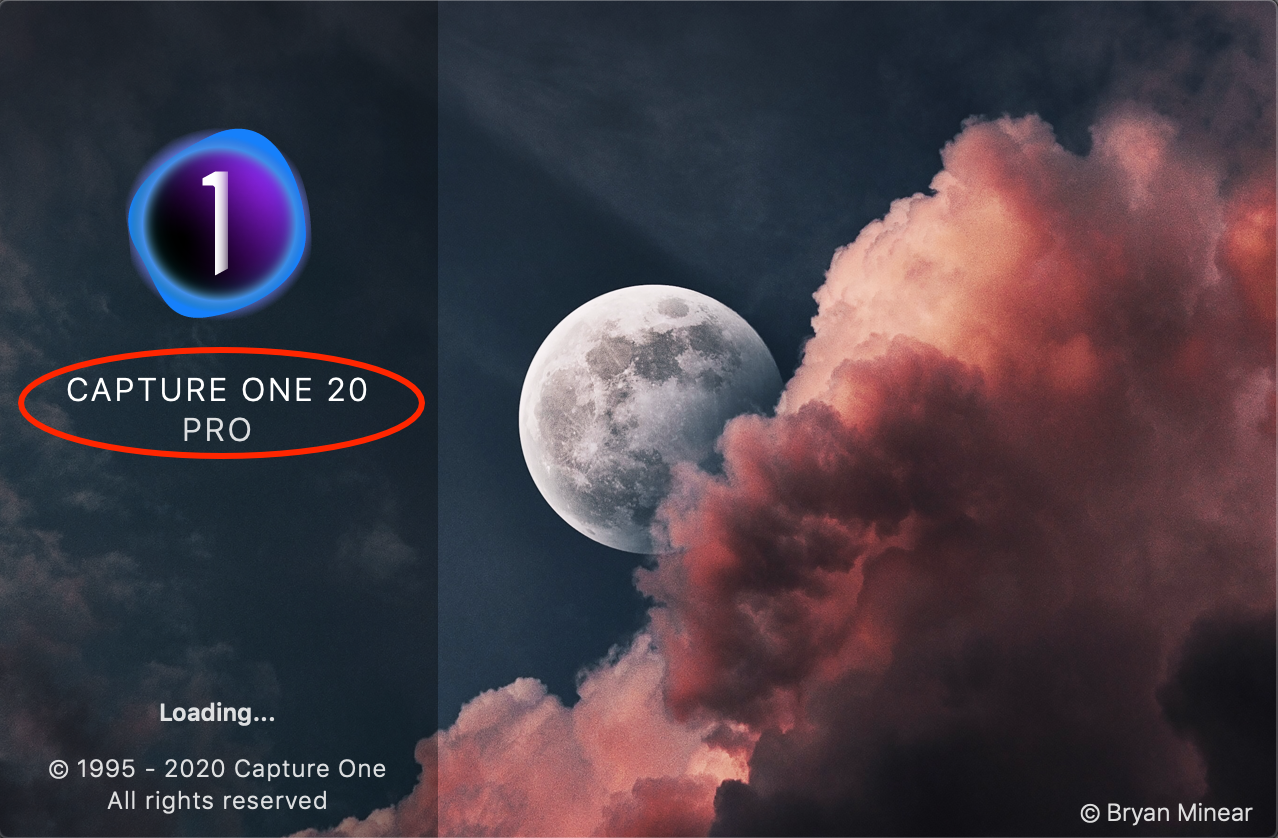
The program starts with a new splash screen. On Mac, there was no splash screen, and on Windows, it was the about screen.
The new splash screen shows the major version number and mode Capture One runs, like Pro, Express (for Sony), Fujifilm, or for Phase One, to name a few. The splash screen can be helpful in troubleshooting.
Workspace Changes
Please note that since Capture One Express does not support different workspaces, this change does not apply to the different Express modes.
The built-in workspaces in the Pro editions, including the branded running modes, are reduced from nine to six. There is only one Simplified workspace, and the Black and White workspace is removed. If you like one of the removed workspaces, please contact Capture One Support.
Below you see the Exposure tool tab. The Base Characteristics and White Balance tools are a part of this tool tab now. The Clarity tool moved up two positions and is now positioned above the Levels and Curve tool.
Now the order of the tools more precisely reflects the processing pipeline, as I described in Processing Pipeline in Capture One.
The Layers tool in the pinned area is now collapsed.
Of course, you can always create and save your workspace. You can read all about that in Capture One Workspace.
Capture One for Nikon
Capture One already teamed up with Sony (Capture One 8, September 2014) and Fujifilm (Capture One 11.3, September 2018) in the past. Now Nikon joins the ranks.
The benefits are a free Capture One Express for Nikon, the feature-limited package for an unbeatable price. The fully Pro-grade package Capture One for Nikon supports Nikon only but is considerably cheaper than the full-fledged Pro.
Please note if you have cameras from different brands that you like to use with Capture One, you always need a Pro license. The exception – so far – are image files from Phase One cameras. Capture One always supports these file formats.
Another benefit for Nikon users is that you can expect quick support for new Nikon cameras and lenses. Sony and Fujifilm users enjoy this premium treatment for some time now.
Due to the expected additional sales that these branded packages generate, more resources come available for the continuous development of the software. So indirectly, we all benefit.
New Camera And Lens Support
These cameras received raw file support in Capture One 20 Update:
-
Canon EOS 250D, G5 X Mark II, G7 X Mark III
-
Leica M10 Monochrom
- Nikon P950
-
Olympus EM1 mk3
- Phase One iXH-150
-
Zeiss ZX1
These lenses were added to the lens correction database:
- Sony FE 20mm F1.8 G
- Tamron 28-75mm F2.8 Di III RXD (Sony FE)
- Fujifilm XF 16-55mm F2.8 R LM WR
- Phase One XT – Rodenstock HR Digaron-W 50mm f/4
- Ricoh GR III fixed lens
- Canon PowerShot G5 X Mark II fixed lens
More Profiles
In addition to the new camera and lens support, several Nikon cameras now have multiple profiles to replicate Nikon Picture Controls. Next to Generic, the profiles are Flat, Landscape, Monochrome, Neutral, Portrait, Standard, and Vivid. These additional profiles with make the seasoned Nikon shooter feel quickly at home in Capture One.
Supported models are:
- D3300/D3400/D3500
- D5500/D5600
- D7500
- D500/D610
- D750/D780
- D800/D810/D810A/D850
- D5/D6
- Z50/Z6/Z7
Please note that the Nikon profiles are not applied automatically when you had selected them in-camera during capture. You apply them manually to your NEF raw file and make further adjustments in Capture One.
More Reviews
This is not the only review of Capture One 20 Update. Some very informative reviews from highly respected friends are out there.
- AlexOnRaw blog and video
- an extensive video from Walter Rowe, a Capture One user and Nikon shooter
- an awesome video from Capture One
Thank you
For reading. This ends my Capture One Pro 20 Update review. Please feel free to leave a comment. Like us on Facebook or subscribe to stay informed about new blogs.
Best Regards,
Image Alchemist











Paul, thank you for this excellent review of C1 20 upgrade. Top notch reporting as usual.
Thank you Jack,
I’ll appreciate that.
Best, Paul Steunebrink / Image Alchemist
You didn’t discuss the scrolling ability. I used to use my scroll wheel for fine tuning as I hivered the mouse over the slider Now when I attemp to do that it just scrolls through the tools Is there any work around so that I could also fine tune a tool woih the scroll wheel?
Thanks
Mick
Hi Mick,
As scrollable tools were introduced in Capture One 20 (13.0) last December, I discussed the change in that review. There is a setting in the Preferences, General tab, Tool Tab section that you can select.
Best, Paul Steunebrink / Image Alchemist