Adjustments In-Depth (part 1)
Both Presets and Styles are a kind of pre-configured adjustment. They allow you to easily create a specific result again and again with minimal effort. Both are very easy to create and apply, yet very powerful in their use. And fun too! This and more you find in this in-depth overview on adjustments.
Adjustments In-Depth
In two earlier blogs on Adjustments, we looked at adjusting individual images and adjusting multiple images, both through manual adjustments or automatic. In this third and last blog in this series, we discuss another kind of adjusting in Capture One Pro 8: presets and styles.
Part 1 and Part 2
To prevent a long read I decided to split this post into two parts. This is part 1 and in the end you find the link to part 2. Ready for Adjustments In-Depth? Go!
Fact Or Fiction?
What you can achieve with presets and styles may look like fiction so let’s start with some facts. What is there to know?
A preset is
- a pre-defined adjustment
- tool specific
- built-in (comes with the program) or build by the user
- stored as a small file
You can
- make as many presets as you like
- give a preset any name you like
- organize presets in folders
- transfer presets between computers
- apply a preset to one or many images at one time, and during import or tethering
All the above is also true for styles, with one exception. A style is like a preset on steroids because a style can contain pre-defined adjustments from different tools. Hence a style is not tool-specific.
Built-In Presets And Styles
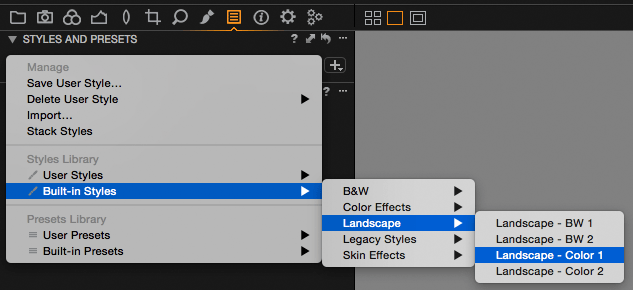
Let’s assume you never used a preset or style in Capture One before. What is the easiest way to start? Go to the built-in items to get your first impression. Navigate to the Adjustments tool tab, and view the Styles and Presets tool. It is a very small tool that you easily miss. Check the drop-down box, which probably displays ‘None’, which means none are applied.
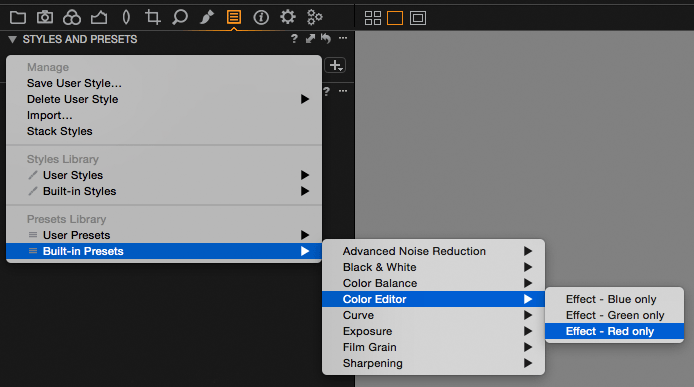
When you click on the drop-down box, you get a total overview of all presets and styles installed with the program. They are listed under the headings Styles Library and Presets Library respectively. Make sure you have an image selected. Next, browse through the Built-in Styles. They are grouped under names like B&W, Color Effects, Landscape and so on.
Preview The Adjustment
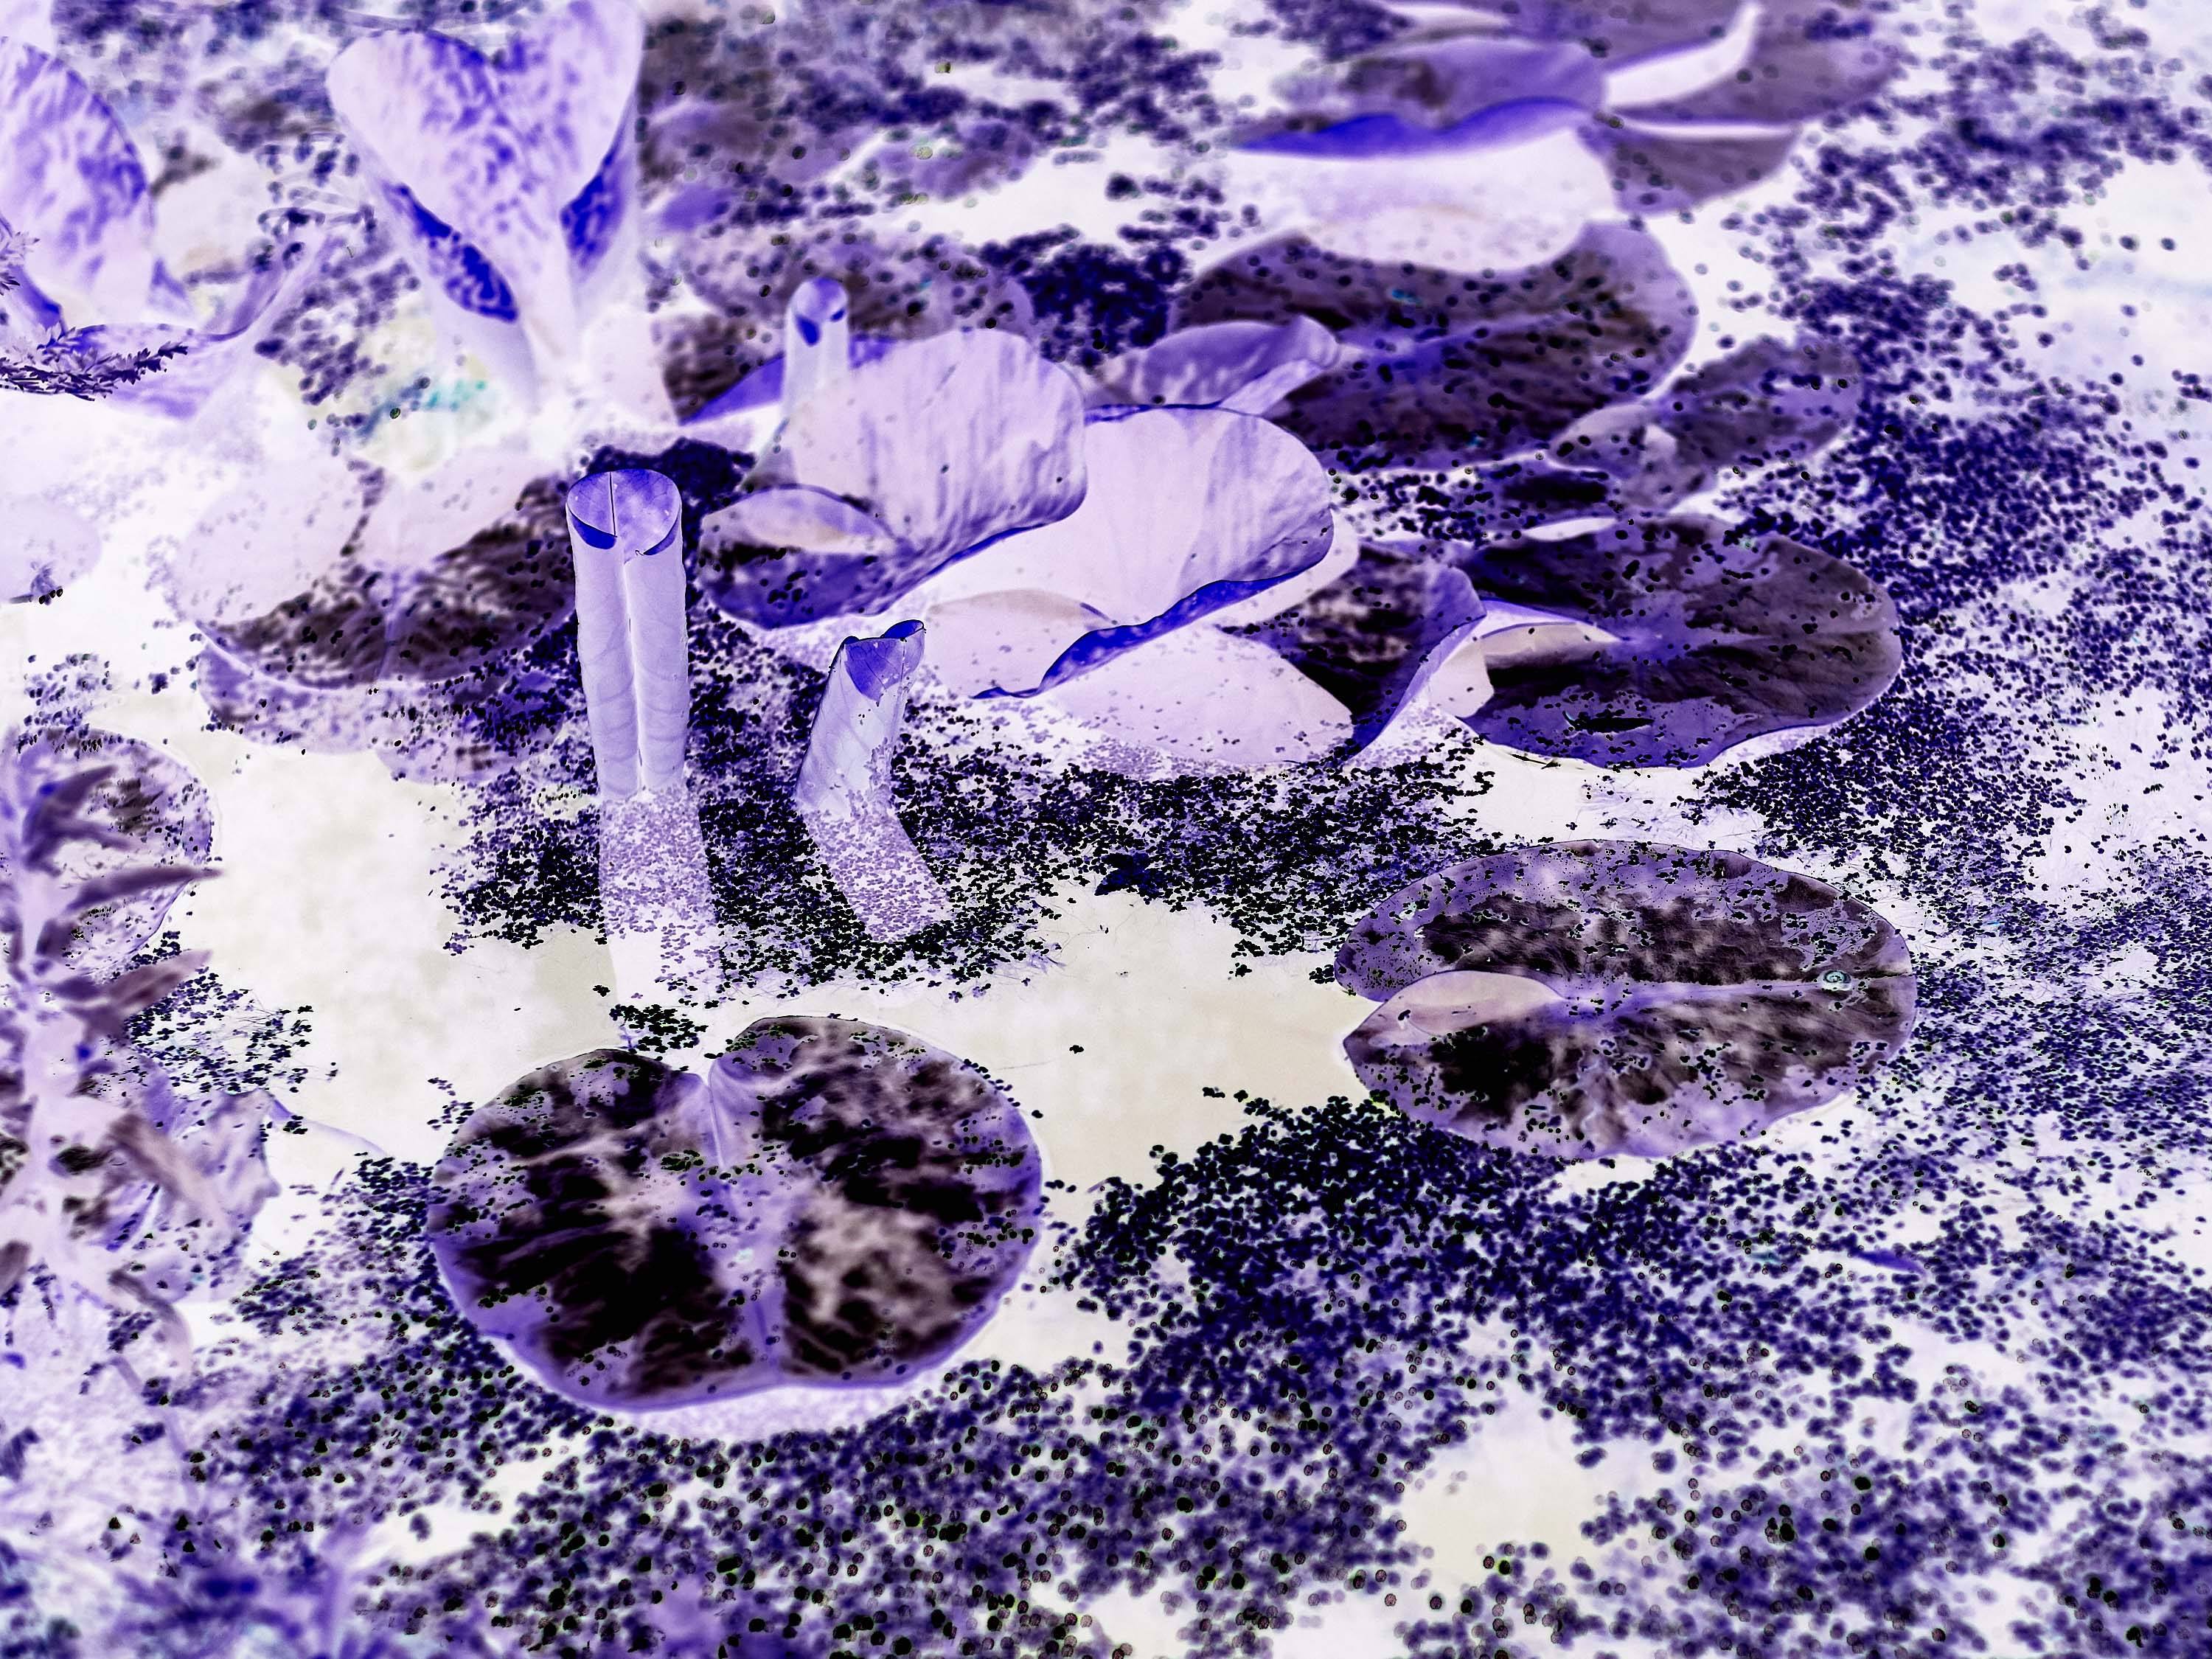
While you browse through the Styles, you will notice that the selected image adapts the adjustments in the viewer immediately, even before you have applied it. Apply a style by clicking on one of your choices. In the image below I selected Color Effects – Inverse 1 (great for correcting a reproduction of negative film).
Back to your browser with thumbnails, you select a few images. Set your viewer to Multi-View (View menu > Viewer mode), to display all selected images. Check that you have Edit All Selected Variants enabled from the toolbar or the Edit menu.
Next, you go back to the built-in styles, hover your mouse over the list while keeping an eye on your images, and apply a style. Notice that all selected image responds to browsing through the styles and the one you applied.
In the same drop-down list, you can find Built-in Presets. Again, you see a list of items that will open when you hover your mouse over it. Note, however, that these items, named Black & White, Color Balance and so on, are the names of the respective tools they belong to.
Presets are tool-specific, remember? You will find the presets at the respective tools as well (shown in a minute). Styles however you will only find in this tool.
Own Your Presets
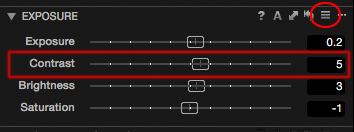
In this in-depth exploration of adjustments, we will make our own Presets and Styles. We start with a preset. Let’s make some presets for the Exposure tool. I would like to make some presets for the Contrast slider in various settings like 5, 10, 15, and 20, both positive and negative (-5, -10, -15 en -20).
Set the Contrast slider to the desired value, say +5. For the purpose of the exercise, also adjust one or more sliders in the tool. Next, open the preset menu from the tool’s header (three horizontal lines), and select Save User Preset…
Note that if there are built-in presets you will see them here.
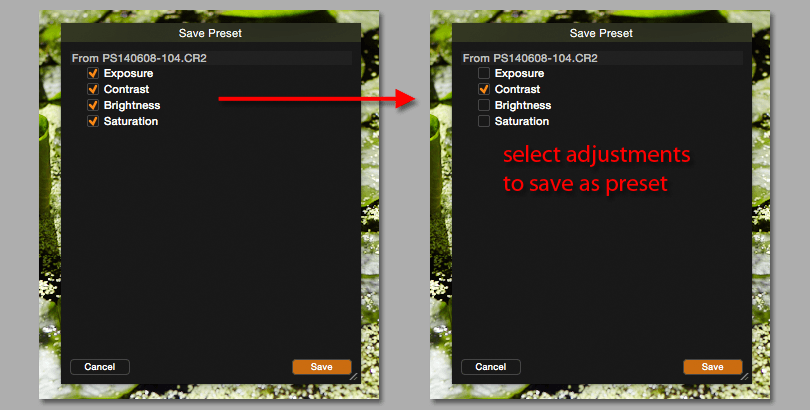
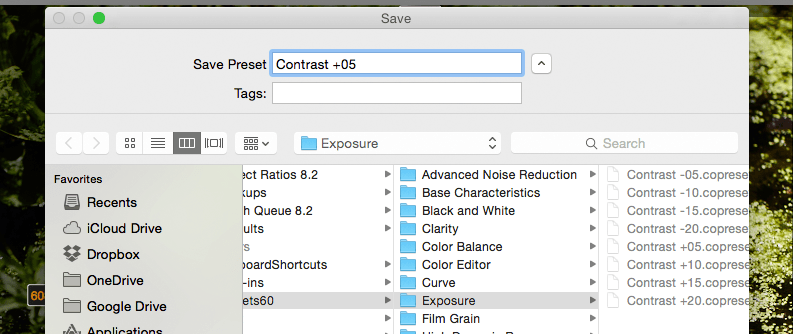
In the Save Preset dialog, I get the option to include/exclude the slider’s values in the preset. Deselect all but the Contrast box. Click Save. Write a descriptive name, like Contrast +05 in the Save Preset box, and click on the Save button.
Now comes the test! Set the Contrast slider to a different value, leave all other sliders in the Exposure tool as is, and open the Preset menu again. You will see your new preset under User Presets. Hover your mouse over the preset and notice the effect. Apply the preset. The contrast slider is set to the pre-defined value (+5), other sliders are not affected because you only saved the Contrast value in the Preset.
Your Own Style
So you just created your first preset, and now you are ready to create a style? Wow, you learn fast! Here is how you do it.
First, make some adjustments to your image from different tools. Maybe you might also want to apply a keyword, star rating, and color tag. At least one tool – shall we say: Vignetting – is not applied. Yes, we go to the max with an interesting mix!
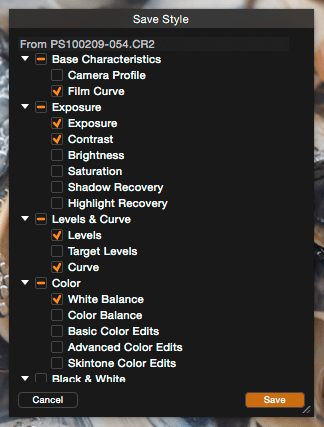
On the Adjustments tool tab go to the Styles and Presets tool. Making a new style is as simple as clicking on the + sign, or you open the drop-down box and choose Save User Style… Next, a list of all tool adjustments – like a clipboard – appears with a checkmark for each type of adjustment the image has been given. You can uncheck boxes for adjustments you do not want to have in the style. For the exercise leave as is. Browse the list and notice that metadata is also included if you made an adjustment in that department, as suggested.
Tip
Normally you would not mix image adjustments with metadata in one style; uncheck the unwanted boxes to prevent collateral damages.
Hit the Save button and provide a sensible name. Note that a remark can appear at the bottom of the dialog that certain adjustments are not recommended to be included in a style as their effect is camera specific (White Balance, Crop for example).
Next, go to another image. Reset all adjustments, remove the rating, color tag and leave any different keyword as long they are different from the style. Apply a vignette. Now, from the Styles and Presets tool, User Styles section, apply your style.
Review your adjustments by comparing with the other image. Note that all adjustments from the style are applied, including rating and color tag. Check the keywords and notice that they are replaced as well. The Vignetting is still there as before since the style did not contain an adjustment for it.
End Of Part 1, More In Part 2
You have come to the end of Adjustments In-Depth, part 1. Please continue reading in part 2.
Thank you
For reading. Please feel free to leave a comment. Like us on Facebook or subscribe to our newsletter to stay informed about new blogs.
Best Regards,
Image Alchemist







Leave a Reply
Want to join the discussion?Feel free to contribute!