Capture One Pro 10.1 Review
In this Capture One Pro 10.1 review you learn all what is new: a Master Temporary Reset switch, deleting images made easy, Fuji X-Trans processing optimised, Watermarking improved, Styles and Presets tool redesigned, and more. Choose your pick, you’ll find it here.

Capture One Pro 10.1 Review
Apart from new camera support, there are a few areas in which this point release has evolved. Please look here for the preceding Capture One Pro 10 Review.
- Added file support
- for PSD files
- for encrypted Fujifilm raw files
- Pipeline redesign
- for Fujifilm X-Trans raw files, removes several limitations
- Deleting images
- easy, consistent, transparent
- New feature
- a Master Temporary Reset switch, for a quick before/after comparison
- Improved feature
- flexible text Watermarking in processing and print
- Redesigned tool
- new user interface for Styles and Presets tool
- Miscellaneous
- Vectorscope color wheel layout in Color Balance tool as an option
- visible indication of OpenCL hardware acceleration support
- extended AppleScript support (Mac)
- under the hood improvements (Mac)
New Camera And Lens Support
The following cameras have been added to the list of supported raw file formats.
- Sony
- A9
- Fujifilm
- X-A10, XQ2, and X-T20
- Nikon
- D3400, D5600
- Panasonic
- FZ2000/FZH1
- TZ85, ZS60, TZ80
- TZ100, ZS100, TZ101
- GH5
- Pentax
- K-70, KP
Lenses from the following brands have been added to the lens correction database.
- Nikon AF-P, AF-S and Nikon 1
- Panasonic Lumix G and Panasonic Leica
- Sigma DC and DG
- Sony DT and FE
- Tamron SP
- Voigtländer Wide Heliar
- Zeiss Batis, Loxia, Milvus, Otus
For details see the release notes.
PSD File Support
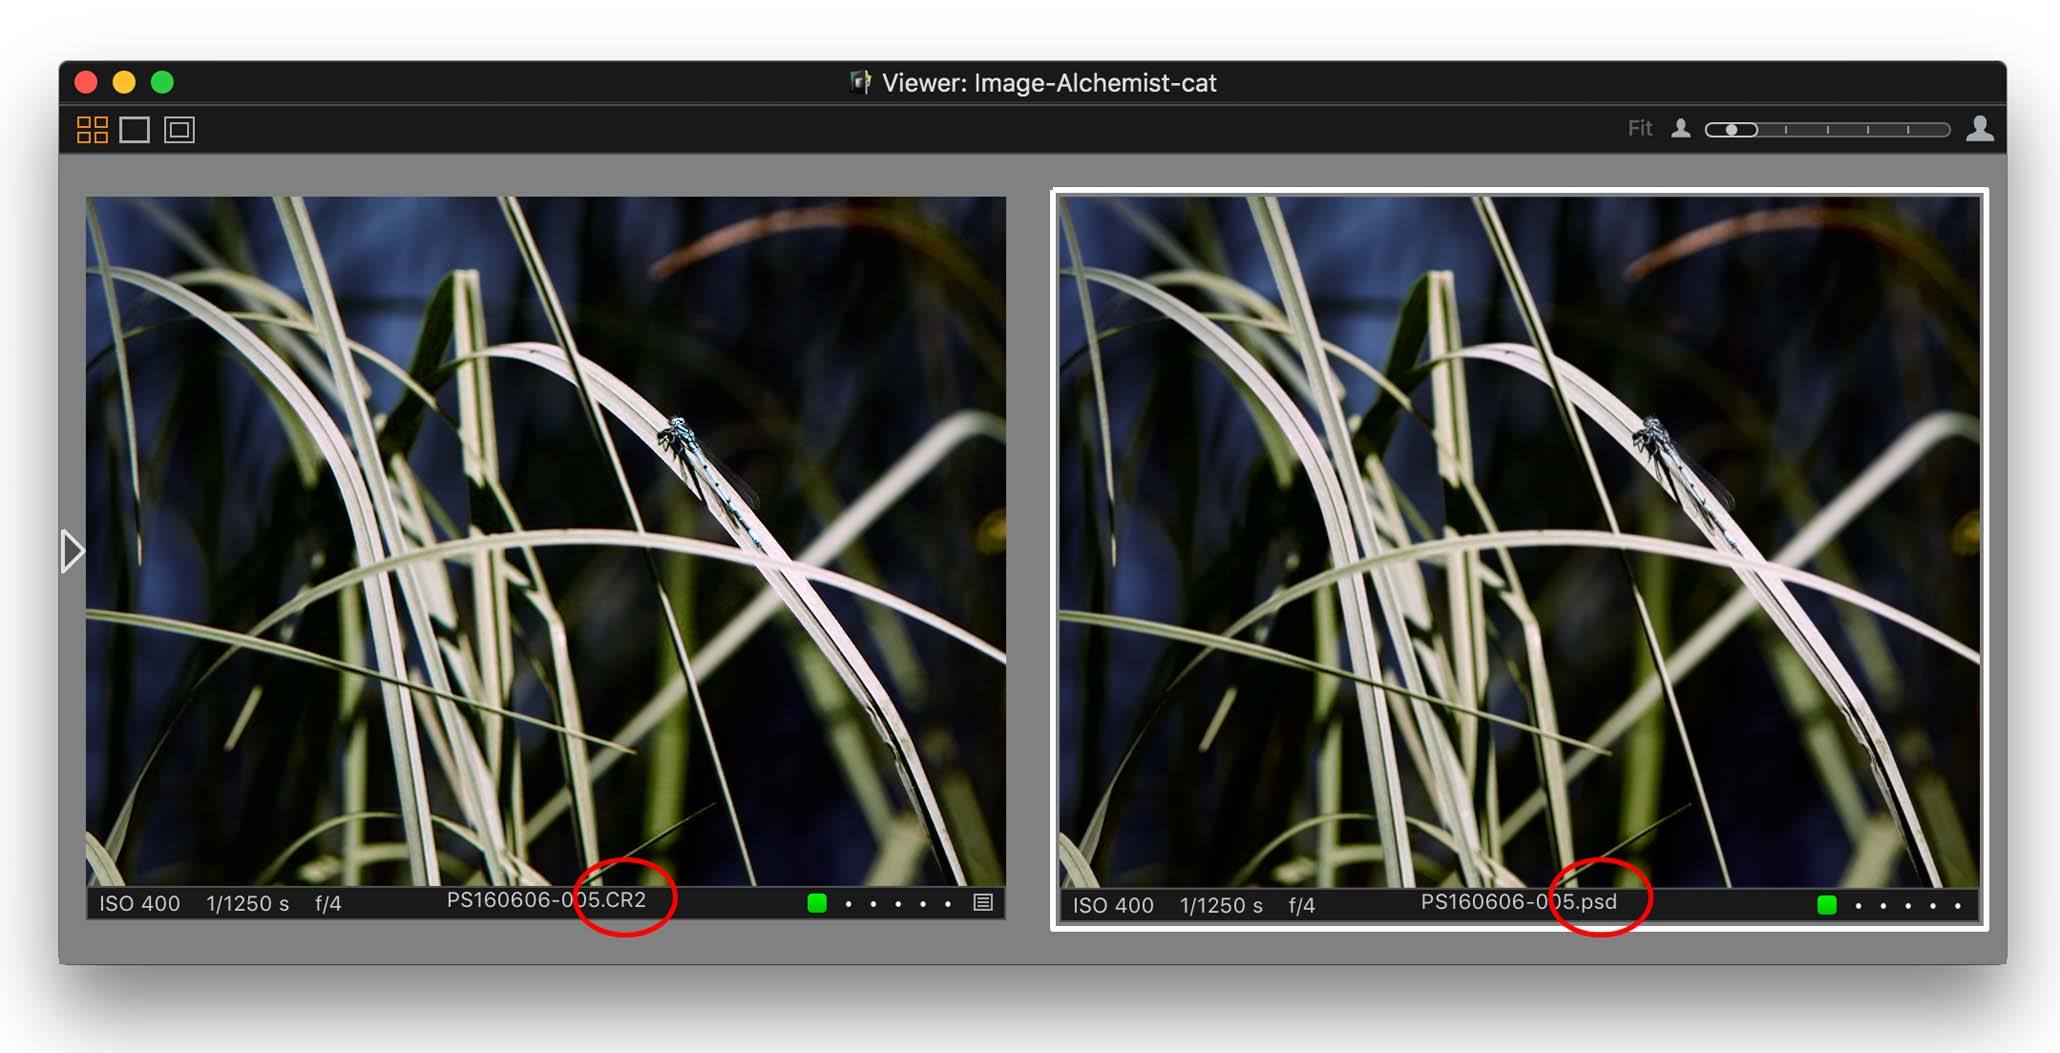
Capture One Pro can export to PSD files for some time, but importing was not available. This option is added as a way to archive PSD files in the Capture One Catalog.
Note that PSD support is limited to files saved with the maximum compatibility setting in Photoshop. Layers in the PSD file are shown in the viewer but as a TIFF with layers, you can not see those layers in Capture One.
To maintain the layers, only edit the PSD (or TIFF) with Photoshop with the Open with-command in Capture One.
Phase One published an excellent blog on the PSD workflow. You find it here.
X-Trans Processing
Fujifilm digital camera shooter will love this update. Here’s why.
The X-Trans sensors in selected Fujifilm cameras have a different layout of color filters compared to the standard Bayer pattern. As a result Capture One uses a different processing pipeline internally. That explains why some features were not available to X-Trans raw files until now.
Since Capture One Pro 10.0 you can use the Auto Mask feature with X-Trans sensor images. As of version 10.1 users with X-Trans raw files now can also enjoy:
- LCC (Lens Cast Calibration)
- Focus Mask
- Chromatic Aberration Analysis in the Lens Correction tool
- Purple Fringing suppression
- OpenCL hardware acceleration
In addition to these X-Trans benefits, Capture One Pro 10.1 now supports the Fuji Compressed RAW format.
The Missing Before-After Comparison
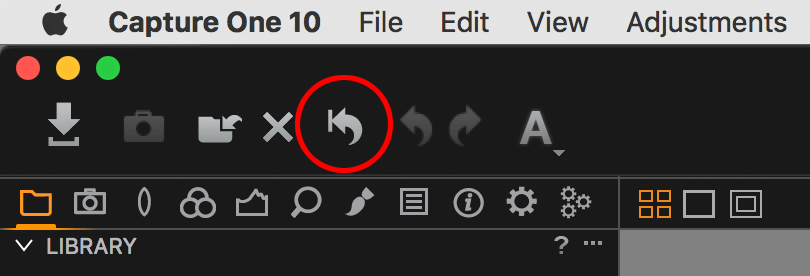
We all have been there: after making multiple adjustments you would like to make a quick comparison with the untouched version, temporary. Capture One had not a straightforward way to achieve that.
Introduce the Master Temporary Reset. It sounds complicated but is easy to use.
Take the Reset icon of the curved arrow on the toolbar. Press the Alt-key and click and hold the mouse button to review the reset state and release the mouse to reinstate the adjustments. Done.
Deleting Images
One of Capture One Pro’s unique features is that you can organize your images in either a Session or a Catalog. With a Catalog, you can store the originals either inside or outside the Catalog folder. Within your Session or Catalog, you can organize your images in Albums, Smart Albums, and Projects.
On the other hand, you must be able to remove an image from an Album, optionally move it to Trash or even wipe it from Disk. That is exactly what Capture One Pro 10.1 is offering and more.
Three Levels Of Deleting
Capture One Pro 10.1 consistently offers three levels of deleting images.
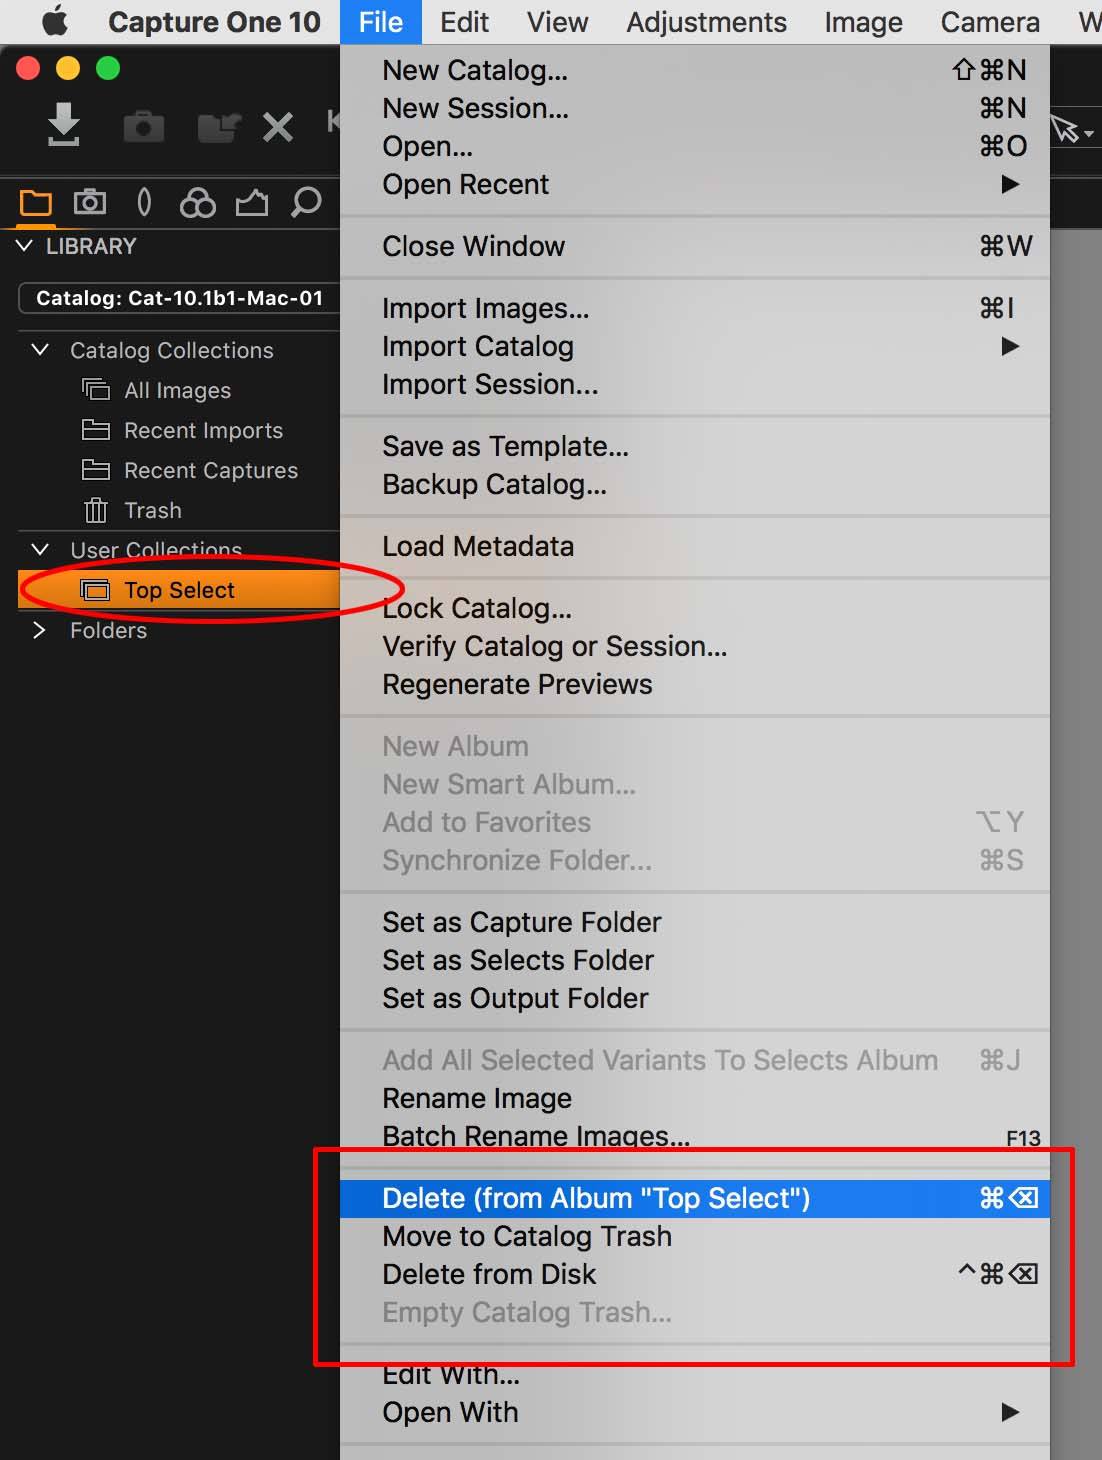
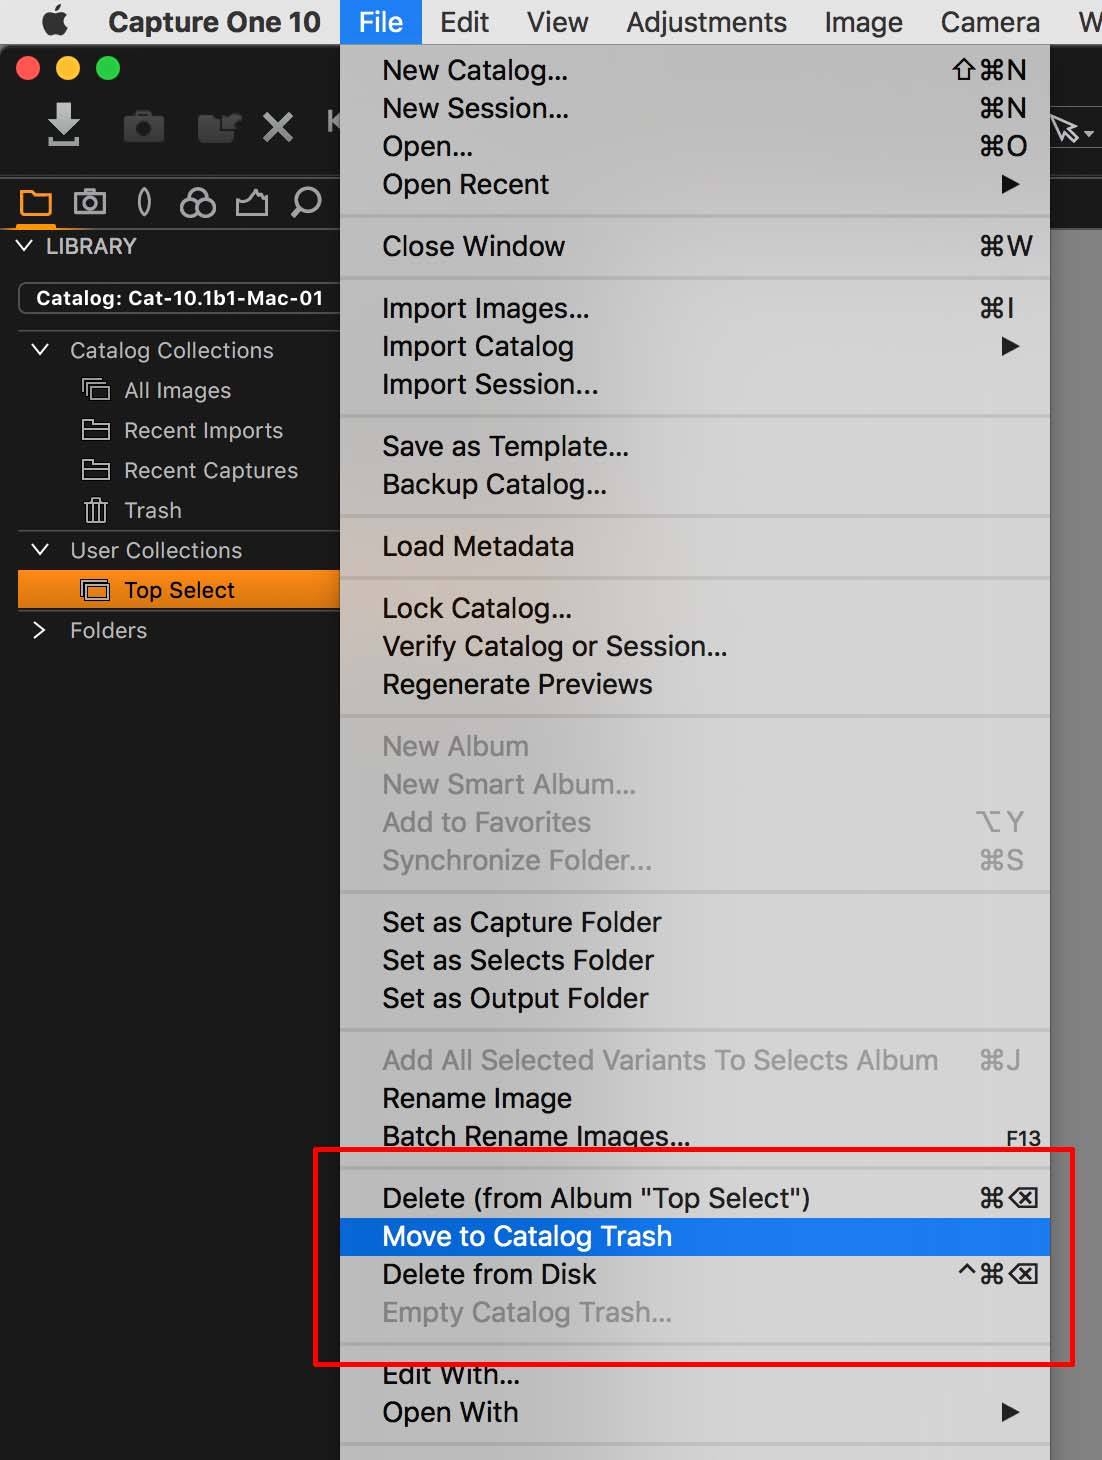
The three related commands are in the file menu. There working is independent of Session or Catalog, stored inside or outside the Catalog, in an Album or Project:
- the first option is Delete (from Album), Delete (from Project), or Delete (Variant)
- this option already existed but is expanded for a Smart Album in a Project; the command in the File menu is dynamic and changes with the situation
- the second option is Moving to Trash
- this option already existed but now you can send an image from an Album directly to Trash; now applies to referenced images in a Catalog; note that you can not edit images in a Trash anymore
- the Empty Session Trash or Empty Catalog Trash command is grey when empty
- the last option is Deleting from Disk
- this option already existed as Delete Permanently in earlier versions; you always get a dialog to confirm (unless disabled in Preferences)
Styles Tool Redesigned
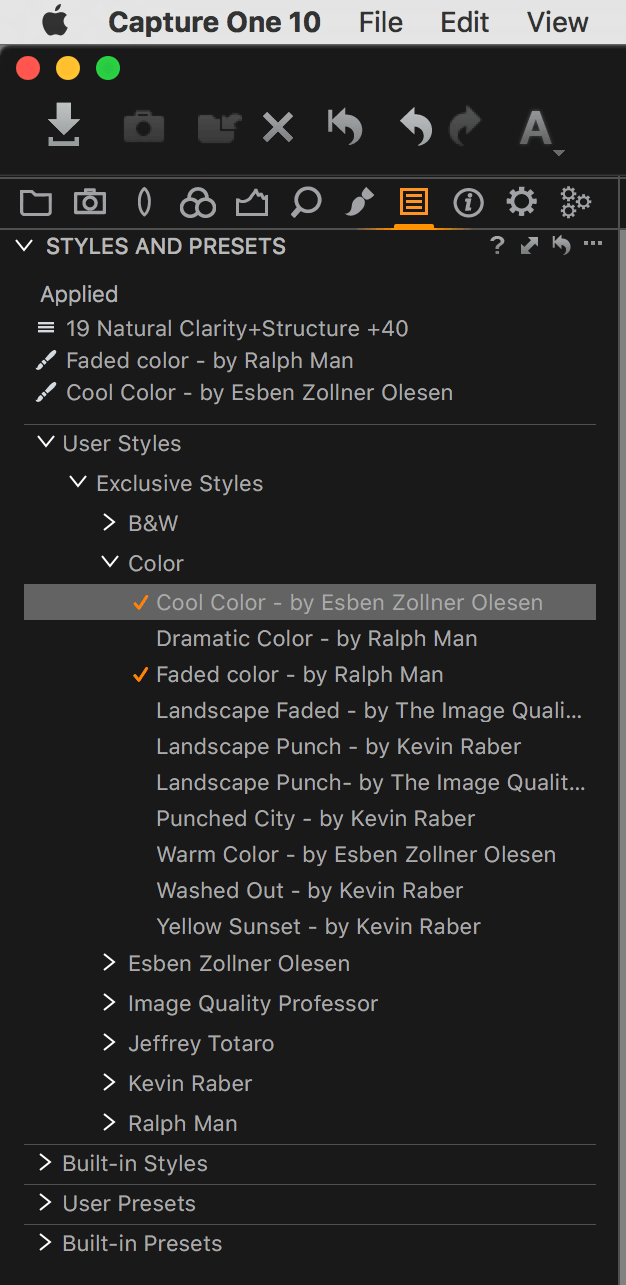
The Styles and Presets tool, or Styles tool for short, got a makeover. Your list of Styles or Presets does not collapse over your image preview.
For larger collections nested in folders, you need to click to expand the list.
Trick
Alt-click will expand and collapse all nested levels. Currently this only works on macOS.
Watermarking Improved
Capture One offers Watermarking in both processing and printing. Note that in exporting variants Watermarking is not available.
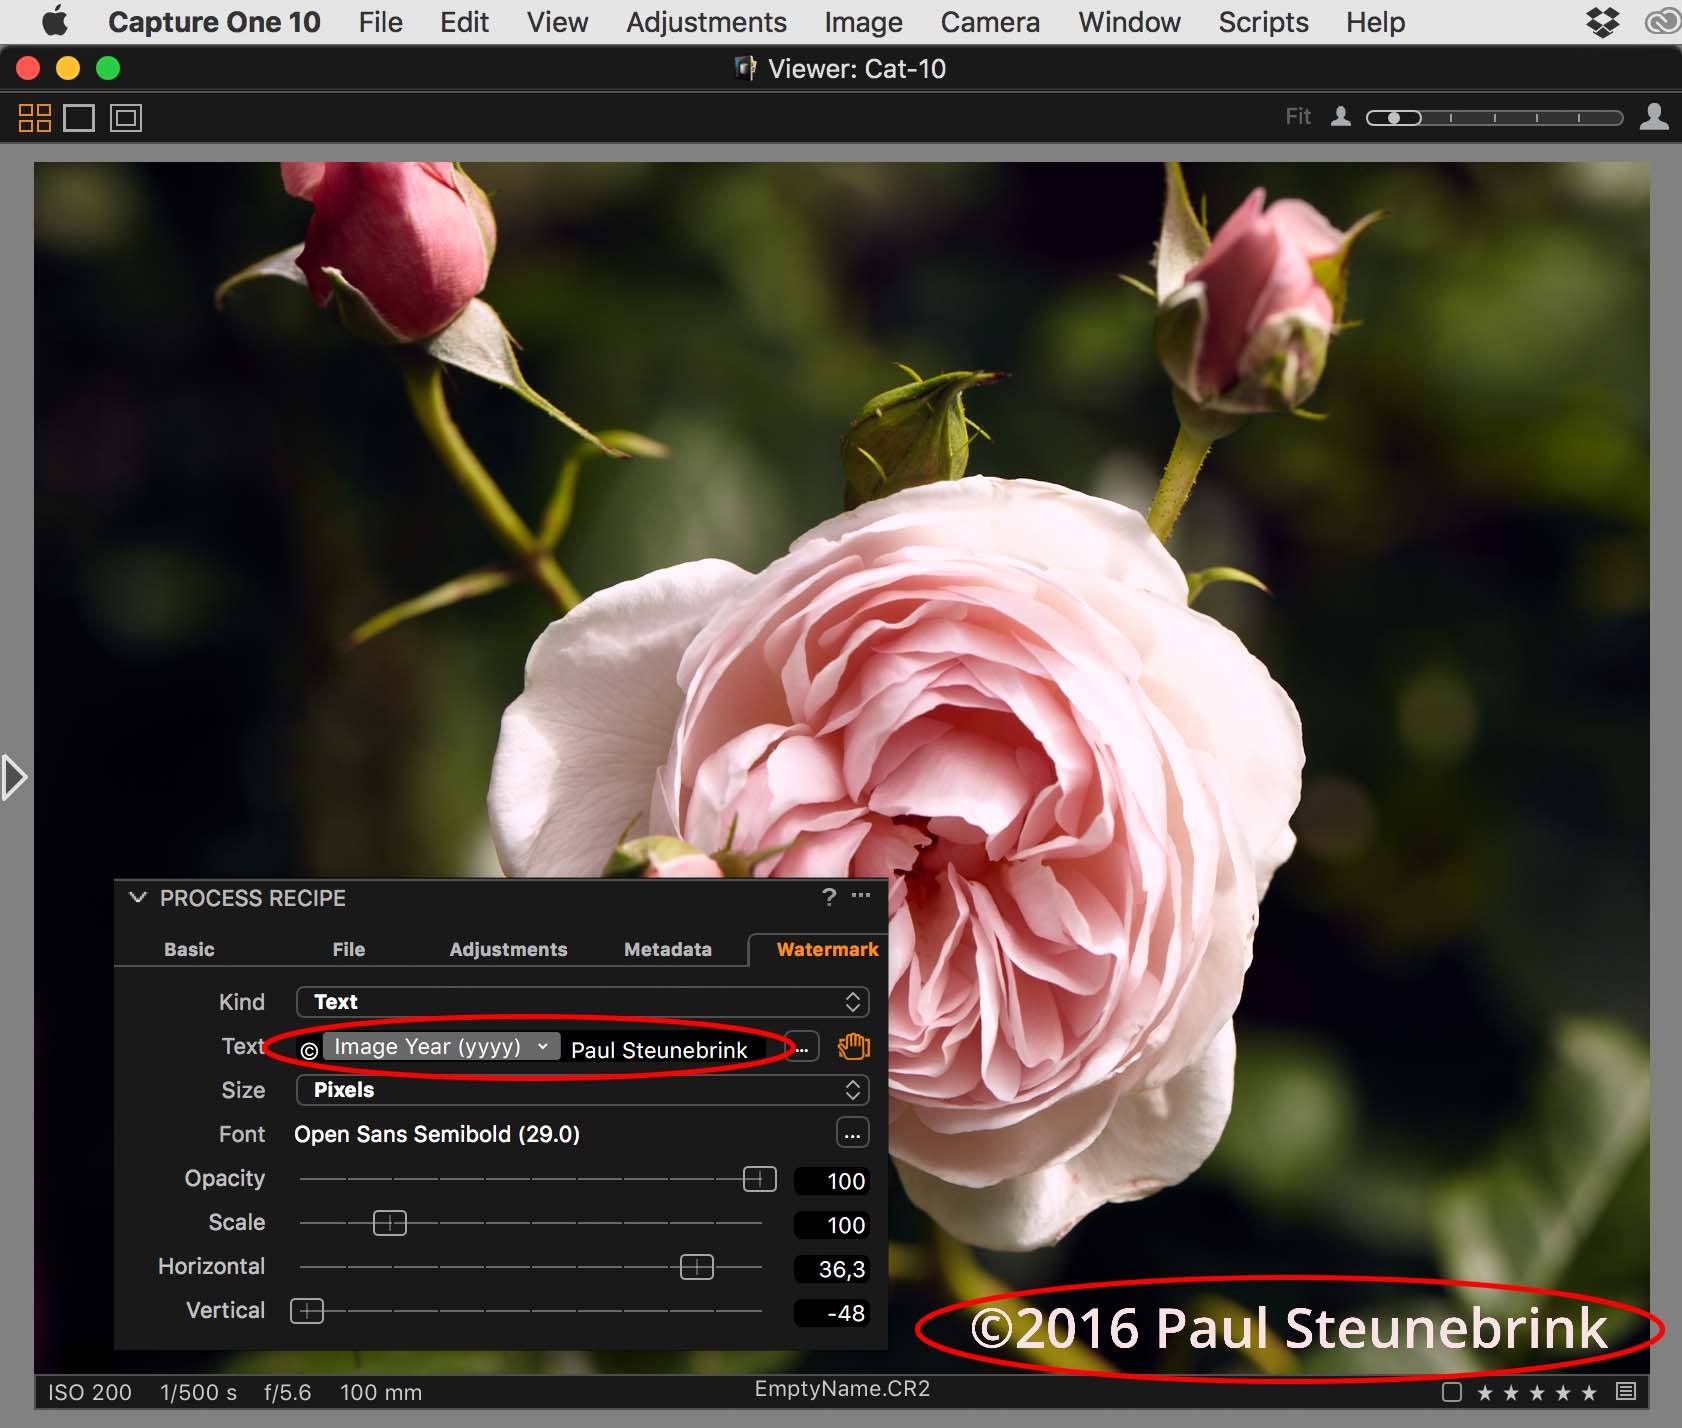
Improvements are Token Watermarking and quality.
Function
You can use an image or text as a Watermark. With text, you now can use Tokens that fill in variable data for you. For example, a copyright message with the image year in it now automatically fills in the year with token <image year>.
Very handy for your copyright messages!
Quality
The quality of text type was sometimes mediocre due to scaling. This has been improved, in particular for smaller output files.
Miscellaneous Features
Vectorscope Color Wheel Layout
In Capture One Pro we are used to the Apple system color wheel layout with red at the 3 o’clock position. That is not what a colorist with video grading applications is used to. Their brain is programmed to find red at the 12 o’clock position, known as the Vectorscope layout.
In the Preferences, Color tab, you can choose between the Standard or Vectorscope layout. Your choice affects both the Color Balance and the Color Editor tool layout.
Hardware Acceleration
Whether of not hardware acceleration through OpenCL is used is now visible from the Preferences. You can also monitor OpenCL initialization on first use. The before/after comparison below shows you the initialization phase (before) and the final result (after).
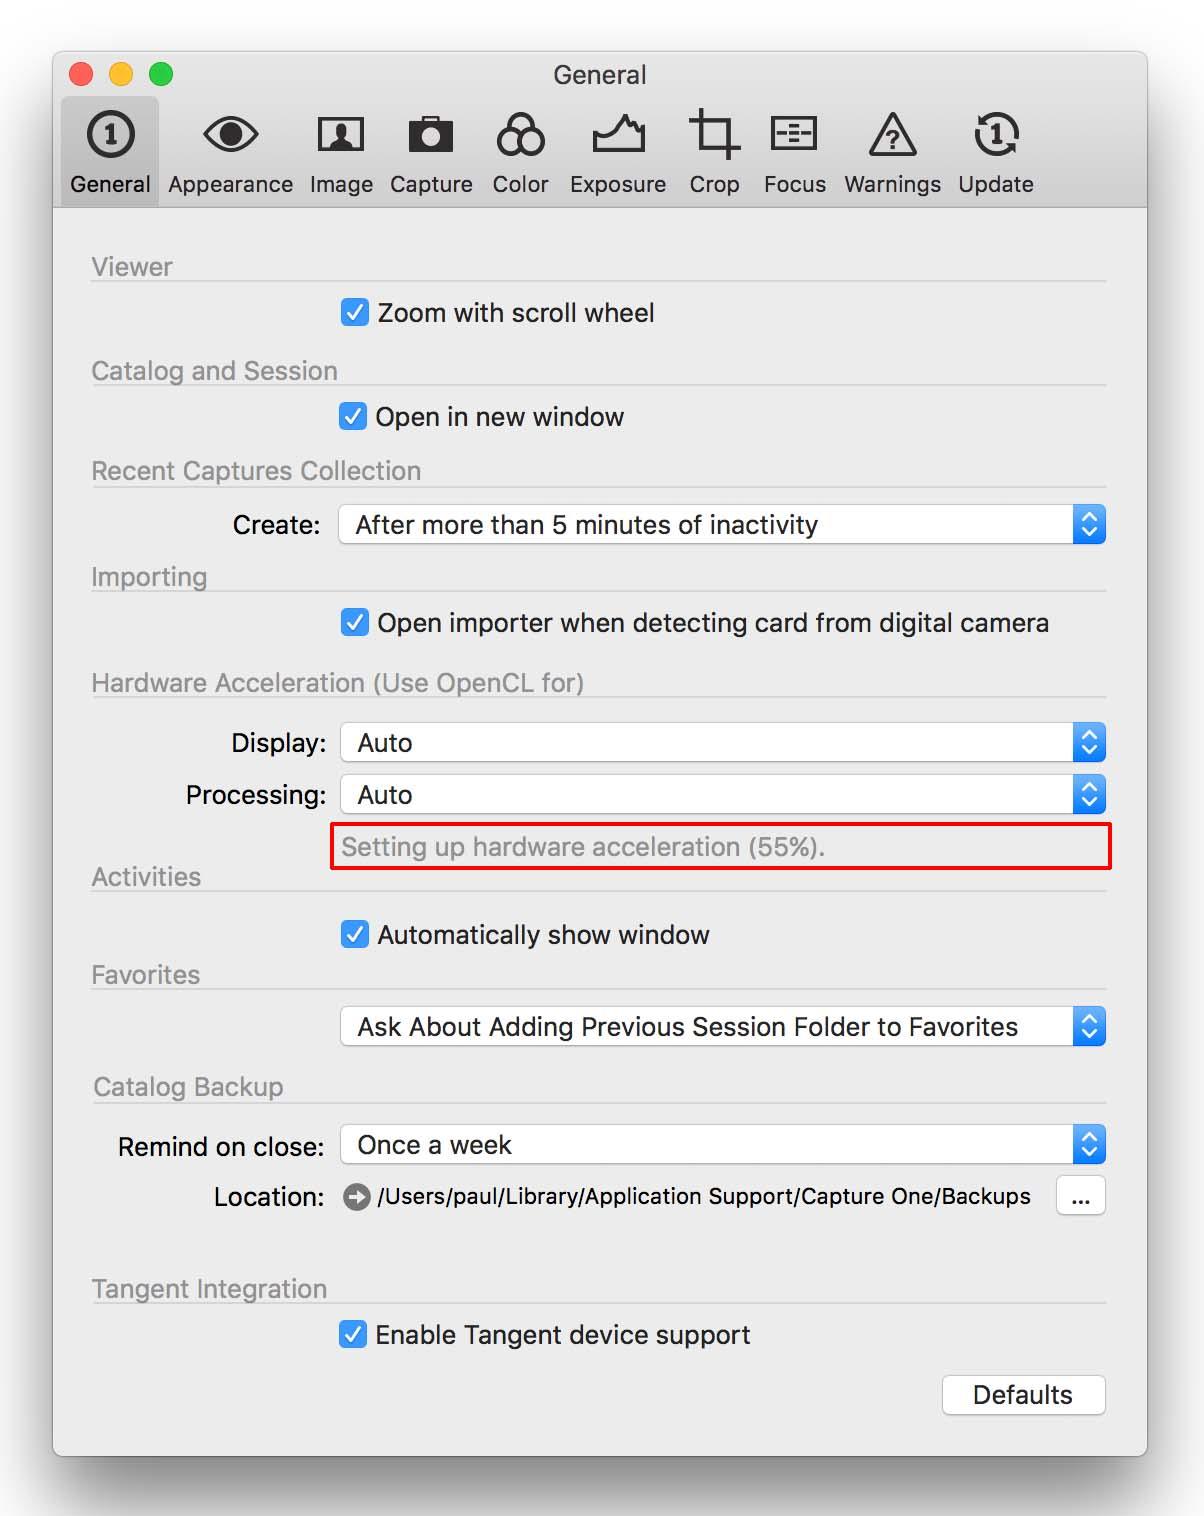
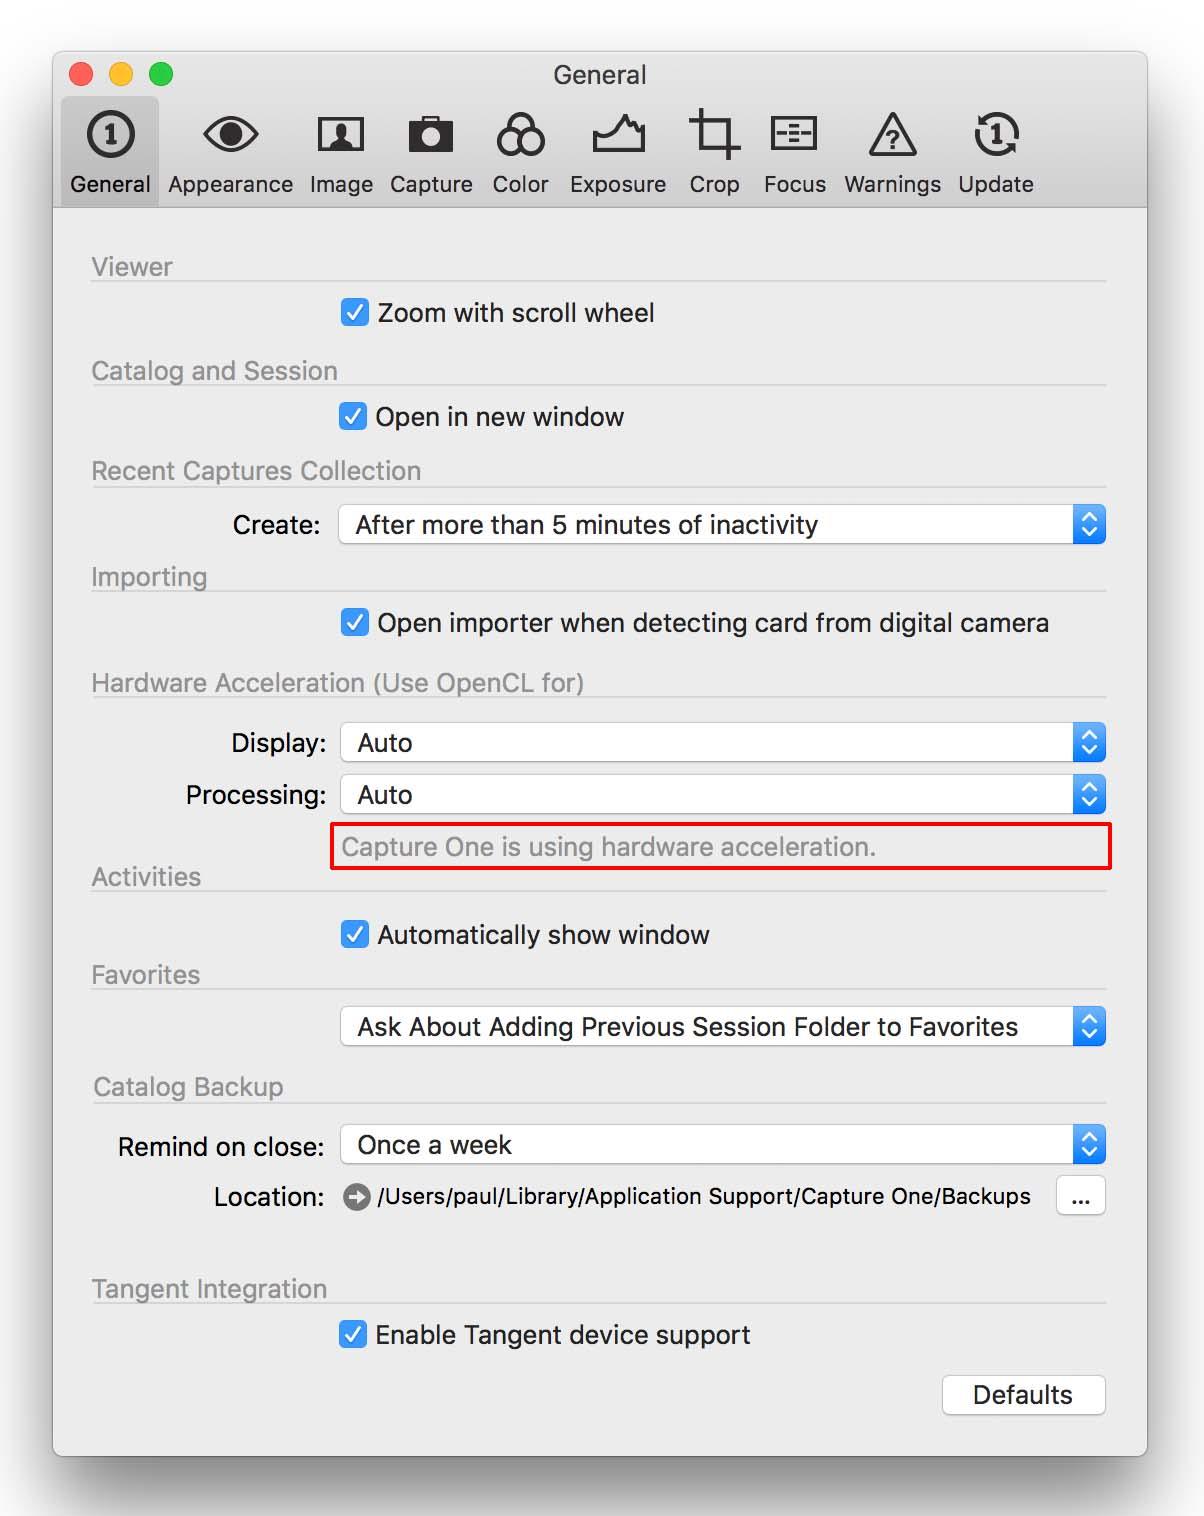
For more on Preferences, including Vectorscope and Hardware Acceleration, please refer to my series of three posts on Preferences.
macOS
If you are on macOS it is good to know that performance improvements under the hood have been done. In particular memory management is improved.
AppleScript lovers among us will be happy to know that the commands to control Capture One through scripts are expanded.
Trial Period
As with both major and point updates, the 30-day trial counter is reset.
Thank you
For reading. Please feel free to leave a comment. Like us on Facebook or subscribe to our newsletter to stay informed about new blogs.
Best Regards,
Image Alchemist




Leave a Reply
Want to join the discussion?Feel free to contribute!