Capture One Pro 11.1 Review
In this Capture One Pro 11.1 review you read all what’s new. New Style Pack SPRING is included. Apply Style to new Layer. Faster large imports. The Resource Hub for instant access to learning resources, news, support, and webshop. New Normalize tool. Enhanced LCC. Much more. Also coming: Capture Pilot 2.0 for remote control for Sony cameras.
Capture One Pro 11.1 Review
Phase One’s aim with this Capture One Pro 11.1 release is to provide you with faster and smoother user experience. Apart from the new camera and lens support, there are a few areas in which this point release has evolved to achieve that goal. You find them highlighted in this review.
For an overview of all new features in the initial Capture One Pro 11 release, please look here for the Capture One Pro 11 Review.
Overview
So, let’s have a look at what version 11.1 brings:
- New camera and lens support
- raw files from Fujifilm, Leica, Olympus, Panasonic, Sony
- extended support for several Nikon raw file formats
- lens correction for lenses from Canon, Leica, Sony, Tamron
- Apply a Style directly to Layer
- from Styles tool
- New Styles included
- SPRING Style Pack pre-installed
- New Layer Shortcuts
- Layer On/Off, Go To Background
- Resource Hub
- all the help you need in one place
- New Normalize Tool
- adapt White Balance and Exposure between images
- Miscellaneous
- bug fixes
- enhanced LCC presets
- expanded AppleScript (Mac only)
- improved large imports
- Capture Pilot 2.0 and Sony remote control (separate download)
New Camera And Lens Support
The following cameras have been added to the list of supported raw file formats.
- Fujifilm
- X-H1
- Leica
- CL, M-D Typ 262, TL2, V-Lux Typ 114, X-U
- Nikon
- 12-bit uncompressed raw file support for D5, D850, and D500
- Olympus
- E-M10 Mk III
- E-PL9
- Panasonic
- G9, GH5S
- Sony
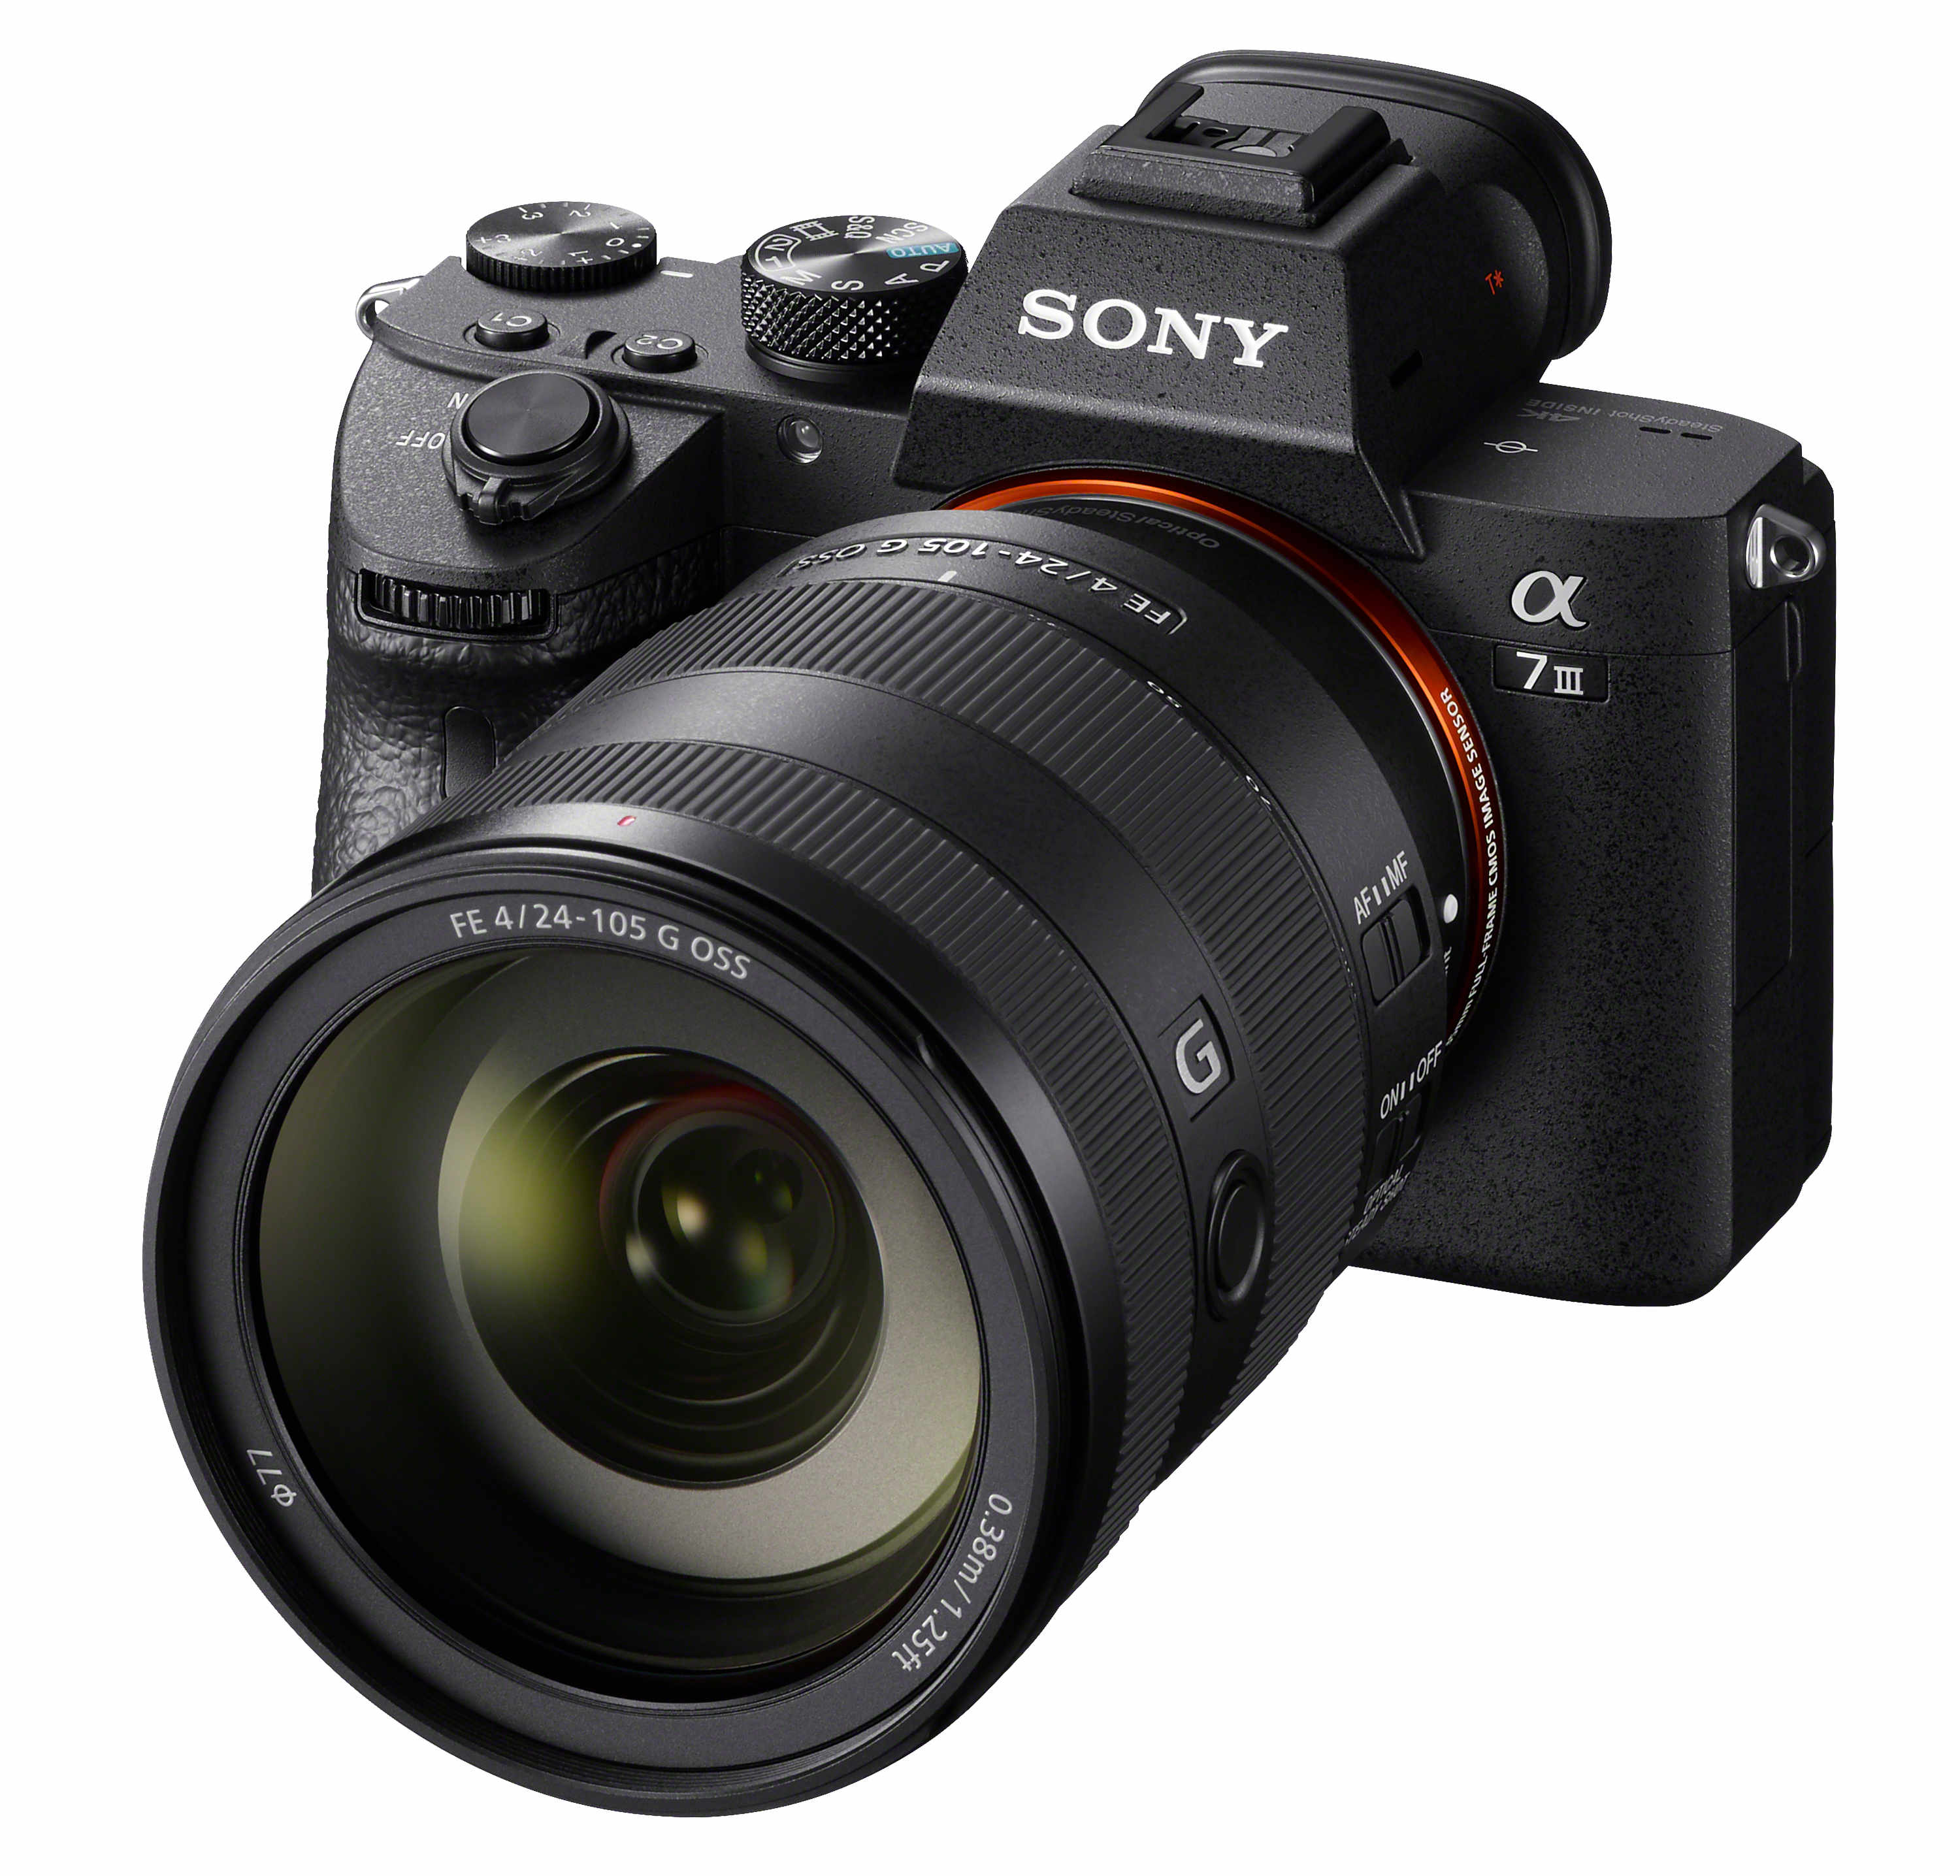
- A7 III
Lenses from the following brands have been added to the lens correction database.
- Canon
- EF 24-105mm f/4L IS II USM
- Leica
- Elmarit-M 90mm f/2.8; Summicron-M 90mm f/2
- Sony
- E 18-135mm f/3.5-5.6 OSS (SEL18135); FE 24-105mm f/4 G OSS (SEL24105G)
- Tamron
- 16-300mm f/3.5-6.3; 28-300mm f/3.5-6.3; SP 35mm f/1.8, 70-200mm f/2.8, and 90mm f/2.8 macro
For details please see the Release Notes.
Style To Layer
With the introduction of Capture One Pro 11, you can apply a Style to a Layer. With the release of version 11.1, this is made easier.
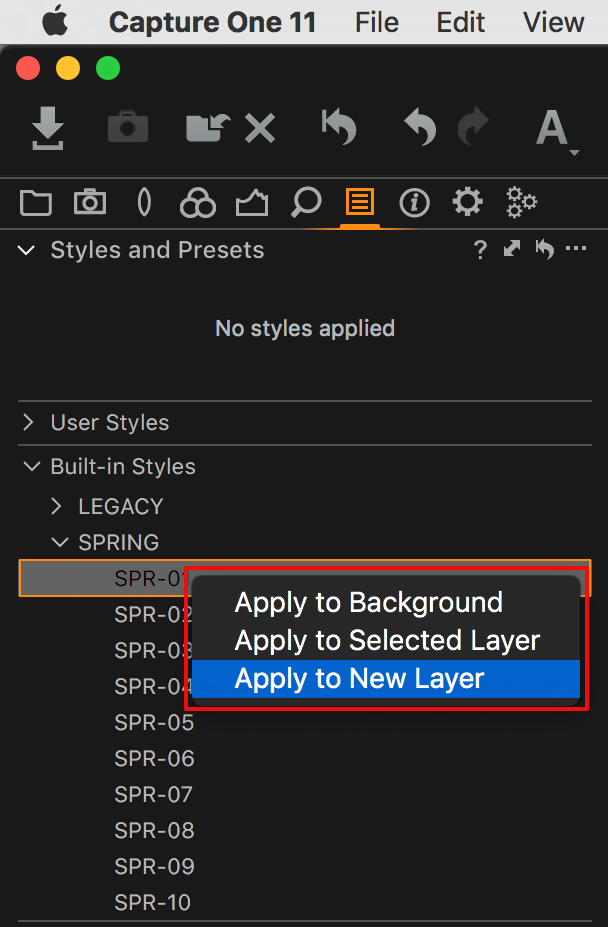
From the Styles and Presets tool, right-click on a Style you like to apply. Next, choose what to do.
There are three options:
- Apply to Background
independent from the current selected Layer, you apply the Style to the Background - Apply to Selected Layer
when a Layer exists and that Layer is selected - Apply to New Layer
independent from the current selected Layer, you create a new Layer for that Style; note that the Layer gets the name of the Style and it is a Filled Layer (mask covers entire image).
Note that the advantage of applying a Style to a Layer versus Background is that you can control the Opacity of a Layer and therefore the impact of the Style.
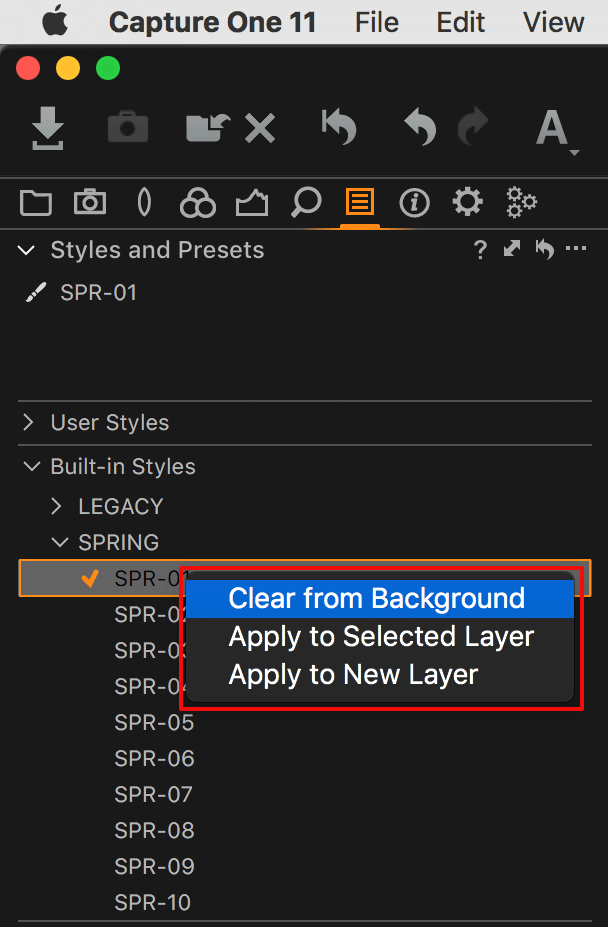
Also, note that when you apply a Style to the Background the Style gets a checkmark (see below).
You remove a Style from the Background in a similar way. Right-click the Style that is checked. Ohh, just clicking the checked Style works as well.
Style Pack Included
It is springtime and that inspired Phase One to create a totally new Style Pack named SPRING. What’s even more, it is part of Capture One 11.1. This Style Pack contains 10 Styles.

The existing built-in Styles are bundled under LEGACY, which is now listed next to SPRING in the Styles and Presets tool.
New Shortcuts For Layers
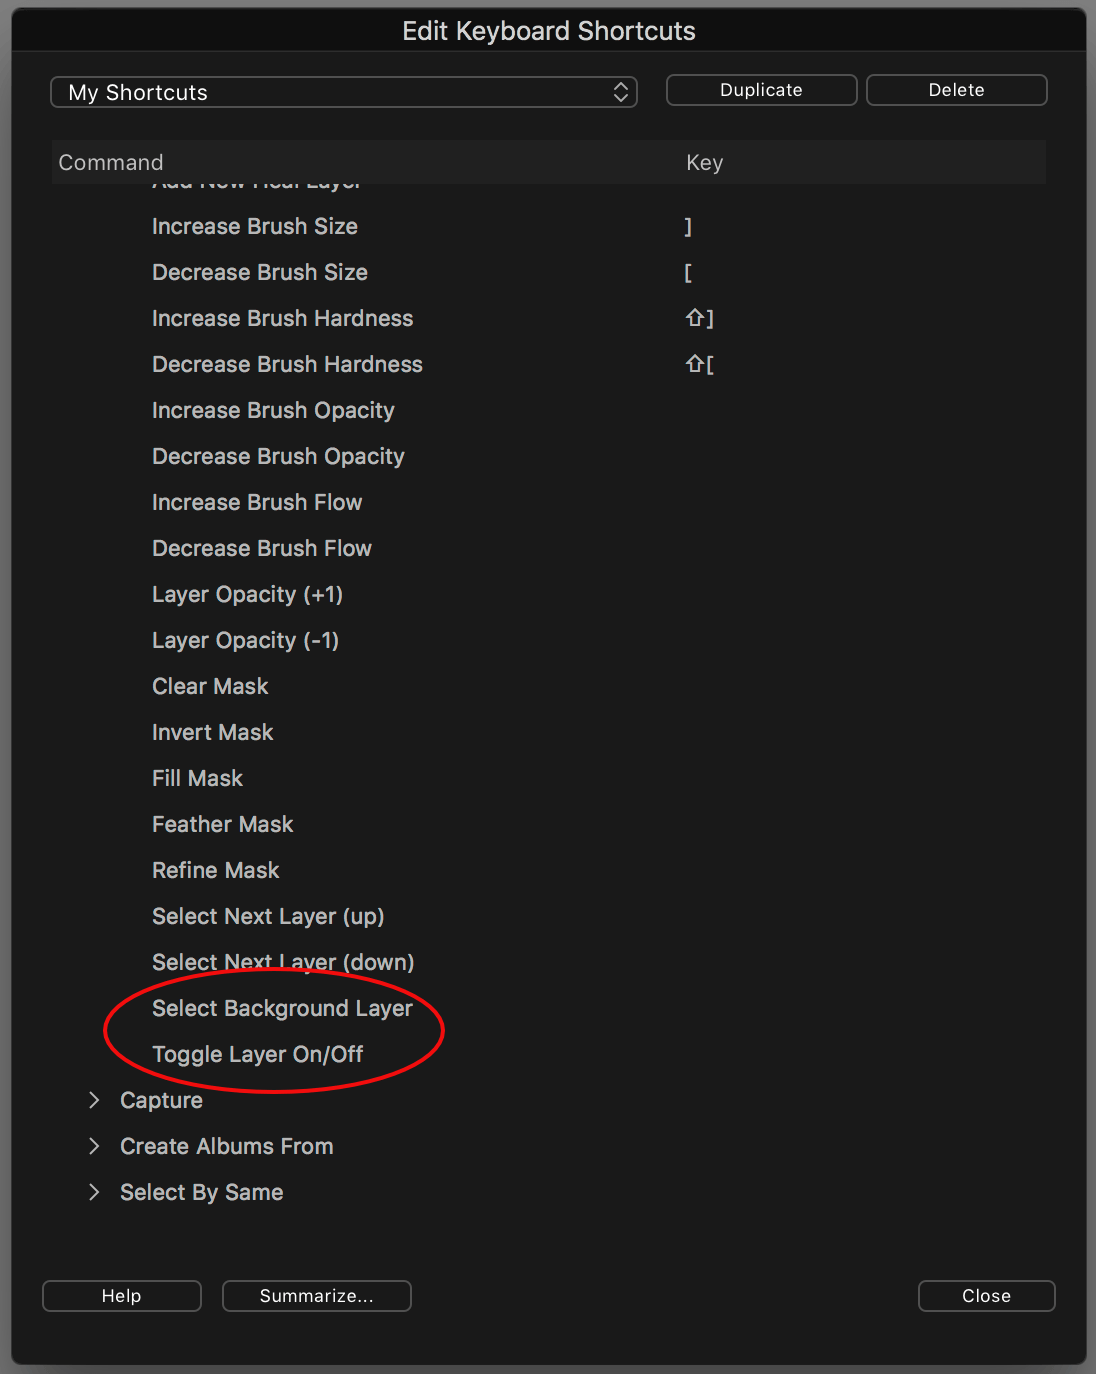
With the focus on Layers in Capture One Pro 11 users also want better navigation and control. There are already quite a number of keyboard shortcuts for Layers. Two new shortcuts are added:
- Select Background Layer
this will the focus from a selected Layer to the Background - Toggle Layer On/Off
this will enable/disable the selected Layer
Both new shortcuts do not have a key assigned to it by default to prevent them from stealing any shortcut you assigned yourself. You can configure the keyboard shortcuts from Capture One menu > Edit Keyboard Shortcuts… > Other > Layers (macOS) or Edit menu > Keyboard Shortcuts… > Other (Windows).
Resource Hub
The Resource Hub is a new feature that gives the user instant access to Capture One learning resources, news, support, and webshop directly from within the Capture One application. The aim is to make the user experience better by placing useful resources in one convenient location.
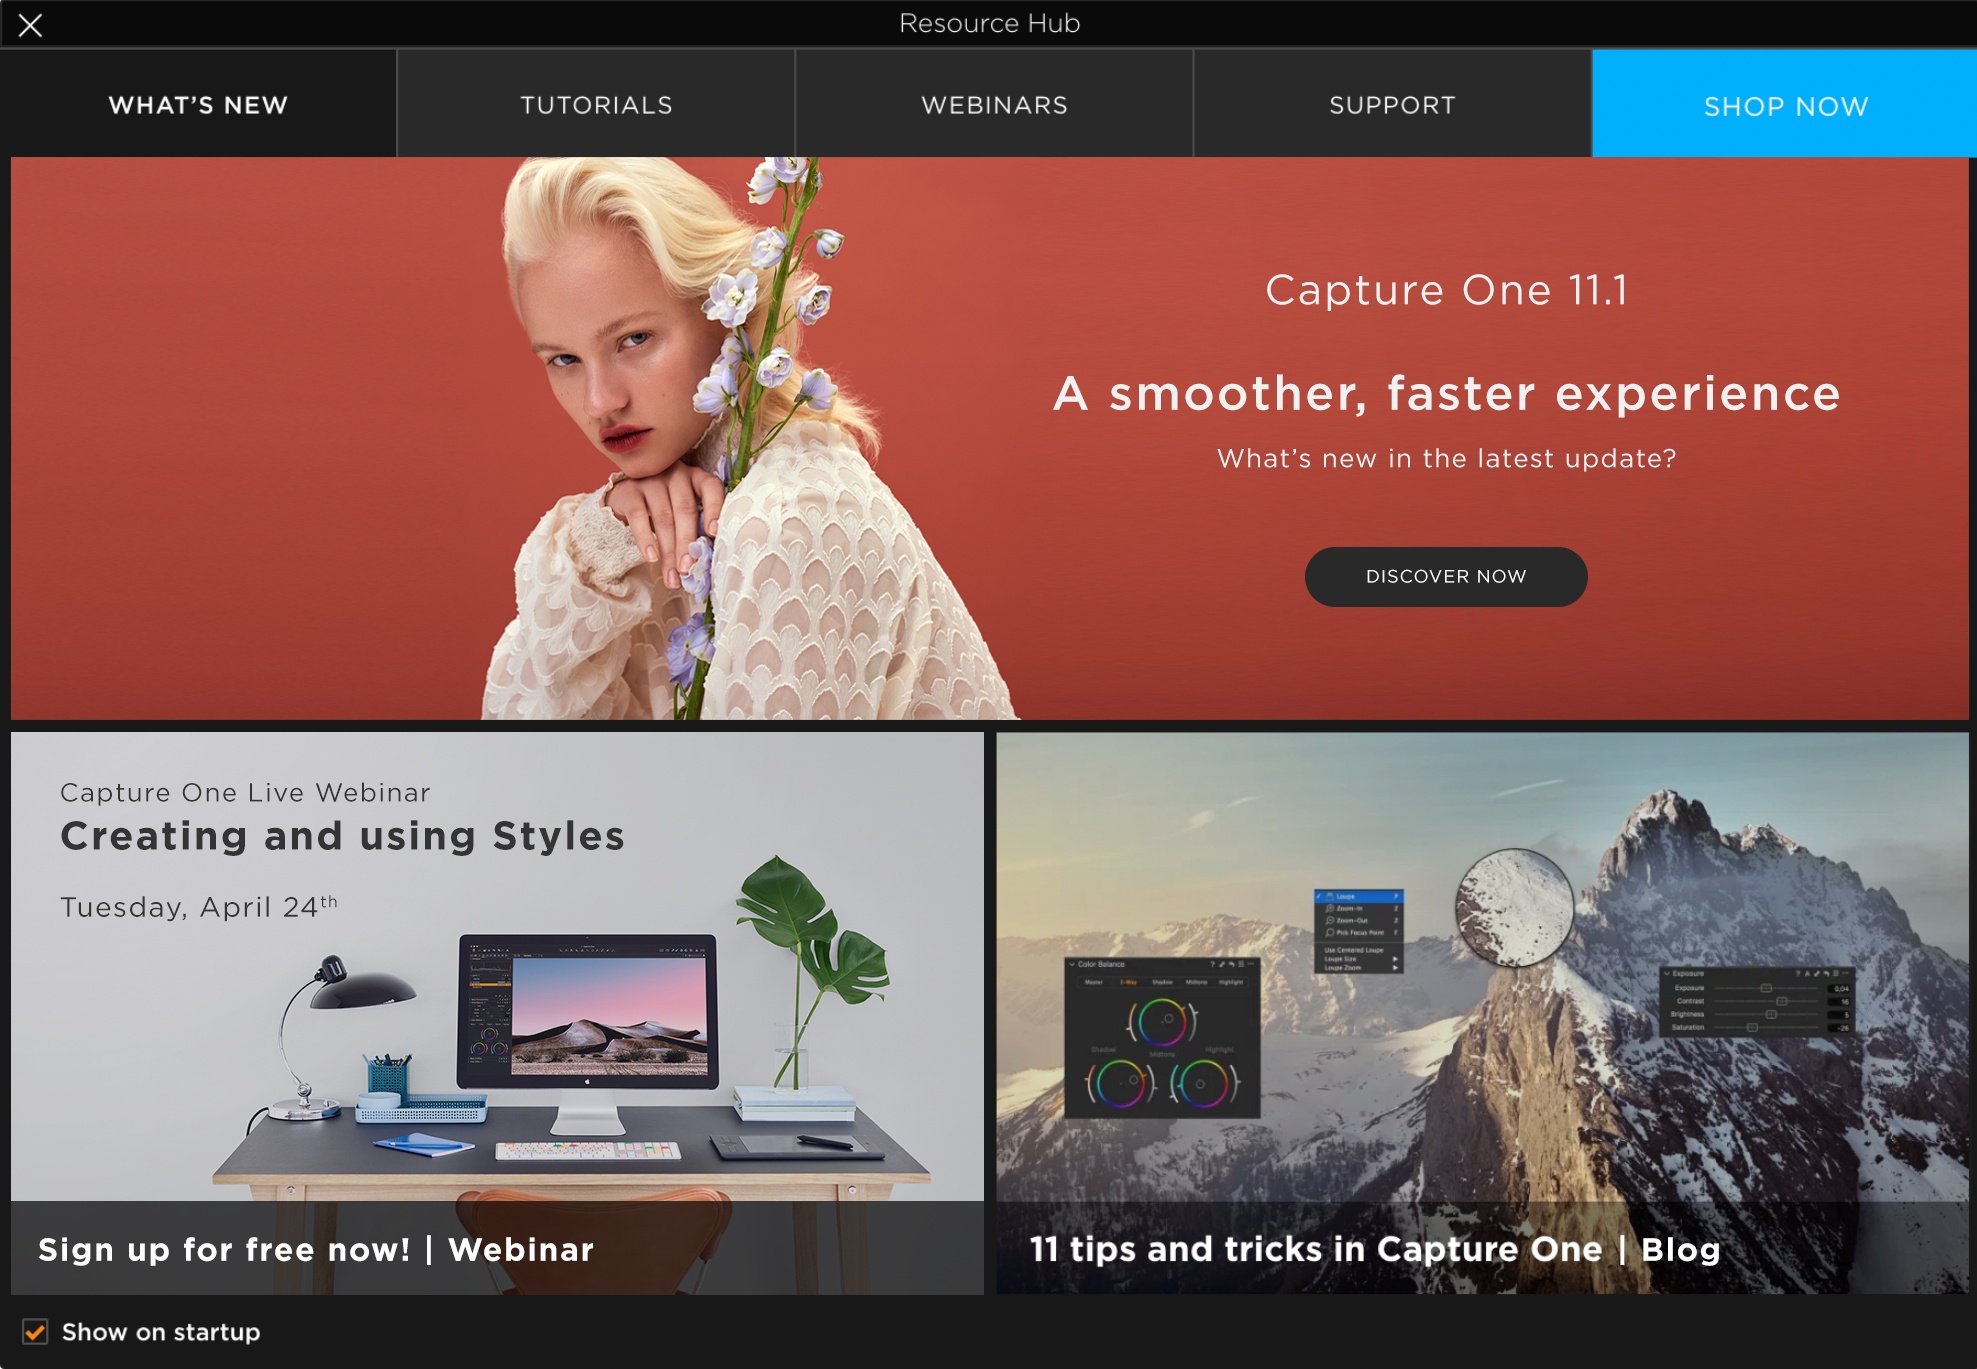
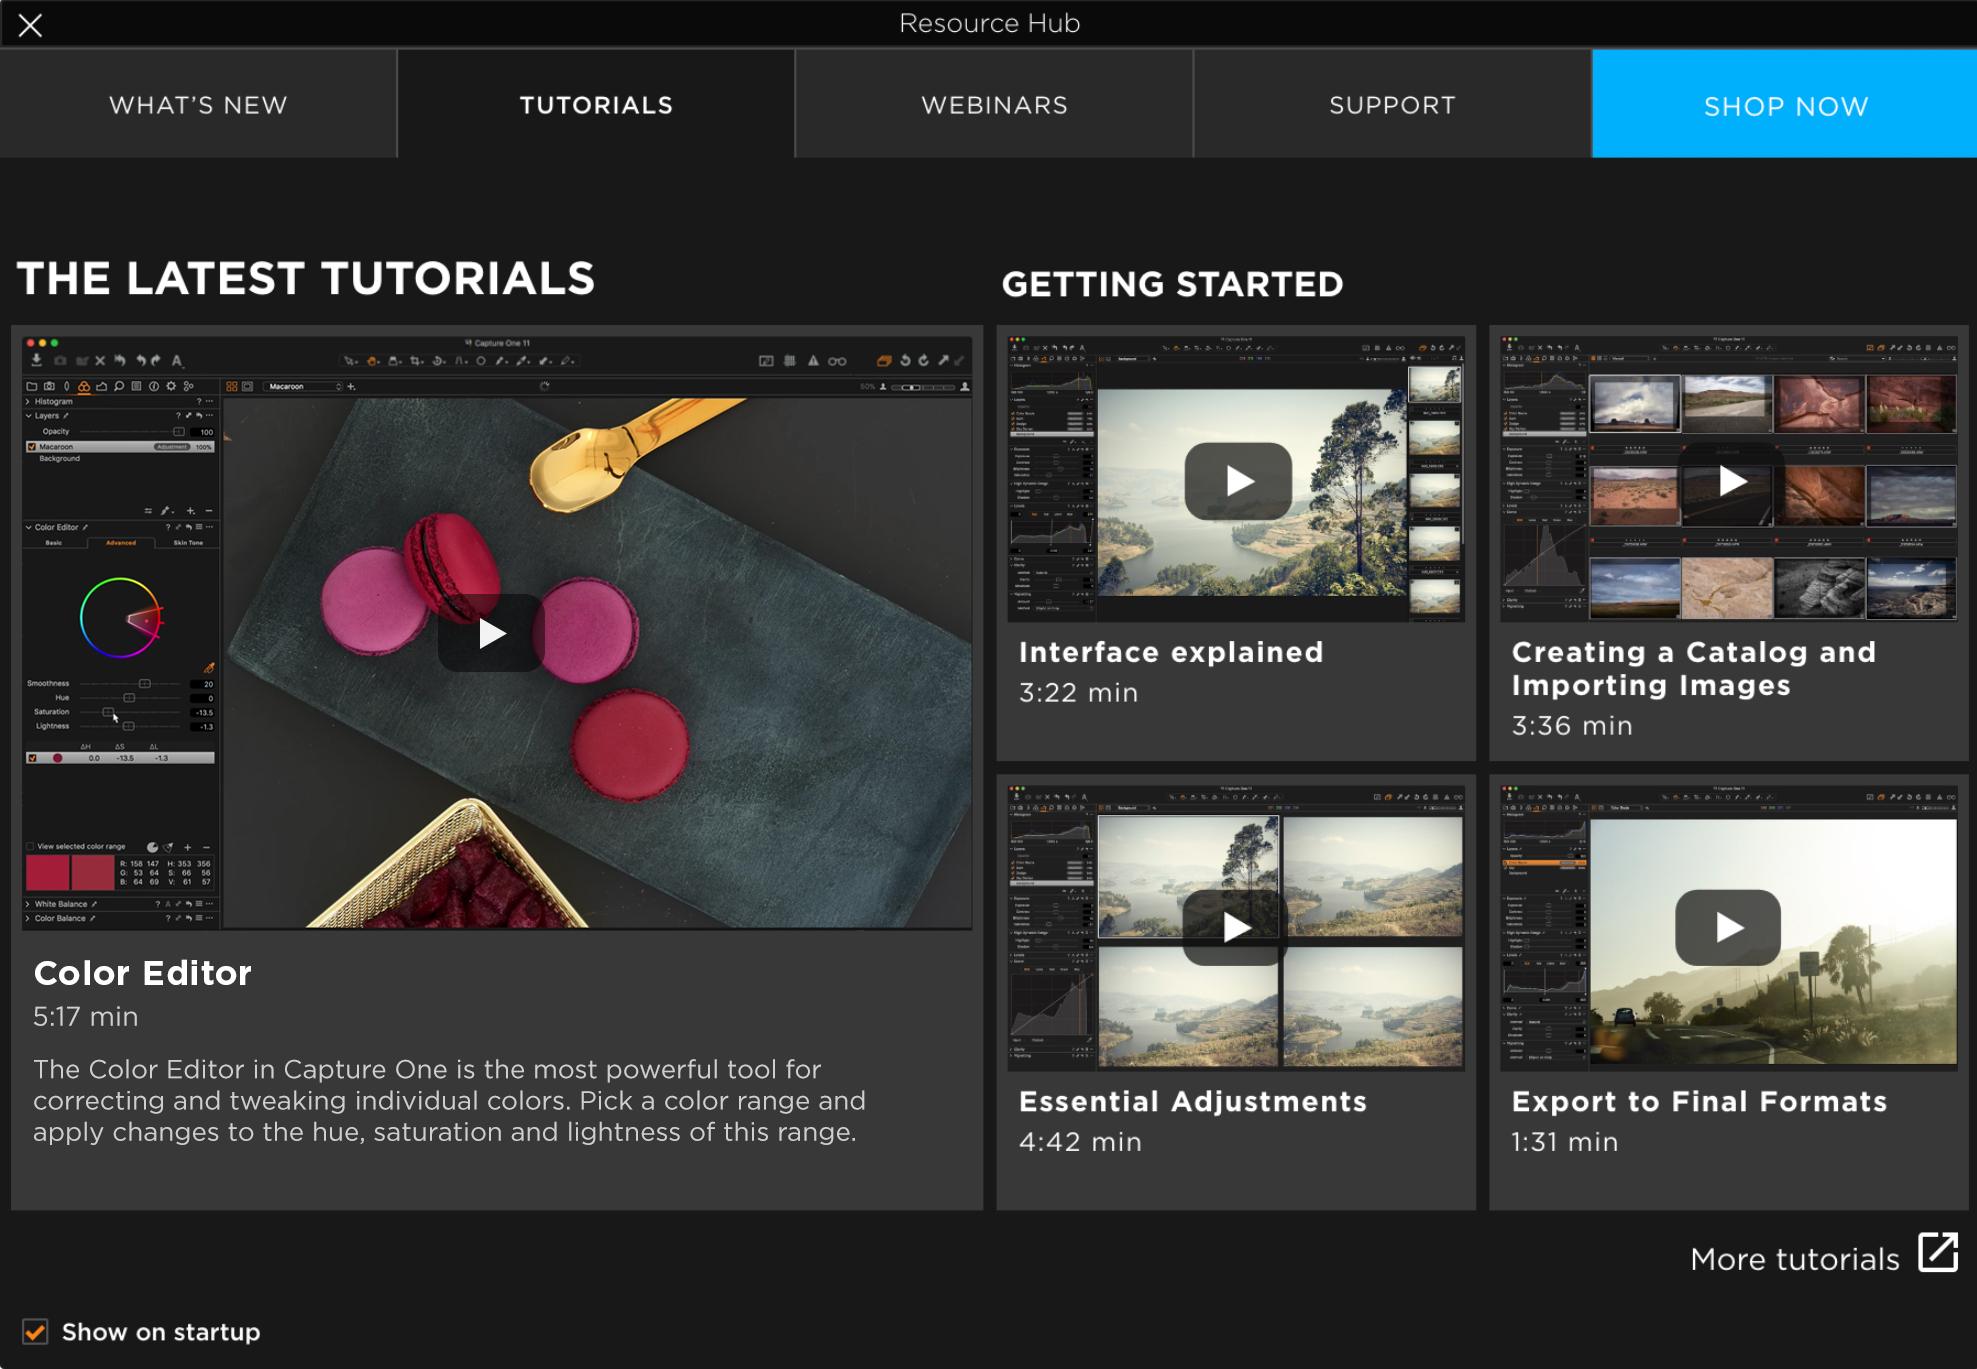
The stacked image above shows the What’s New and Tutorials tabs.
The Resource Hub opens when you start Capture One but you can open it at your convenience from Help menu > Resource Hub…
Normalize Tool
The Normalize tool is designed to make easier baseline corrections to images. The tool allows you to store any RGB values in a picker, on which to base corrective White Balance and Exposure values in the target image.
How To Use
There are two ways to use the tool. Either by using the Normalize pickers to pick and store a value (to then use and apply on other images) or by typing in the desired RGB values in the Color Selector which will set the values to the Apply picker.
The Normalize tool is especially useful for correcting difficult images, working in Target critical environments, or aligning a look across varied exposures.
Blast From The Past
The Normalize tool replaces the Skin Tone tab in the White Balance tool but can be used in exactly the same way by excluding the Exposure option.
Where To Find
You find the tool on the Color tool tab under the White Balance tool in the Default Workspace. If it is not there, after installation of 11.1, just select the Default Workspace again from the Windows menu.
If you use a custom Workspace, just add it yourself to a tool tab of choice.
Miscellaneous Improvements
In addition to the features discussed above, there are many other items that got a revision. Obviously, a long list of bugs was fixed and you find them in the Release Notes.
The most iconic fix, pun intended, is to have icons, text or both in the Toolbar. Since Capture One 4 – the big overhaul from 2007 – the issue existed, if I recall correctly. I always believed in miracles and I am right again.
This is a macOS only feature by the way, not available on Windows.
Enhanced LCC Presets
The improved LCC Tool can intelligently sort and recommend presets based on available metadata plus user-input data. More details currently not available.
More AppleScript (Mac Only)
Big Imports
Imports of over 400 images are going faster now.
Capture Pilot And Sony Remote Control
Capture Pilot 2.0 for iPhone and iPad. It has a renewed Remote Control in-app purchase. It now allows you to control Sony cameras remotely in addition to Canon, Nikon and Phase One/Leaf.
For more on how Capture Pilot and Capture One work together, please refer to my Using Capture Pilot with Capture One post.
Thank you
For reading. Please feel free to leave a comment. Like us on Facebook or subscribe to our newsletter to stay informed about new blogs.
Best Regards,
Image Alchemist








You do us a great service. Thank you.
Thank you Jack, appreciate your comment.
Best, Paul Steunebrink / Image Alchemist
Thanks. Good job.
I would like to store frequently used layers into presets.
I have to create them for each photo repeatedly.
I apologize for bad English
Hi Jaromir,
You can either use a reference images with that layer/these layers and copy them including the adjustments, or store the adjustments only you made on a layer as a style and apply that style when needed. The last option does not include the mask. Hope this helps.
Best, Paul Steunebrink / Image Alchemist
Hi Paul,
many thanks for the good overview of C1 11.1.
Ekkehard
Thank you Ekke for your ongoing support.
Best, Paul Steunebrink / Image Alchemist
Hi Paul,
What are the changes in Capture Pilot 2.0? Great review and explanation of the new features in 11.1.
Thanks,
Rob
Hi Rob, according to the AppStore, version 2.0 has Sony remote control, bug fixes and performance tweaks.
Best, Paul Steunebrink / Image Alchemist
Thanks for your review, unless I am mistaken, I can not agree with you about the previous tool white balance skin tone (capture 10), it is not present anymore in Capture 11. The normalisation tool is a valuable tool but it does not related to the previous skin tone tool. Best
Hi Luc, thank you for your comment. The Skin Tone tool of the White Balance tool has evolved into the Normalize tool in Capture One Pro 11.1. It is actually the Skin Tone plus Exposure adjustment. The Skin Tone label was confusing as it was working for all kind of colors.
Best, Paul Steunebrink / Image Alchemist