Adjustments Explained
You got your images into Capture One, perhaps made a selection, and are now ready to adjust your images to make them shine and dwarf the competition. This blog explains how Capture One does adjustments. How they are applied, reset, stored and processed. And if you are in for a quick start, Auto Adjust might be for you. So, get ready for Adjustments Explained!

Adjustments Explained
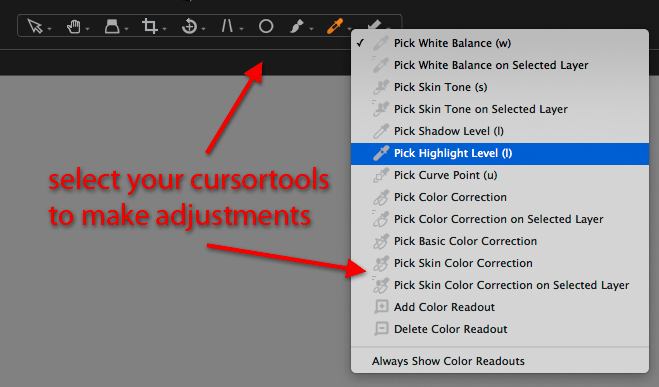
There are several ways to apply adjustments to enhance your image. To start, you can move sliders like for the Exposure or the White Balance tool. Some tools have a cursor tool related to it. The White Balance tool has a Pick White Balance cursor, the Levels tool a Pick Shadow Level and Pick Highlight Level cursor.
Sometimes you can use the mouse cursor to move or drag a marker or a line, like in the Levels and Curve tools. With the Rotation tool’s cursor, you can Straighten the horizon.
On other occasions, you select a value from a drop-down list, like in the Base Characteristics, White Balance and the Lens Correction tools.
Many tools work with fields with numeric values. There are different ways to manipulate those values. You can enter any value (within the range of the tool) directly, or position the cursor into the field and increase/decrease the value with the up/down cursor keys or use Shift+up/down cursor keys for larger increments. You can also use your trackpad or scroll wheel of the mouse while pointing the mouse pointer at the tool’s slider to move it around.
Storing Adjustments
Adjustments are saved automatically. These adjustments you make are considered your work, representing valuable time and energy you have put into it. Therefore it is important to know where it is stored so you can back this up properly.
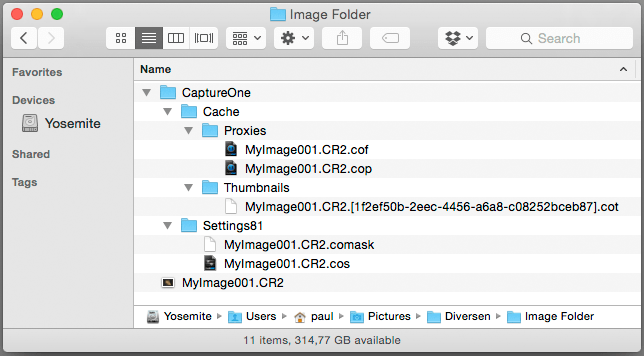
When you work with a session, the adjustments are stored in so-called settings files. One file (sometimes more) for each image. You can find them in a subfolder to the image folder, with the extension .cos. I discussed this in more detail in Sessions In-Depth.
When you work with a catalog, all adjustments are stored in the central catalog database. This database is located in the catalog folder. Backing up this database is paramount and can easily be started from the File menu or automatically at a pre-set interval. You set this interval in the Preferences. I discussed this in more detail in Catalogs Continued.
Note that Capture One will never write to your original image file. This is a safety measure to prevent any file corruption.
Processing Adjustments
While working in Capture One your adjustments are applied in real-time to the preview image and thumbnail that Capture One created from the original file. The preview is actually a low-res representation of the original, which allows Capture One to work fast because reading and interpreting the original (raw) file is slow.
On exporting or processing Capture One reads the original file again and applies your adjustments against this original when creating a new image file, most often a TIFF, JPEG or PSD file.
Automatic Adjustments
I started this blog by explaining the various ways of manual adjustments. However, Capture One has many ways of automatic adjustments, or auto-adjust for short.
Auto-adjust is not only for the lazy one, or the not-so-critical gadget-loving shooter. An auto-adjust is often a great starting point or an exact calculated final result. And by the way, what is wrong with speed?
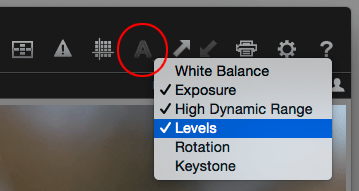
There are several auto-adjust options in Capture One. Let us start with the generic auto-adjust. You can use it from the toolbar or the Adjustments menu, where you can see the shortcut as well: Cmd+L (Mac) or Ctrl+L (Windows). This generic auto adjust allows you to automatically apply settings in the tools White Balance, Exposure, High Dynamic Range and Levels.
Both from the Adjustments menu and the toolbar you can select which tools you want to be included in the auto-adjust.
You might see Rotation and Keystone listed as well under Adjustments menu > Auto Adjustments, but these options are only effective for images from Phase One IQ backs. By using metadata recorded by sensors in these backs. These digital backs have built-in sensors that record the position (tilt, horizon) of the back during exposure and allow Capture One to automatically correct distortion as a result of this.
Note that you can also use automatic adjustments during import.
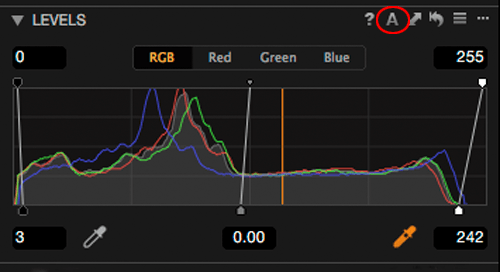
Apart from the generic auto adjust, can you control the auto-adjust individually per tool. This gives you greater control over which tool to use for auto adjustments and on which image. You can, for example, adjust the exposure manually, but like to use auto-adjust for the Levels tool.
Get A Reset!
Sometimes you like to start all over again and remove all adjustments you made on an image. You can do this with a shortcut or through the menu, just like auto-adjust. The shortcut for reset is Cmd+R (Mac) or Ctrl+R (Windows), or you can use Adjustments menu > Reset.
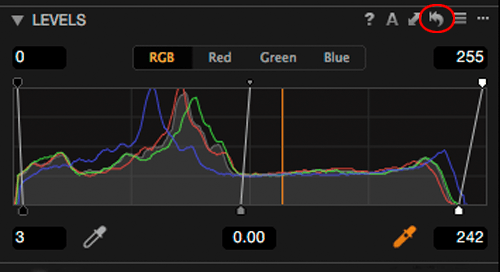
On other occasions, you might prefer a more subtle approach to resetting your adjustments. White Balance? No. Exposure. No, but Crop and Rotation: Yes, remove. You can reset per tool like you can do an auto-adjust. Go to the tool’s header and click on the curved arrow. This will reset adjustments for that tool only.
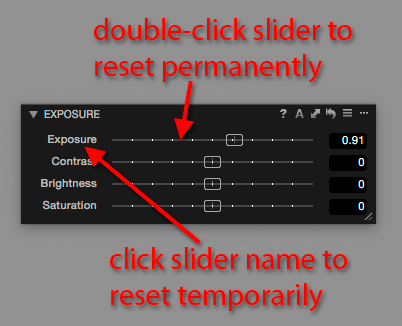
A tool with multiple sliders like the Exposure tool has an extra option to only reset a specific slider. When you double-click on a slider you reset it to the neutral or the as shot position.
Reset Yes Or No?
Sometimes you are more interested in a temporary reset, also known as the ‘before-after’ function. Often you would like to review the effect of one or all adjustments to an image. Capture One Pro 8 has a few tricks on its sleeve, each of which may prove effective depending on the situation you are in. Let’s look at them in random order.
First, after a total reset as explained in the previous section, you can immediately undo that action. The Cmd+Z/Ctrl+Z (Mac/Windows) key is a great shortcut. But I must admit, this is not my favorite sequence of keystrokes. I prefer the second option.
New Variant
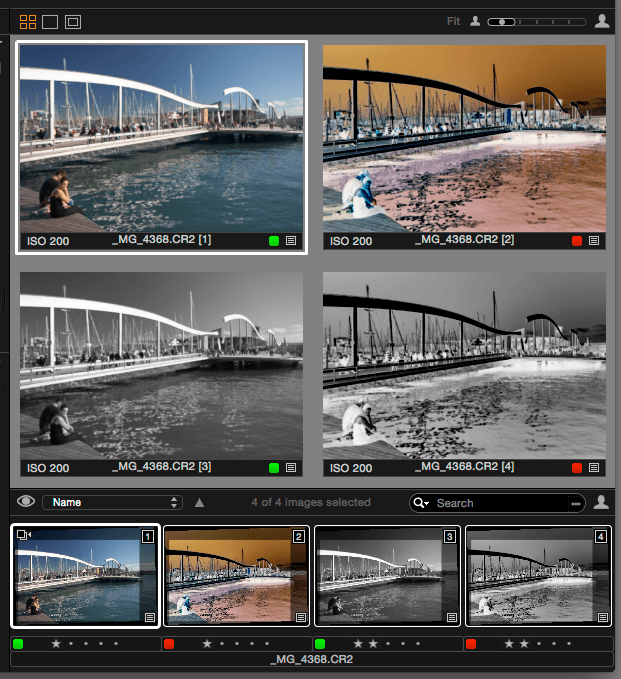
Second, create a new variant. I explained Variants in detail earlier, but for short, a new variant is a second thumbnail without any adjustment. Now I can go back and forth between two thumbnails of the same image, one with and one without adjustments.
Fine, you say, but can’t you add a little subtleness into the process like resetting a tool or perhaps only a slider temporarily? Okay, my friend, I will do this special for you. Here goes…
Third, go the tool you like to review a before-after effect. Move your mouse to the reset symbol (curved arrow, discussed above), press the Alt-key on your keyboard, and click on the reset and keep both key and mouse pressed. When your ready, release the mouse, next release the Alt-key. After releasing the mouse, the adjustments return as you have set them.
Fourth, and last, you can reset individual sliders in a tool, temporarily. No need to press a keyboard key here, just click on the slider’s name, left from the slider, and release the mouse. Clicking resets the slider to its neutral position, releasing the mouse restores the adjustment.
Double-clicking next to the button of the slider resets the slider permanent.
More subtle then this won’t happen soon, I am afraid.
More?
This blog got you started on the topic. I focussed on the basics of adjustments, adjusting one image at a time. But when talking adjustments in Capture One, there is so much more to it!
Continue reading in Adjustments Continued, a level-2 tutorial. In this post, we explore the options of adjusting multiple images at the same time and how to copy adjustments from one image to other images.
In the post after that, Adjustments In-Depth, a level-3 tutorial, all ins-and-outs of presets and styles are there for you. Yes, we are on to something here!
Thank you
For reading. Please feel free to leave a comment. Like us on Facebook or subscribe to our newsletter to stay informed about new blogs.
Best Regards,
Image Alchemist










Great hint how to reset an adjustment temporarily. Thank you very much.
Coming from Aperture I really missed the simple way to get a look at the original I had there by simply hitting “m”. I knew I could make a new variant though this seemed a bit of an overkill (and you had to clean up afterwards). What you pointed out provides a very useful way to look at the effects of single adjustments, which should be fine in most cases.
Great shortcut to reset an adjustment temorarily! Love it! Thanks so much!
I think this is among the most significant info for me.
And i am glad reading your article. But should remark
on few general things, The site style is perfect, the articles are really nice :D.
Good job, cheers
Thank you for your nice comments. Enjoy Capture One and let me know when you have any questions.
Best, Paul Steunebrink / Image Alchemist