Capture One Black & White
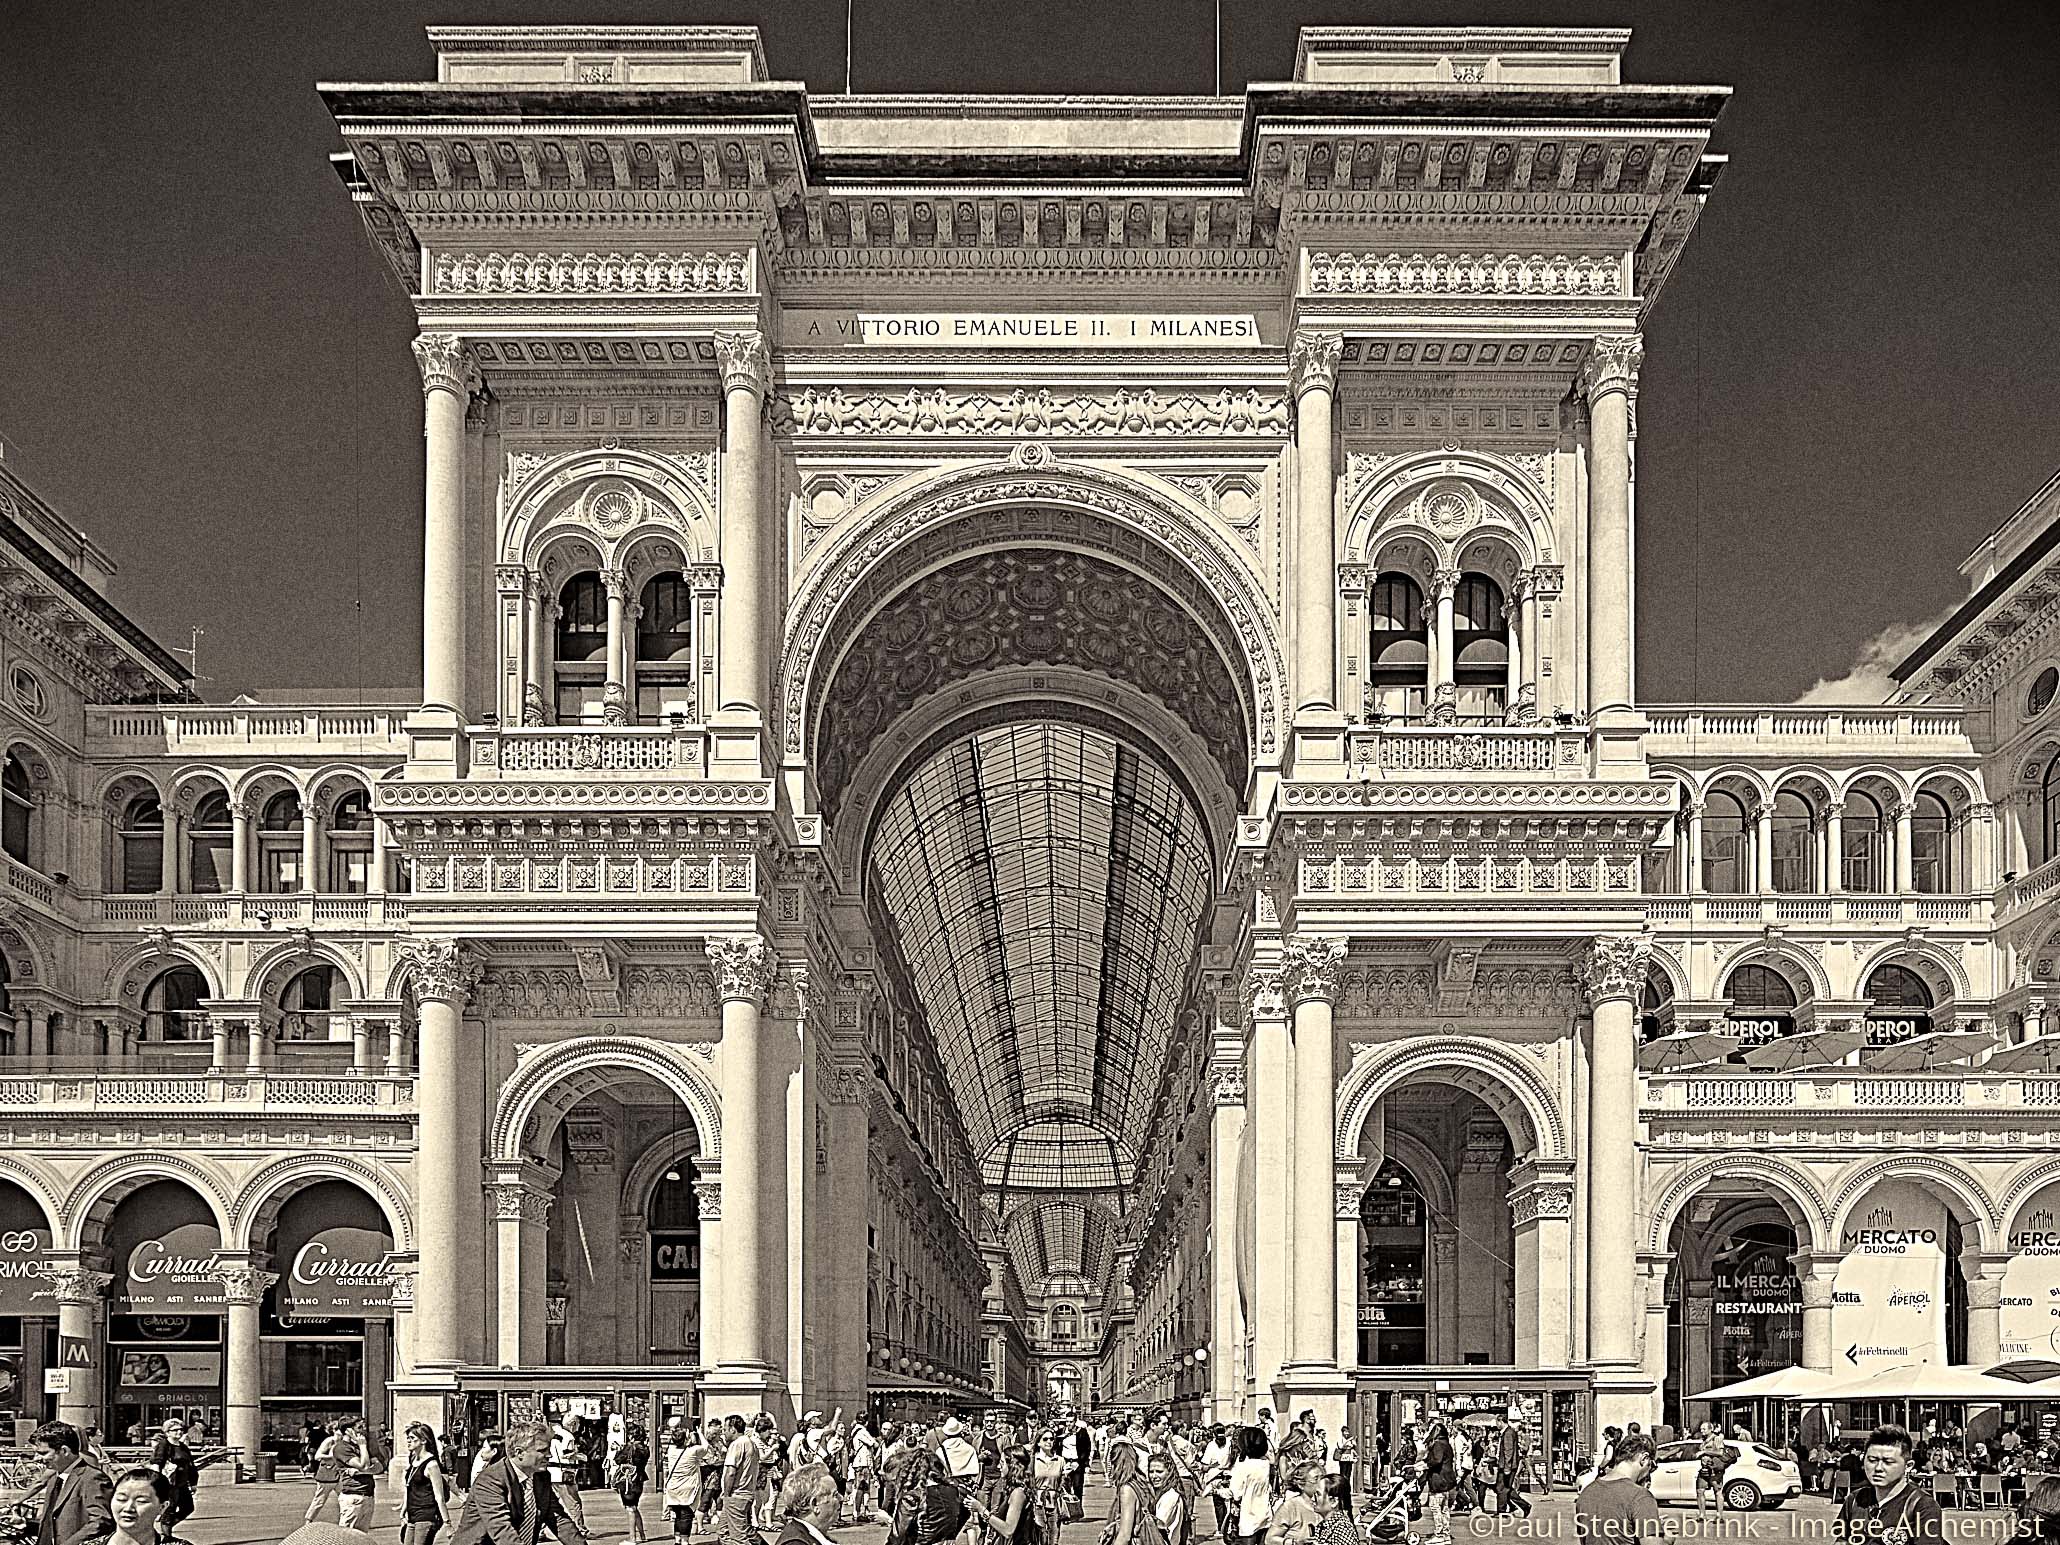
Capture One Black & White is a flexible and versatile tool for converting you color images into black & white. You have full control over how colors translate into grey as if you were using a color filter and a black & white film. In addition you can tone your images to make them look more interesting.
Capture One Black & White
It may seem funny or ironic, but the Capture One Black & White tool is on the Color tool tab for a reason. After all, you create a Black & White image from a color image. And how you translate colors into greys is exactly what this tool is all about.
That said, the Capture One Black & White tool does not stand on itself. A dedicated Black & White tool tab brings all relevant tools together.
Once you have managed to create the perfect grey tones from your colors the Capture One Black & White tool has a second trick on its sleeve: Split Tones.
How this all comes together is what you learn in this post.
Prepare For Take-Off
When you start converting color into black & white images in Capture One, the following tips give you a kickstart.
Install Black & White Tool Tab
Although you find the Capture One Black & White tool on the Color tool tab, the more seasoned user might prefer the dedicated Black & White tool tab. This tool tab, however, is not part of the default Capture One Workspace.
Fortunately, there is a Black & White Editing workspace built-in. Go to Window menu > Workspace > Black & White Editing.
If you prefer to keep your current workspace, just add the Black & White tool tab to it via View menu > Add Tool Tab > Black & White. The tool tab is added at the right but might not show up because the column width for tool tabs may not be sufficient. Increase the column width with your mouse by dragging the divider line at the top right of the tools area.
Install Presets
I have prepared a set of 190 Presets for the Black & White tool, with a free subset of 54 Presets if you want to try first, what I highly recommend by the way. Due to a special editing trick, these Presets add enormous value to how you use the Black & White tool.
I discuss these Presets later in this post.
Make Clone Variants
The third and last tip is more a day-by-day workflow tip. In general, I prepare the following steps when I create Black & White images:
- Adjust your color image first, including Cropping, Exposure, Levels, Local Adjustments and so on;
- next, make a Clone Variant;
- last, convert the Clone Variant into black & white.
Please adapt this to your own liking but having the second variant of each image in a Collection to be the Black & White variant makes it very easy to select them all. Just right-click the thumbnail > Select By Same > Variant Position (n) where (n) is the position number.
Anatomy Of The Tool
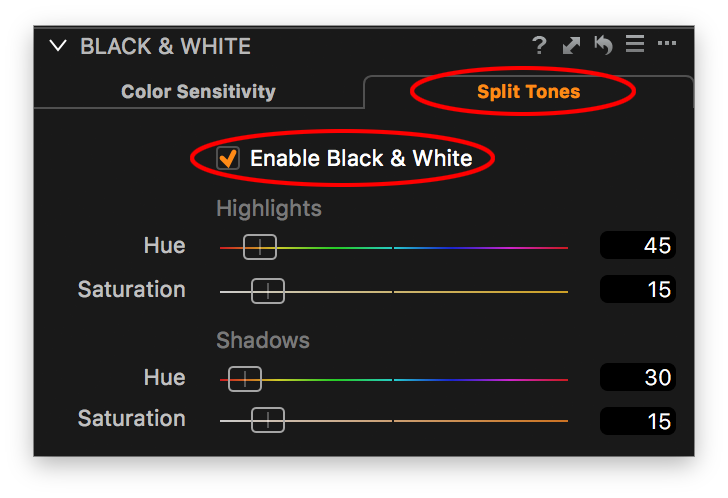
Let’s have a closer look at the Capture One Black & White tool. You see two tabs, Color Sensitivity and Split Tones. On both tabs, there are sliders and the Enable Black & White checkbox. The checkboxes on both tabs are functionally identical and linked.
Note that the free Capture One Express (for Sony) version does only have the slider functions from the Sensitivity tab. Split Tones are missing in that version.
At the top right corner, you see the regular Tool Controls like online help, Local Copy and Apply, Reset, and Presets. I come to that later.
Enable Black & White Box
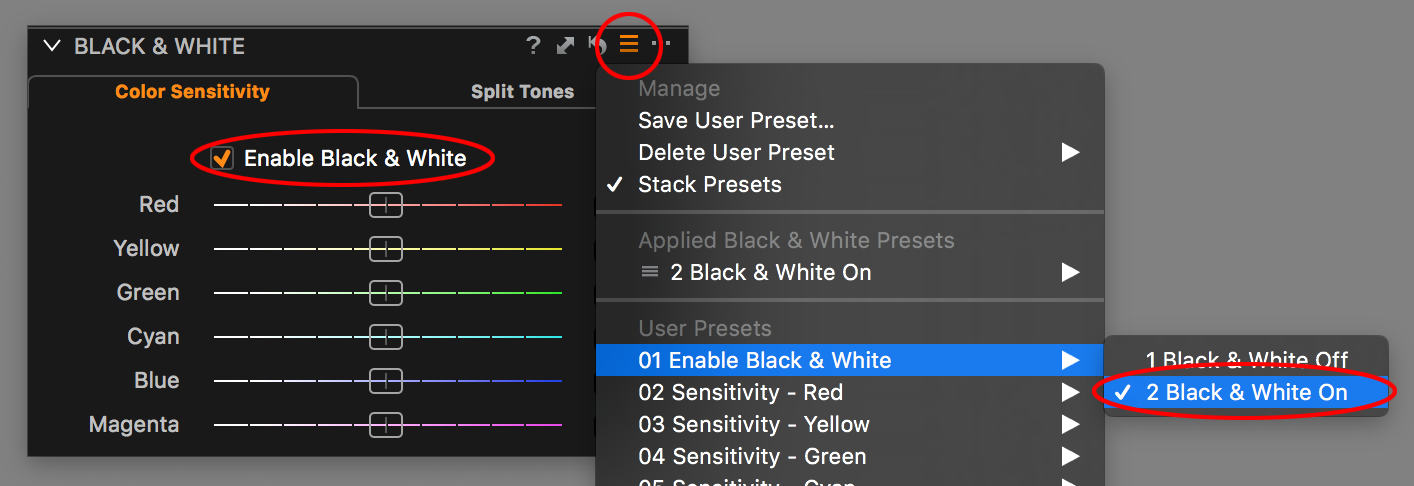
When you check the Enable Black & White box you convert the Primary Variant into a Black & White image. You can copy this adjustment independently from or combined with adjustments on the Color Sensitivity and Split Tones tabs.
 Unchecking the box will obviously revert the image back to color. Note that there is no keyboard shortcut for altering the checkbox status and you can not assign one.
Color Sensitivity Tab
On the Color Sensitivity tab you see six sliders for different colors: three for the primary colors (Red, Green, Blue) and three for the secondary colors (Yellow, Cyan, Magenta).
With each slider, you adjust the sensitivity for that color. Starting from a neutral position (zero) you can increase sensitivity for making converting a color into lighter grey and vice versa.
Maybe you have been working with Black & White film and are familiar with Panchromatic (sensitive to all colors), Orthochromatic (blind for red), or the highly sensitive Infrared film. The difference between these films has to do with color sensitivity.
Adjusting the Color Sensitivity sliders can have a huge impact on the image but it is cumbersome and unwieldy to use in my opinion. Presets can help here, as I show you in a minute.
Split Tones Tab
The Split Toning tab offers four sliders, divided into two groups of two: Highlights and Shadows. With the two sliders in each group, Hue, and Saturation, you control the color that you assign to either the Highlights and Shadows respectively (and independently).
Remember the Sepia toning from the wet darkroom?
Oh, a nice touch is that the Saturation sliders adapt their color to the selected Hue. You may also note that changing the Hue does not have any effect as long as Saturation is set to the default zero position.
Using The Capture One Black & White Tool
Okay, dawdled long enough, let’s get started. Using the Capture One Black & White tool is a 3-staged process:
- Enable Black & White
- Adjust Color Sensitivity
- Adjust Split Tones
I will look into it with you in all its glorious details below. But first, I show you the color image I work on today. Next, I demonstrate in a number of steps how I got the end result as shown at the beginning (and end) of this post.
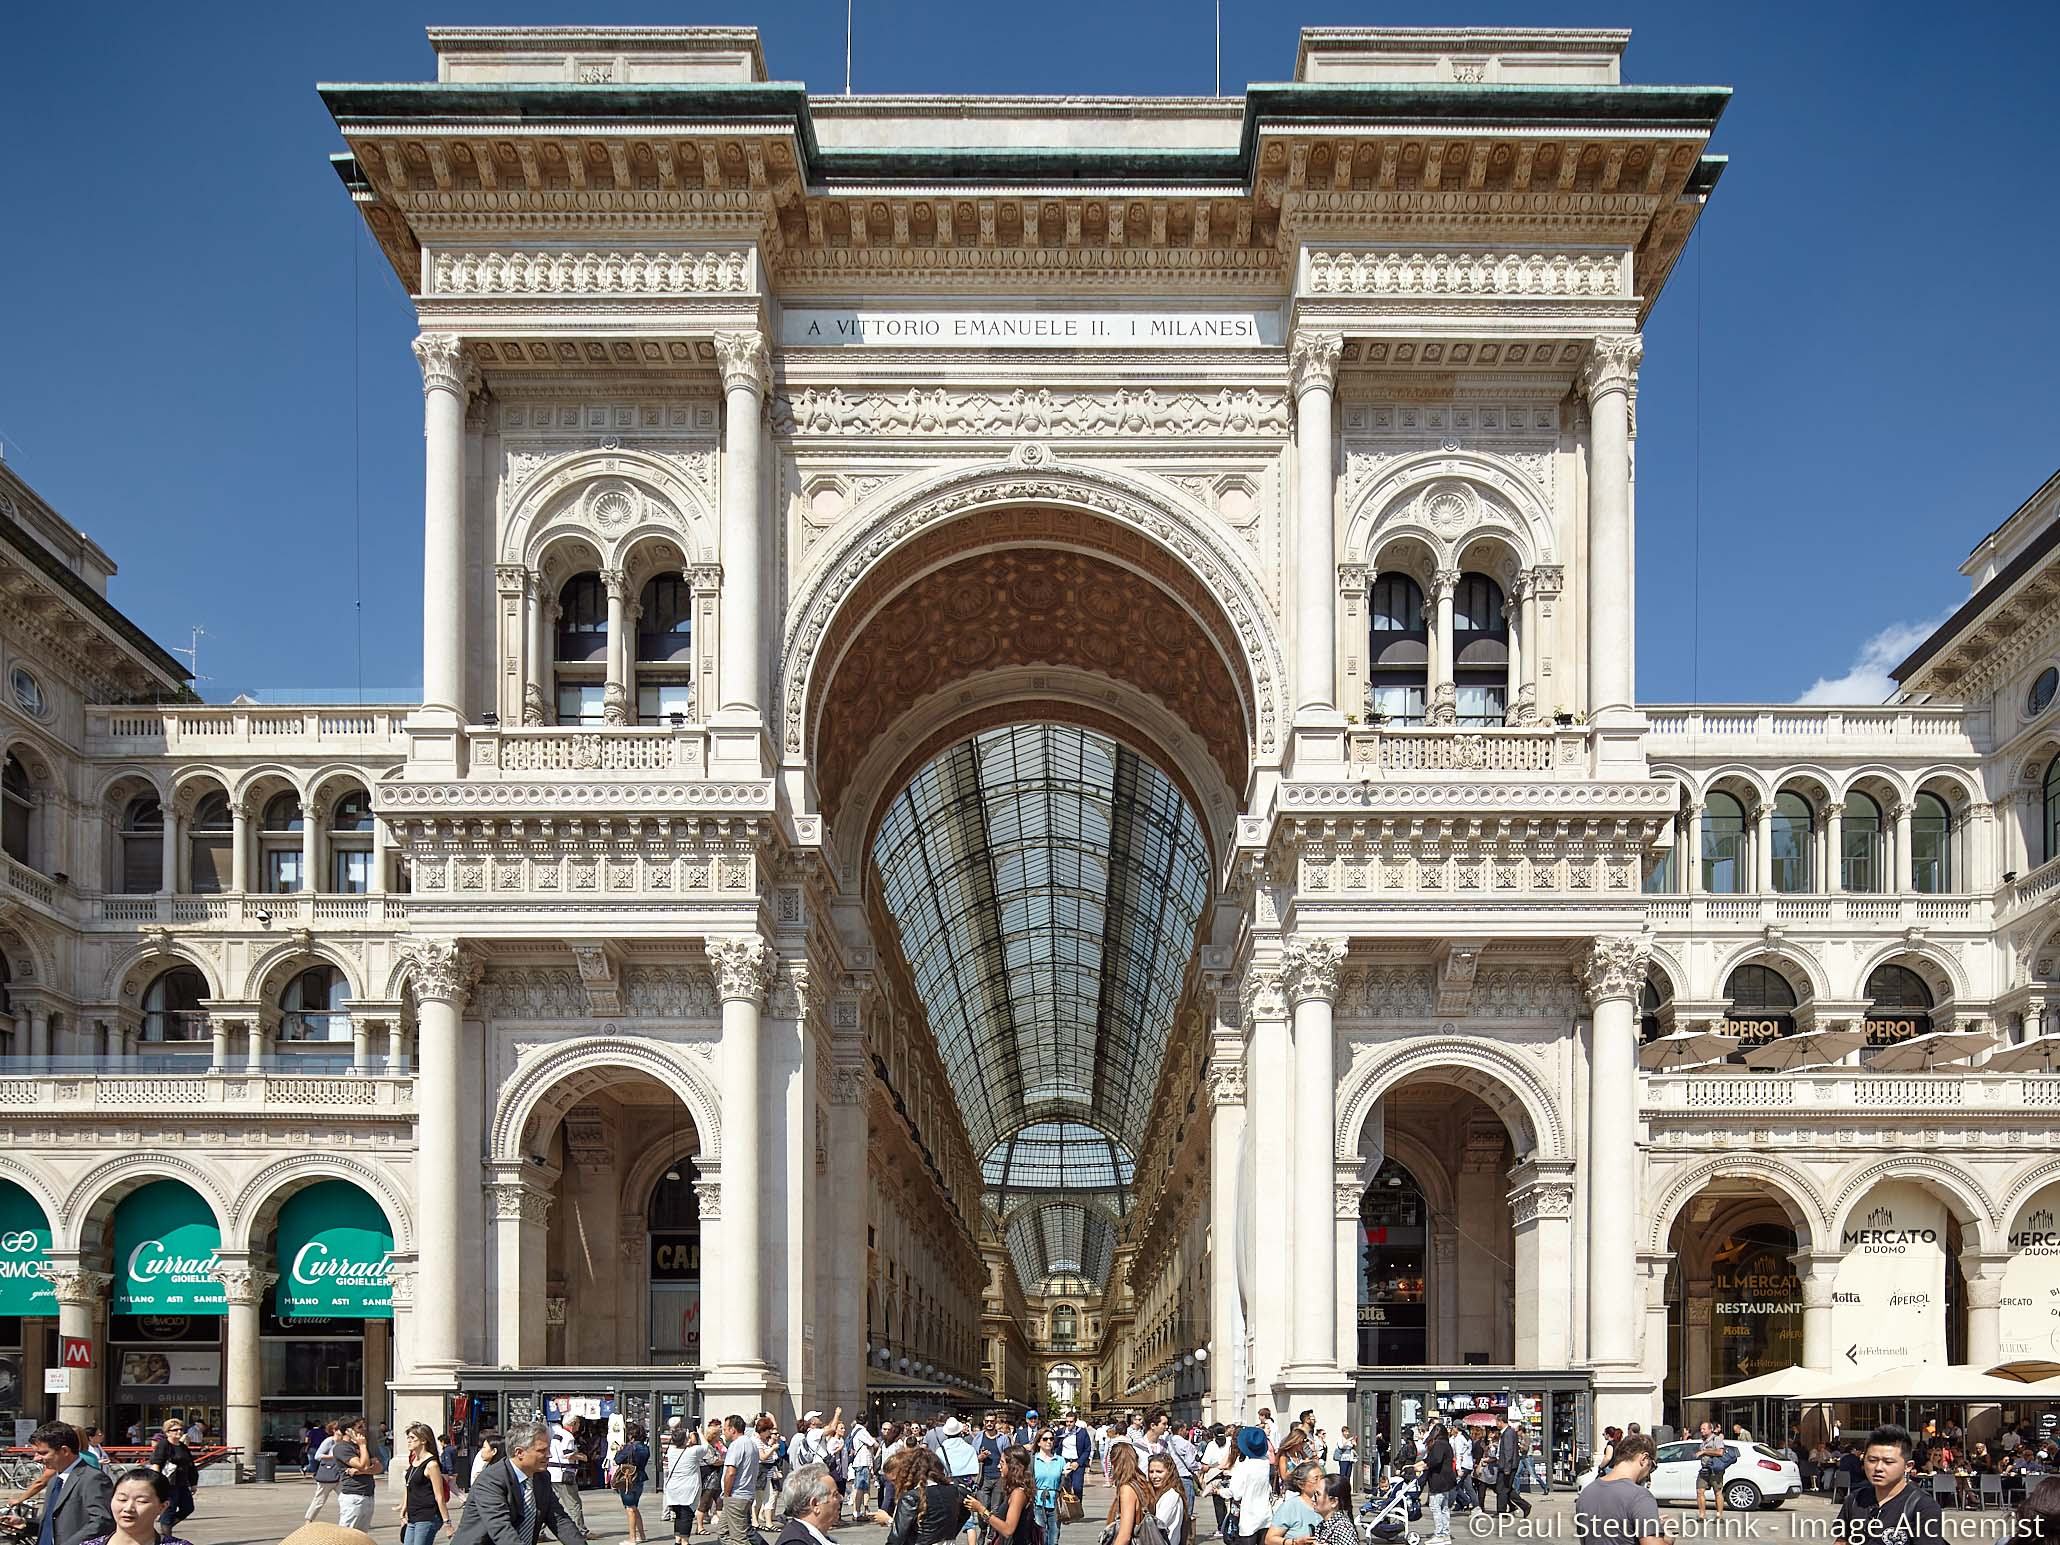
The image shows is the main entrance of the Galleria in Milan, Italy, taken with a Canon DSLR and the Canon TS-E 17mm f/4 L lens with a vertical shift movement.
Enable Black & White
After you make a Clone Variant of your image, an optional but highly recommended step, you check the Enable Black & White checkbox first to get this tool running. There is currently no keyboard shortcut available or configurable, so you need your mouse to check the box.
You can enable this for a selection of images with the Preset I advised you to install earlier or use Copy and Apply.
Adjust Color Sensitivity
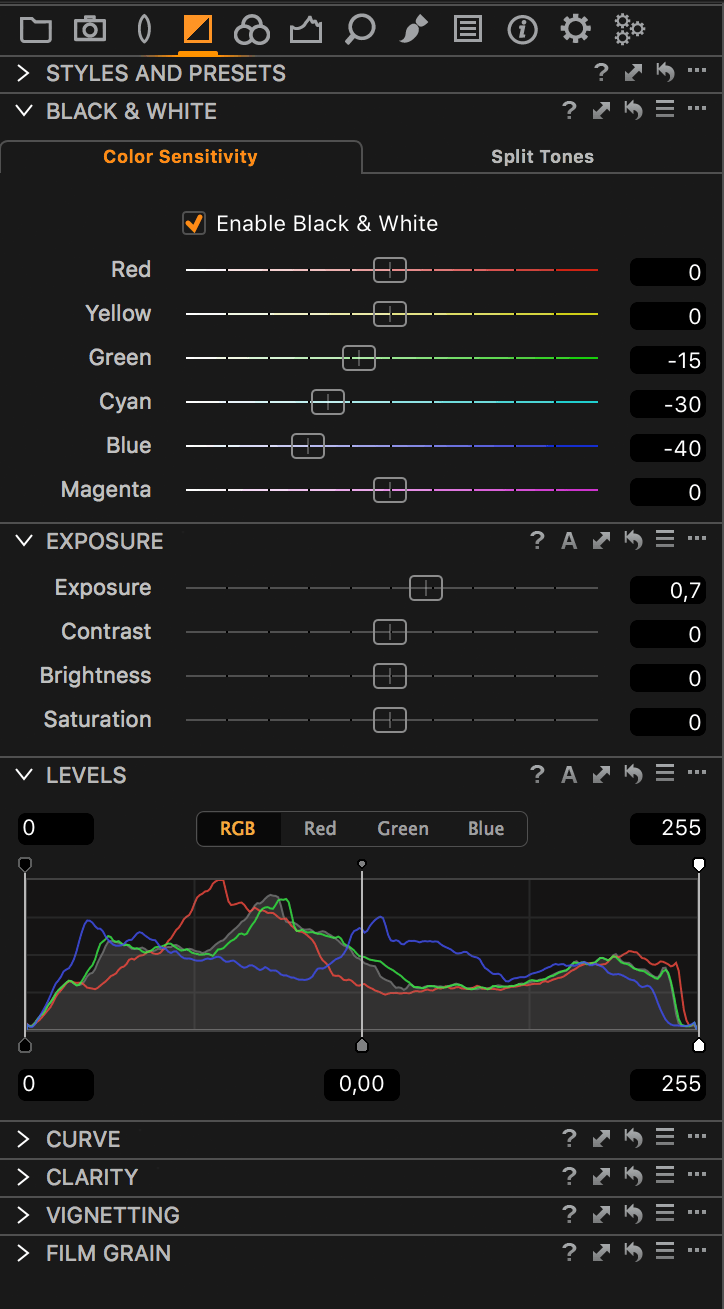
On the Color Sensitivity tab, you have six sliders at your disposal. Three are for the primary colors and another three for the secondary. Here you see the added value of the Capture One Black & White tool over older and simpler options like desaturating your image or convert to greyscale on output.
In my example, I changed the Color Sensitivity for Green, Cyan, and Blue to a negative value to have these colors look darker in Black & White. The before/after stack below illustrates this.
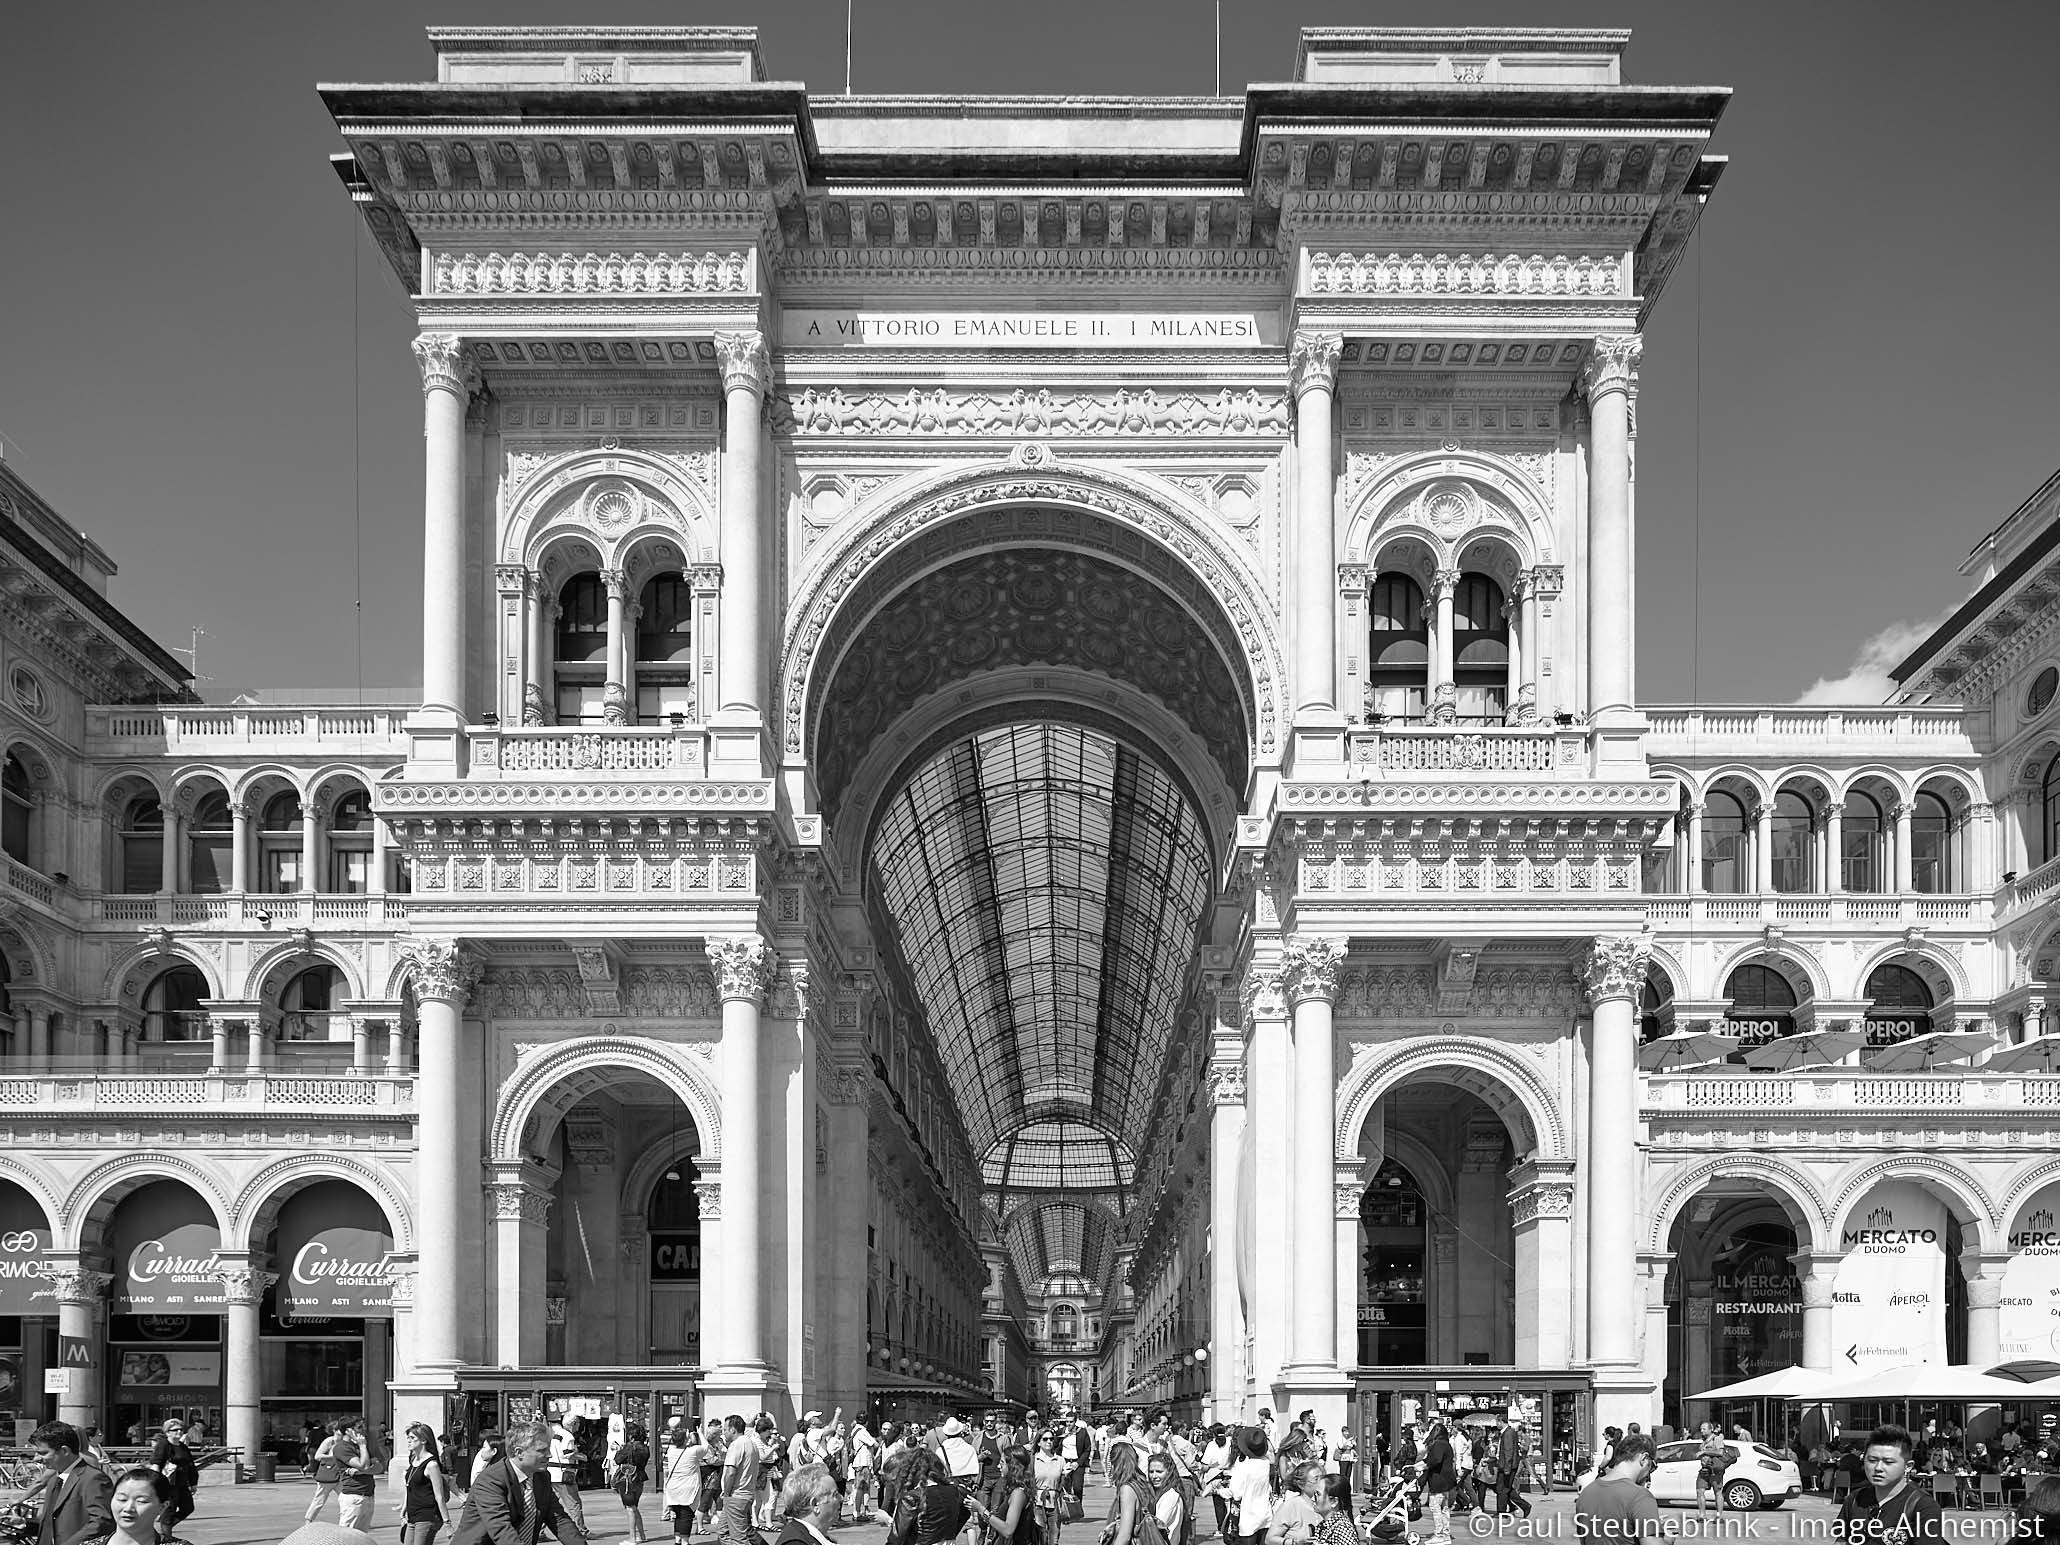
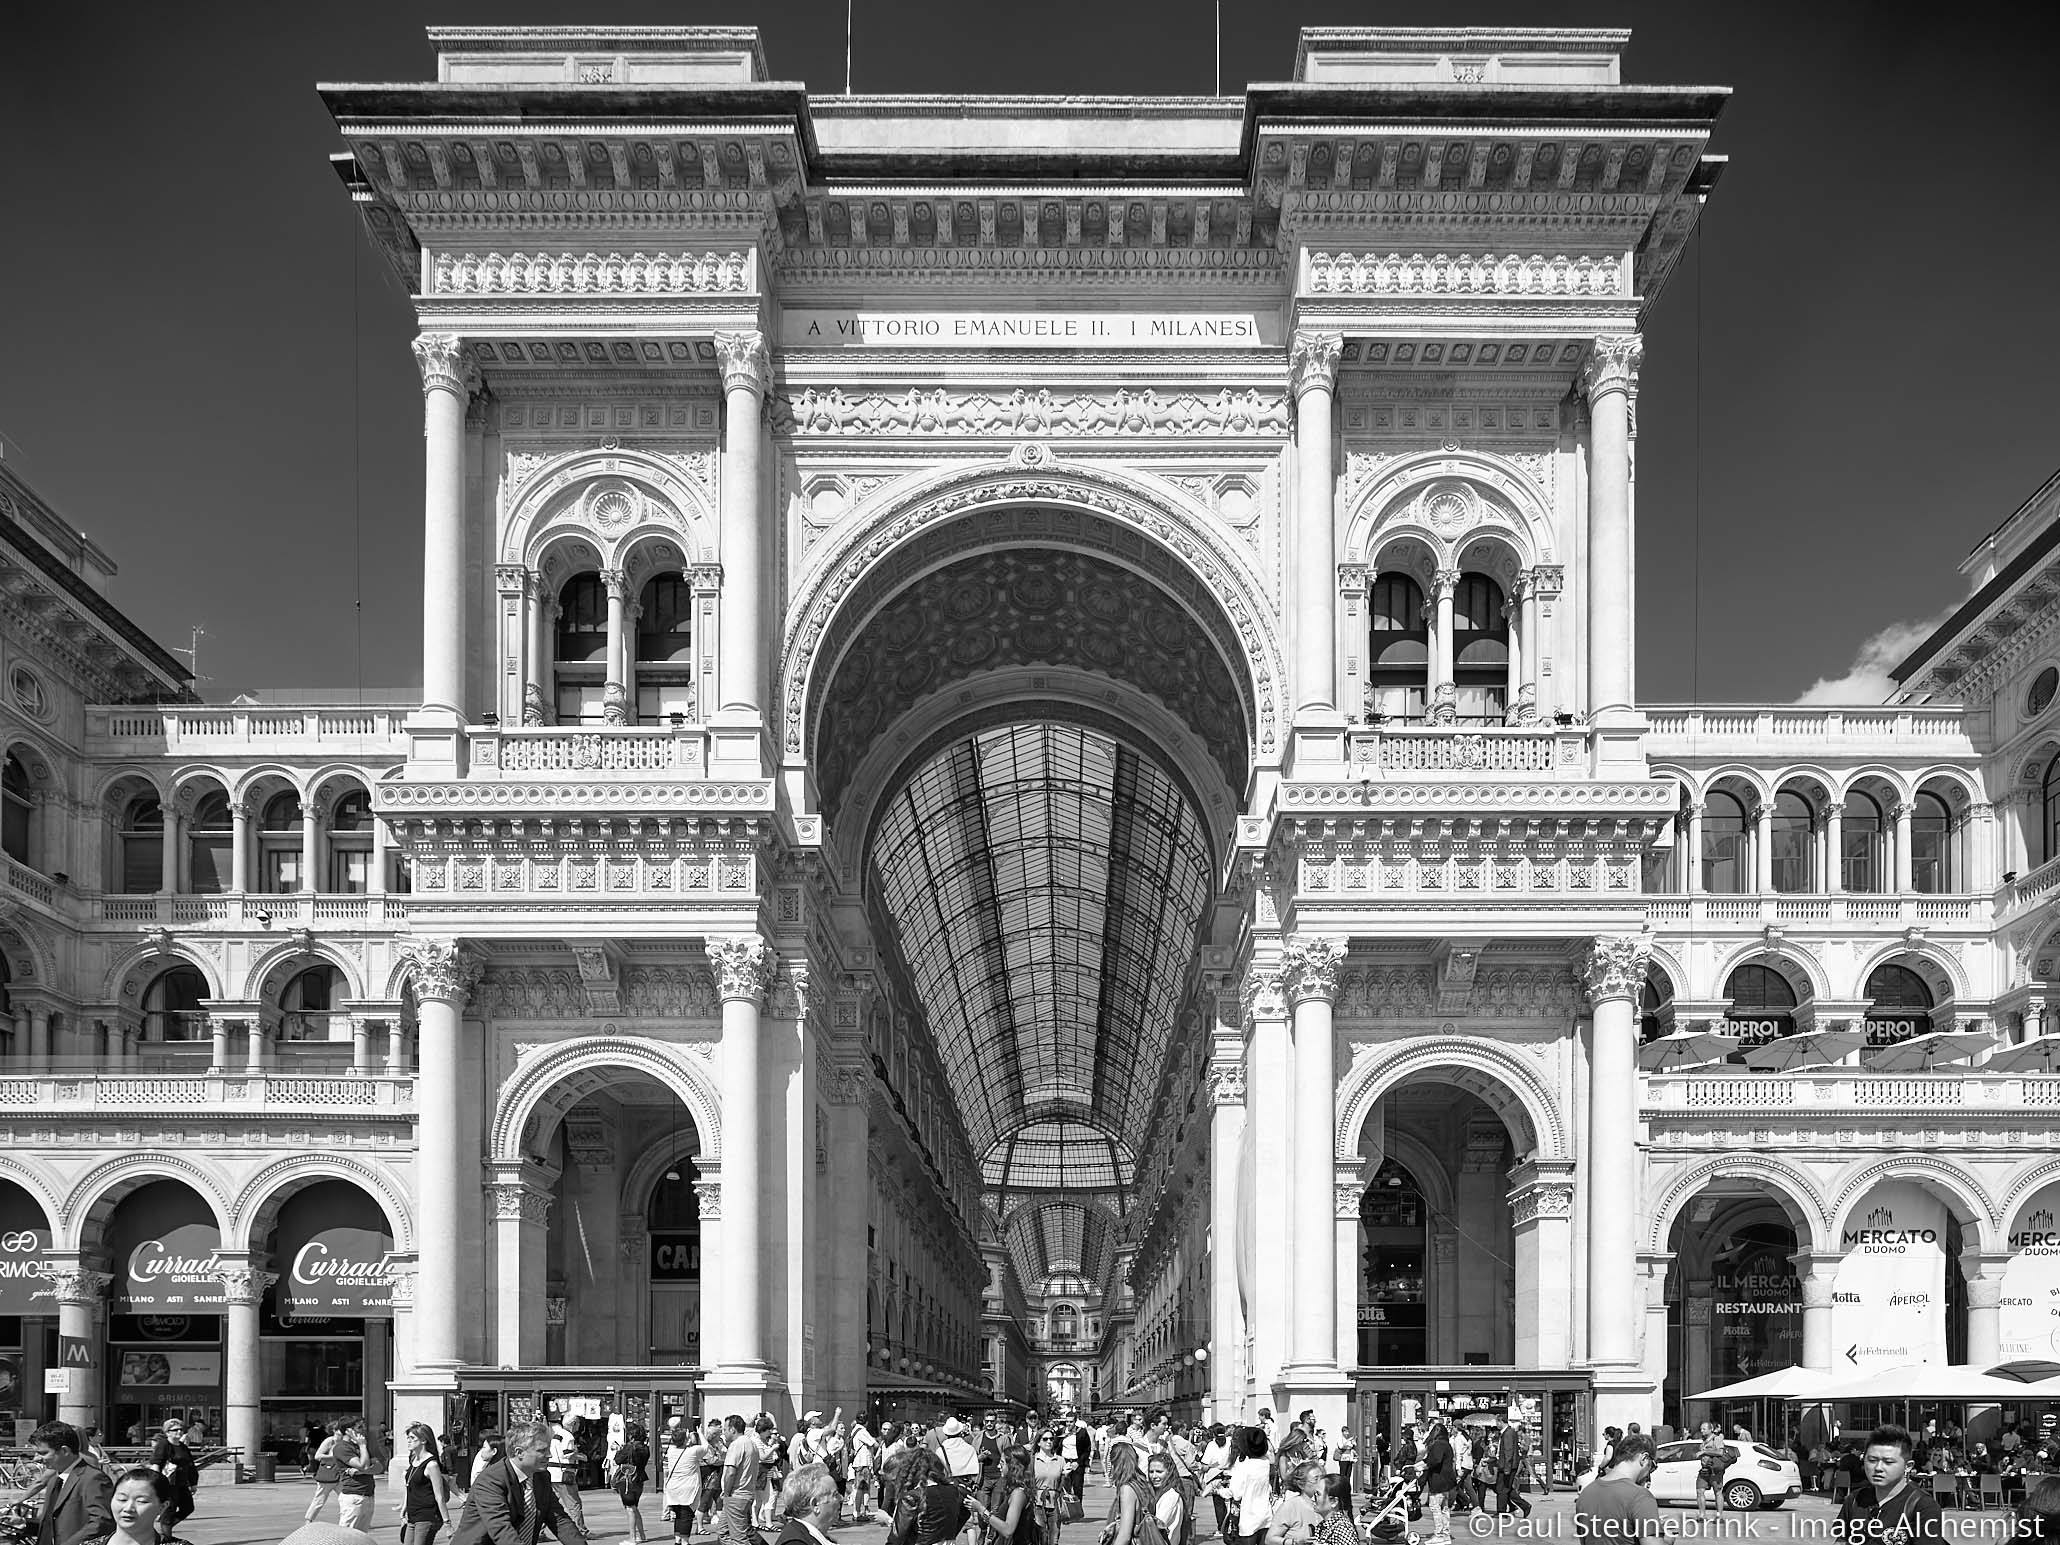
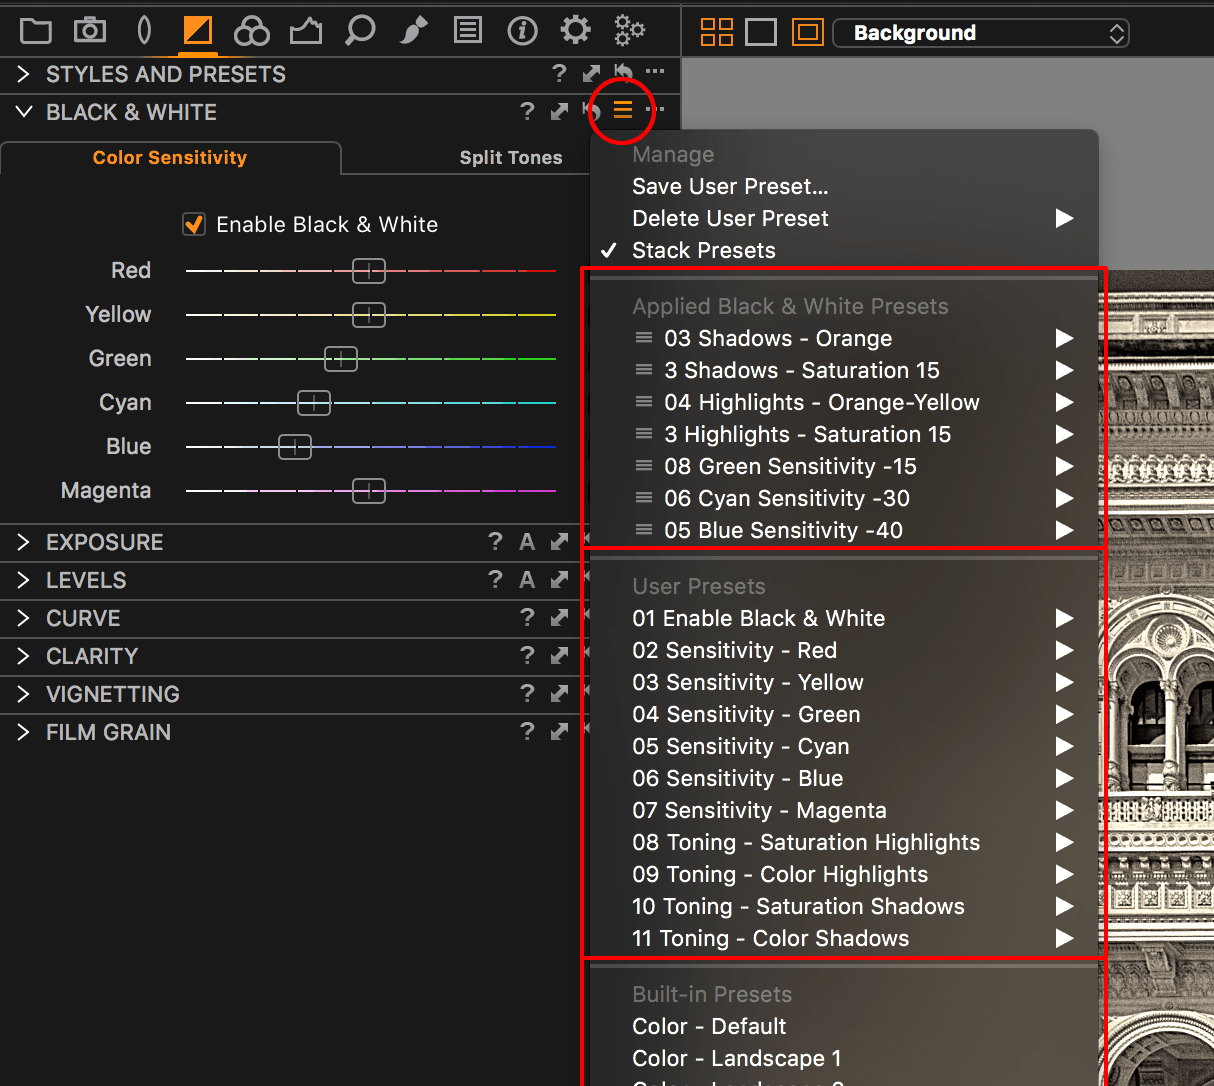
I do not like to drag the sliders with my mouse because I can not watch tools and preview at the same time. My preferred method is to browse and hover over a list of Color Sensitivity Presets that contain all these values per color in small increments but large enough to notice a difference. See the screenshot below.
An alternative is that you click into a field number and use the up/down cursor keys for +/- 1 steps or in combination with the Shift+cursor key for +/- 10.
Important Notice
Do not forget to check Stack Presets when using multiple Presets for respective colors. Also, note that some colors respond stronger to the Color Sensitivity sliders then others depending on the colors in your image.
Adjust Split Tones
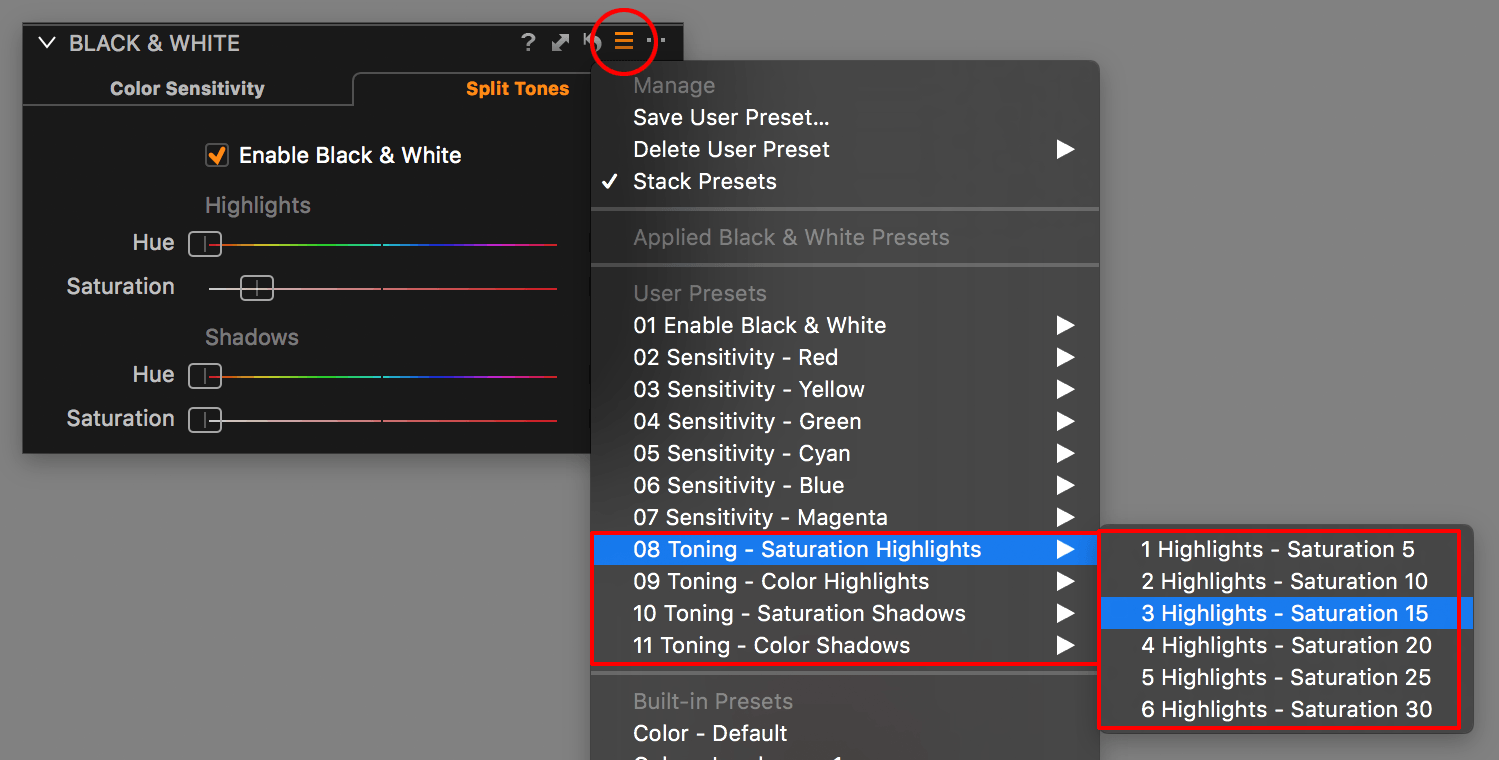
Toning your Black & White image is an optional step, but again highly recommended. Obviously, the sliders work in a similar fashion as other sliders. As said, I prefer to adjust the field values with the cursor keys on the keyboard and the Presets even more. I created separate Split Tones Presets in the Capture One Black & White Presets.
There are separate Presets for Saturation and Color, both for the Highlights and Shadows adjustments. In the screenshot below you see the Saturation Highlights Presets.
The fun of toning your Black & White image is that you intentionally introduce a kind of color cast over your image to introduce or strengthen a specific mood. Thanks to working in the RGB color space, in contrast to converting to greyscale, toning is a breeze.
However, in general, toning is boring. That is because coloring all brightness levels of your Black & White image with the same color does not add much to it.

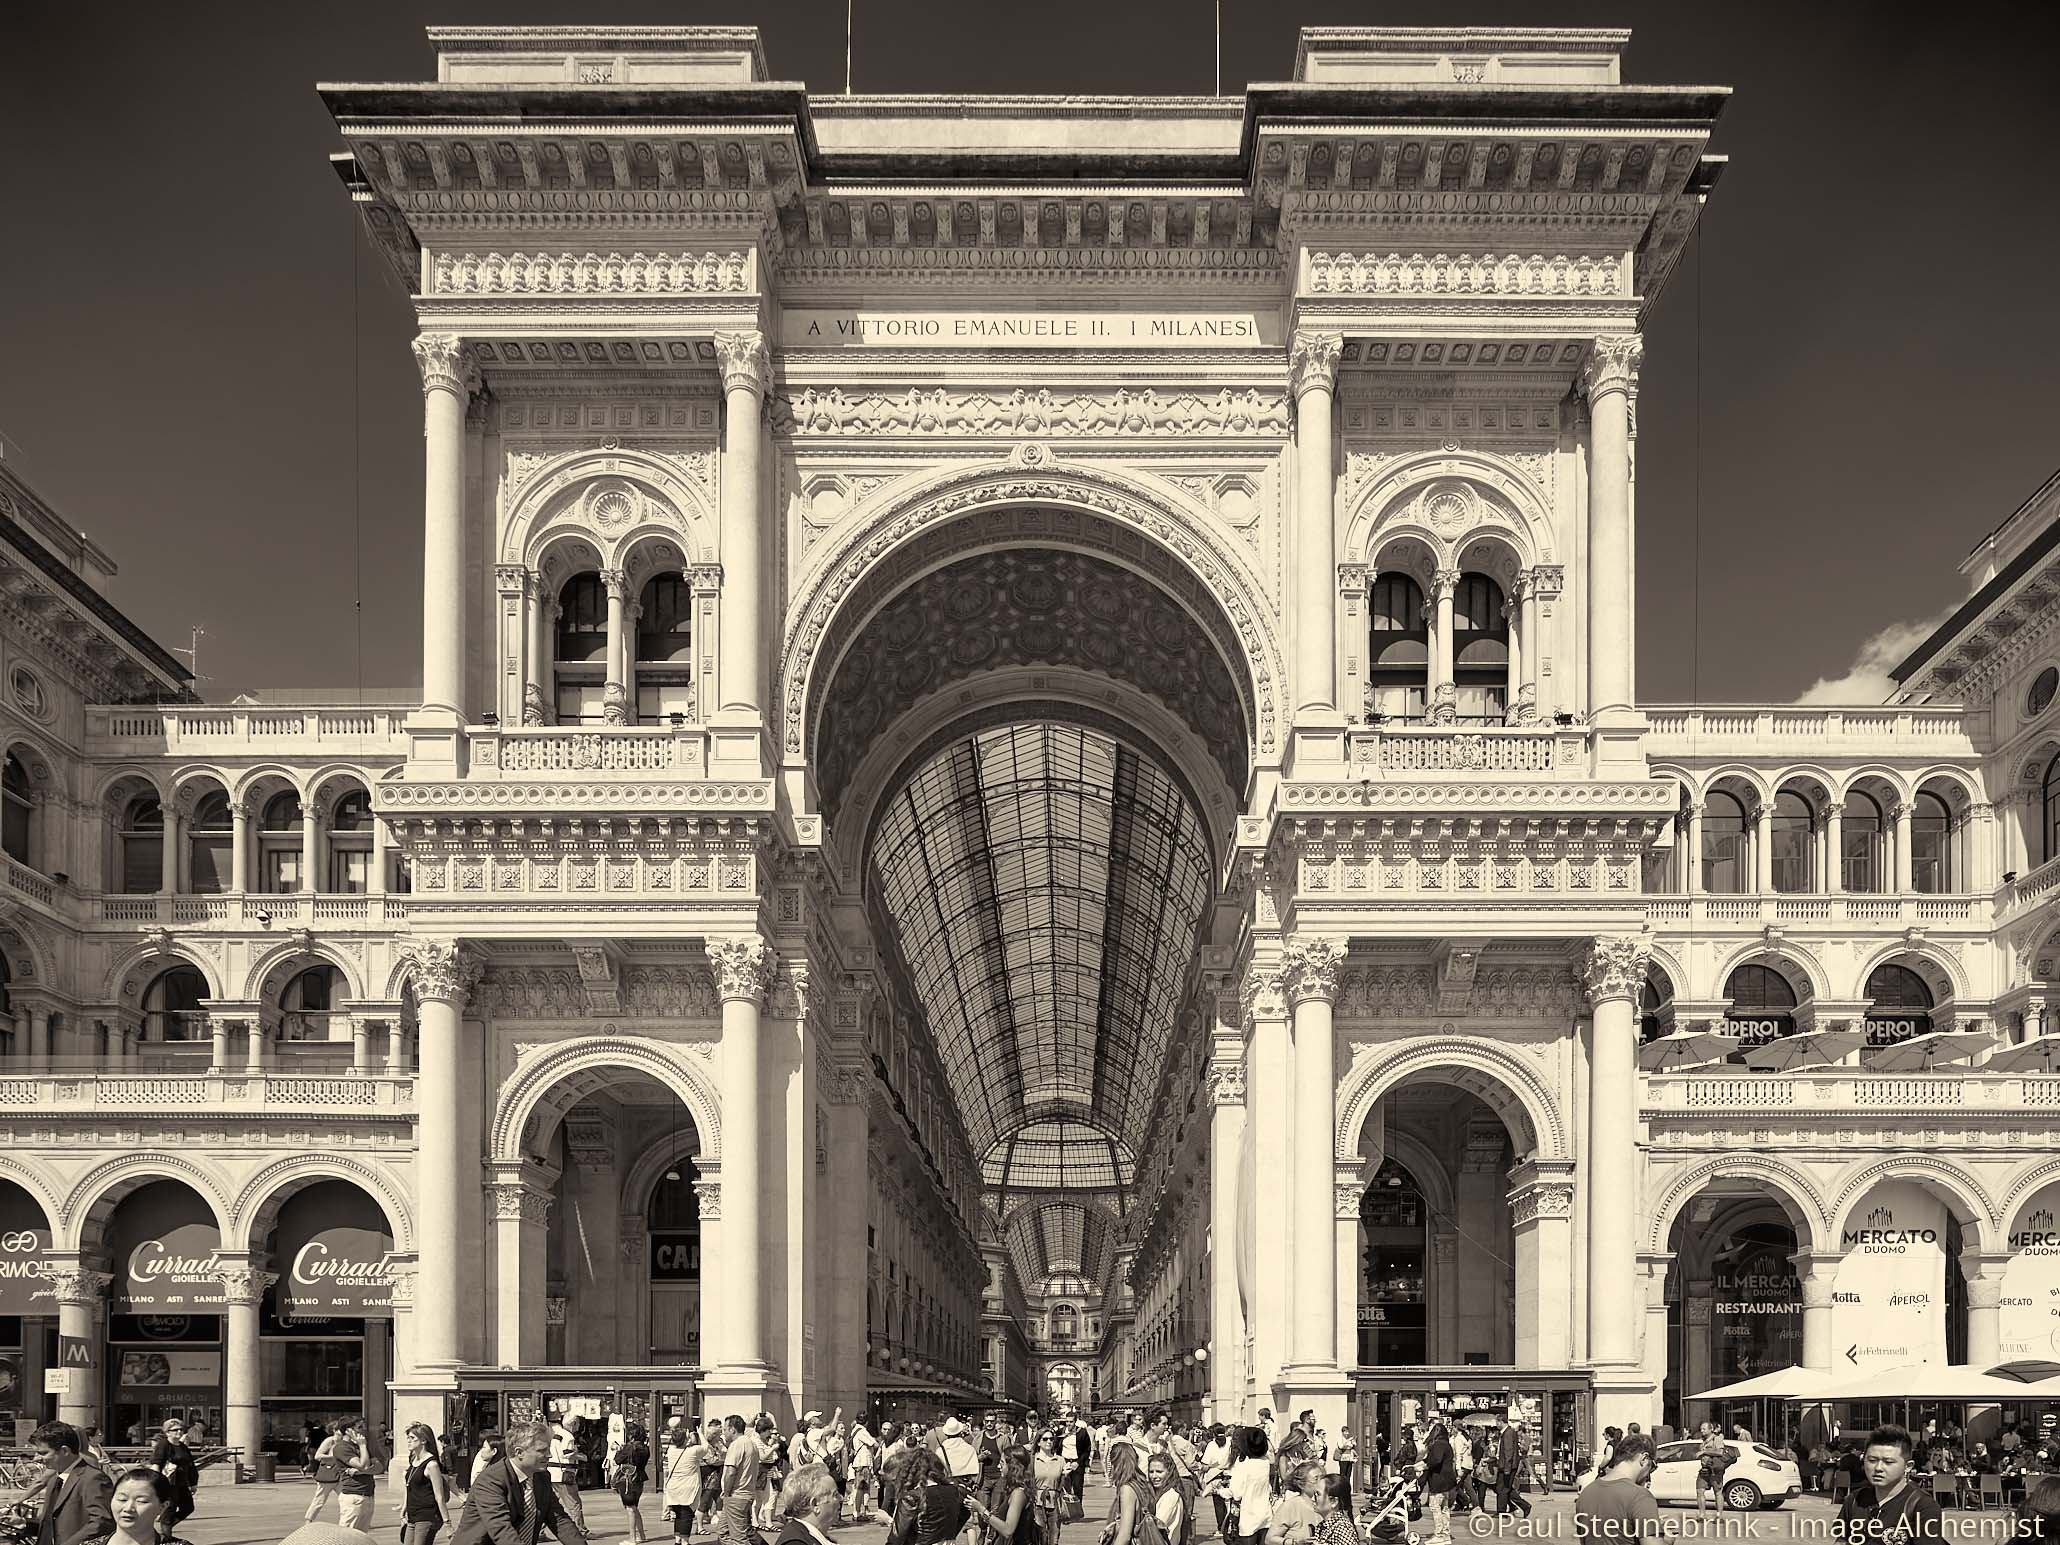
Introducing Split Tones. With this feature, you can color tone you Black & White image for both the Highlights and the Shadows separately. I used an Orange-Yellow tone for Highlights and Orange for Shadows from my Presets.
Tip
By default, Toning is off. This is because both Saturation sliders are in the most left (zero) position. Hence, your first move is to raise the bar a bit. Set Saturation to a value in the range of 10-20 to start with.
Other Tools
I started the Black & White workflow with the advice to adjust the color image to your liking (crop, exposure). However, I am fully aware that once converted into Black & White you may like to change some of that again.
That is exactly the reason for the dedicated Black & White tool tab. All the tools you may need specifically for this purpose are grouped together. Lets quickly browse through the list:
- Styles And Presets tool
Using either Styles or Presets (or both) is very convenient when working with Black & White images - Black & White tool
That is obvious - Exposure tool
In particular, Contrast and Brightness adjustments are valuable to be at hand here - Levels tool
The Midtone Level control is similar to the Brightness sliders (Exposure tool); with Shadow and Highlight point you can change Contrast
In my before/after stack, I took the toned image and added some weird kind of aging with the Clarity tool (Classic Clarity + Structure at +100), the Curve tool and added grain with the Film Grain tool.


- Curve tool
Similar to color images the Curve tool is ideal to control the tonality of the image - Clarity tool
This tool affects Contrast for details or surfaces - Vignetting
This is actually an exposure control at the edges of your image, making it darker or brighter and very effective in Black & White images - Film Grain
Suitable for both color and Black & White images, it seems almost indispensable for the latter; fantastic tool
Although the Black & White tool tab provides an adequate set of tools, I still miss one: the Color Editor tool. What on earth does that have to do with Black & White?
Well, to give you an example, affecting colors in terms of hue, saturation or lightness before conversion into Black & White can be very helpful. Think of darkening a sky, or brighten the yellow flowers through an adjustments layer. Just a tip, I leave it to you.
Thank you
For reading. Please feel free to leave a comment. Like us on Facebook or subscribe to our newsletter to stay informed about new blogs.
Best Regards,
Image Alchemist







Thanks for the insight. I’ve being using Capture One for about eight mounts and never noticed the Color Sensitive Presetes