Capture One Exposure
The Capture One Exposure tool allows you to adjust the exposure of your image after the fact. In addition, it provides related controls like Contrast, Brightness, and Saturation. It is a very important tool that you best start with, before making finer adjustments with other related tools. Presets for this tool made by the Image Alchemist are explained too. After reading this blog, the Exposure tool does not have any secrets for you anymore.

Capture One Exposure
The Capture One Exposure tool is one of the tools you probably use most. It is often the starting point of your adjustments. You can find the Exposure tool on the Exposure tool tab.
On this tab, you will find other tools that are related to exposure. I will discuss them in successive blogs. The Exposure tool’s meaning and workings seem obvious at first sight, but there is a lot to explore. Let’s have a look.
Four Sliders
The Exposure tool offers four controls in the form of sliders, named Exposure, Contrast, Brightness, and Saturation. In addition, you find some controls through the icons in the title bar of the tool, top right, like with most tools, including an Auto Adjust, discussed below. In the sections below I discuss what the sliders actually do with examples to help you understand it more thoroughly and make better adjustments and better images of course!
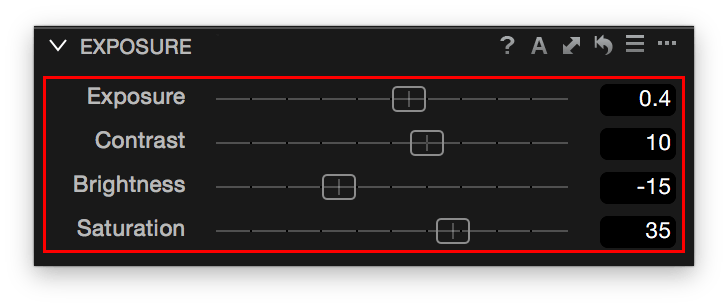
Exposure Slider
In general, you use the Exposure slider to compensate for over or underexposure. What the slider actually does is mimicking the camera changing the exposure. When you treat an image that was overexposed by 1 stop with an adjustment of -1 in Capture One, you will get a result that is very similar to a properly exposed image.
Technically spoken the slider moves the entire histogram to the left (negative adjustment) or right. All brightness levels seem equally affected. However, according to the online help, there is a roll-off in the highlights to prevent clipping for strong positive adjustments of underexposed images.
Note that since Capture One 9 the Contrast, Brightness, and Saturation sliders have much improved for better image quality, in particular with extreme adjustments with these sliders.
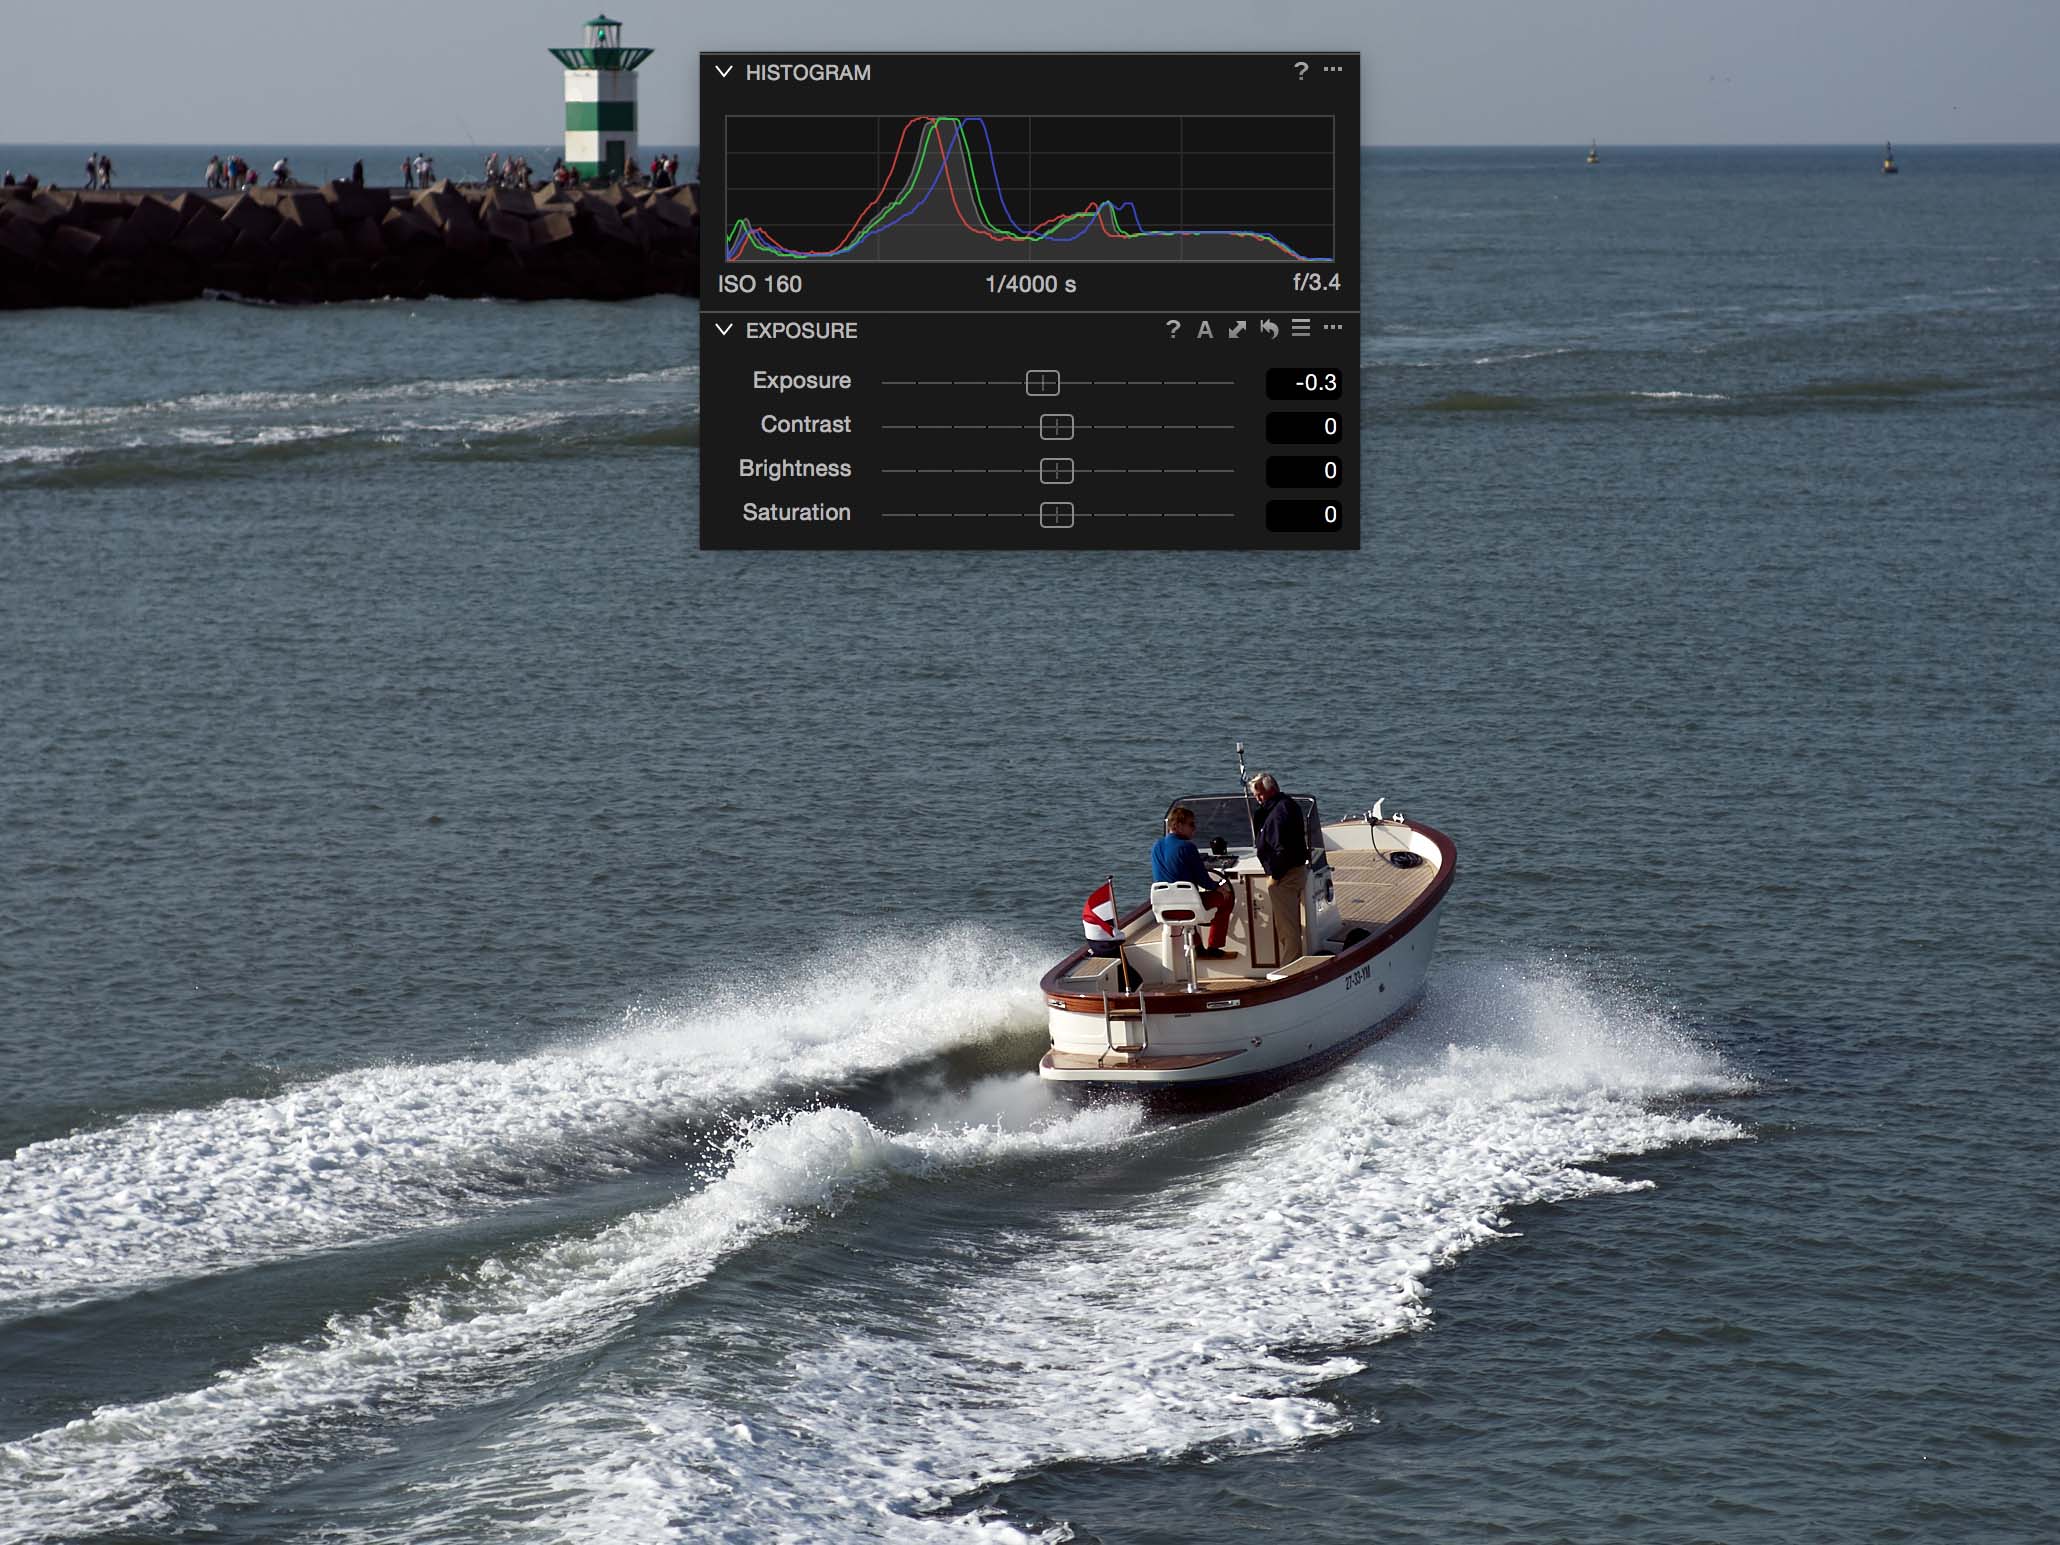
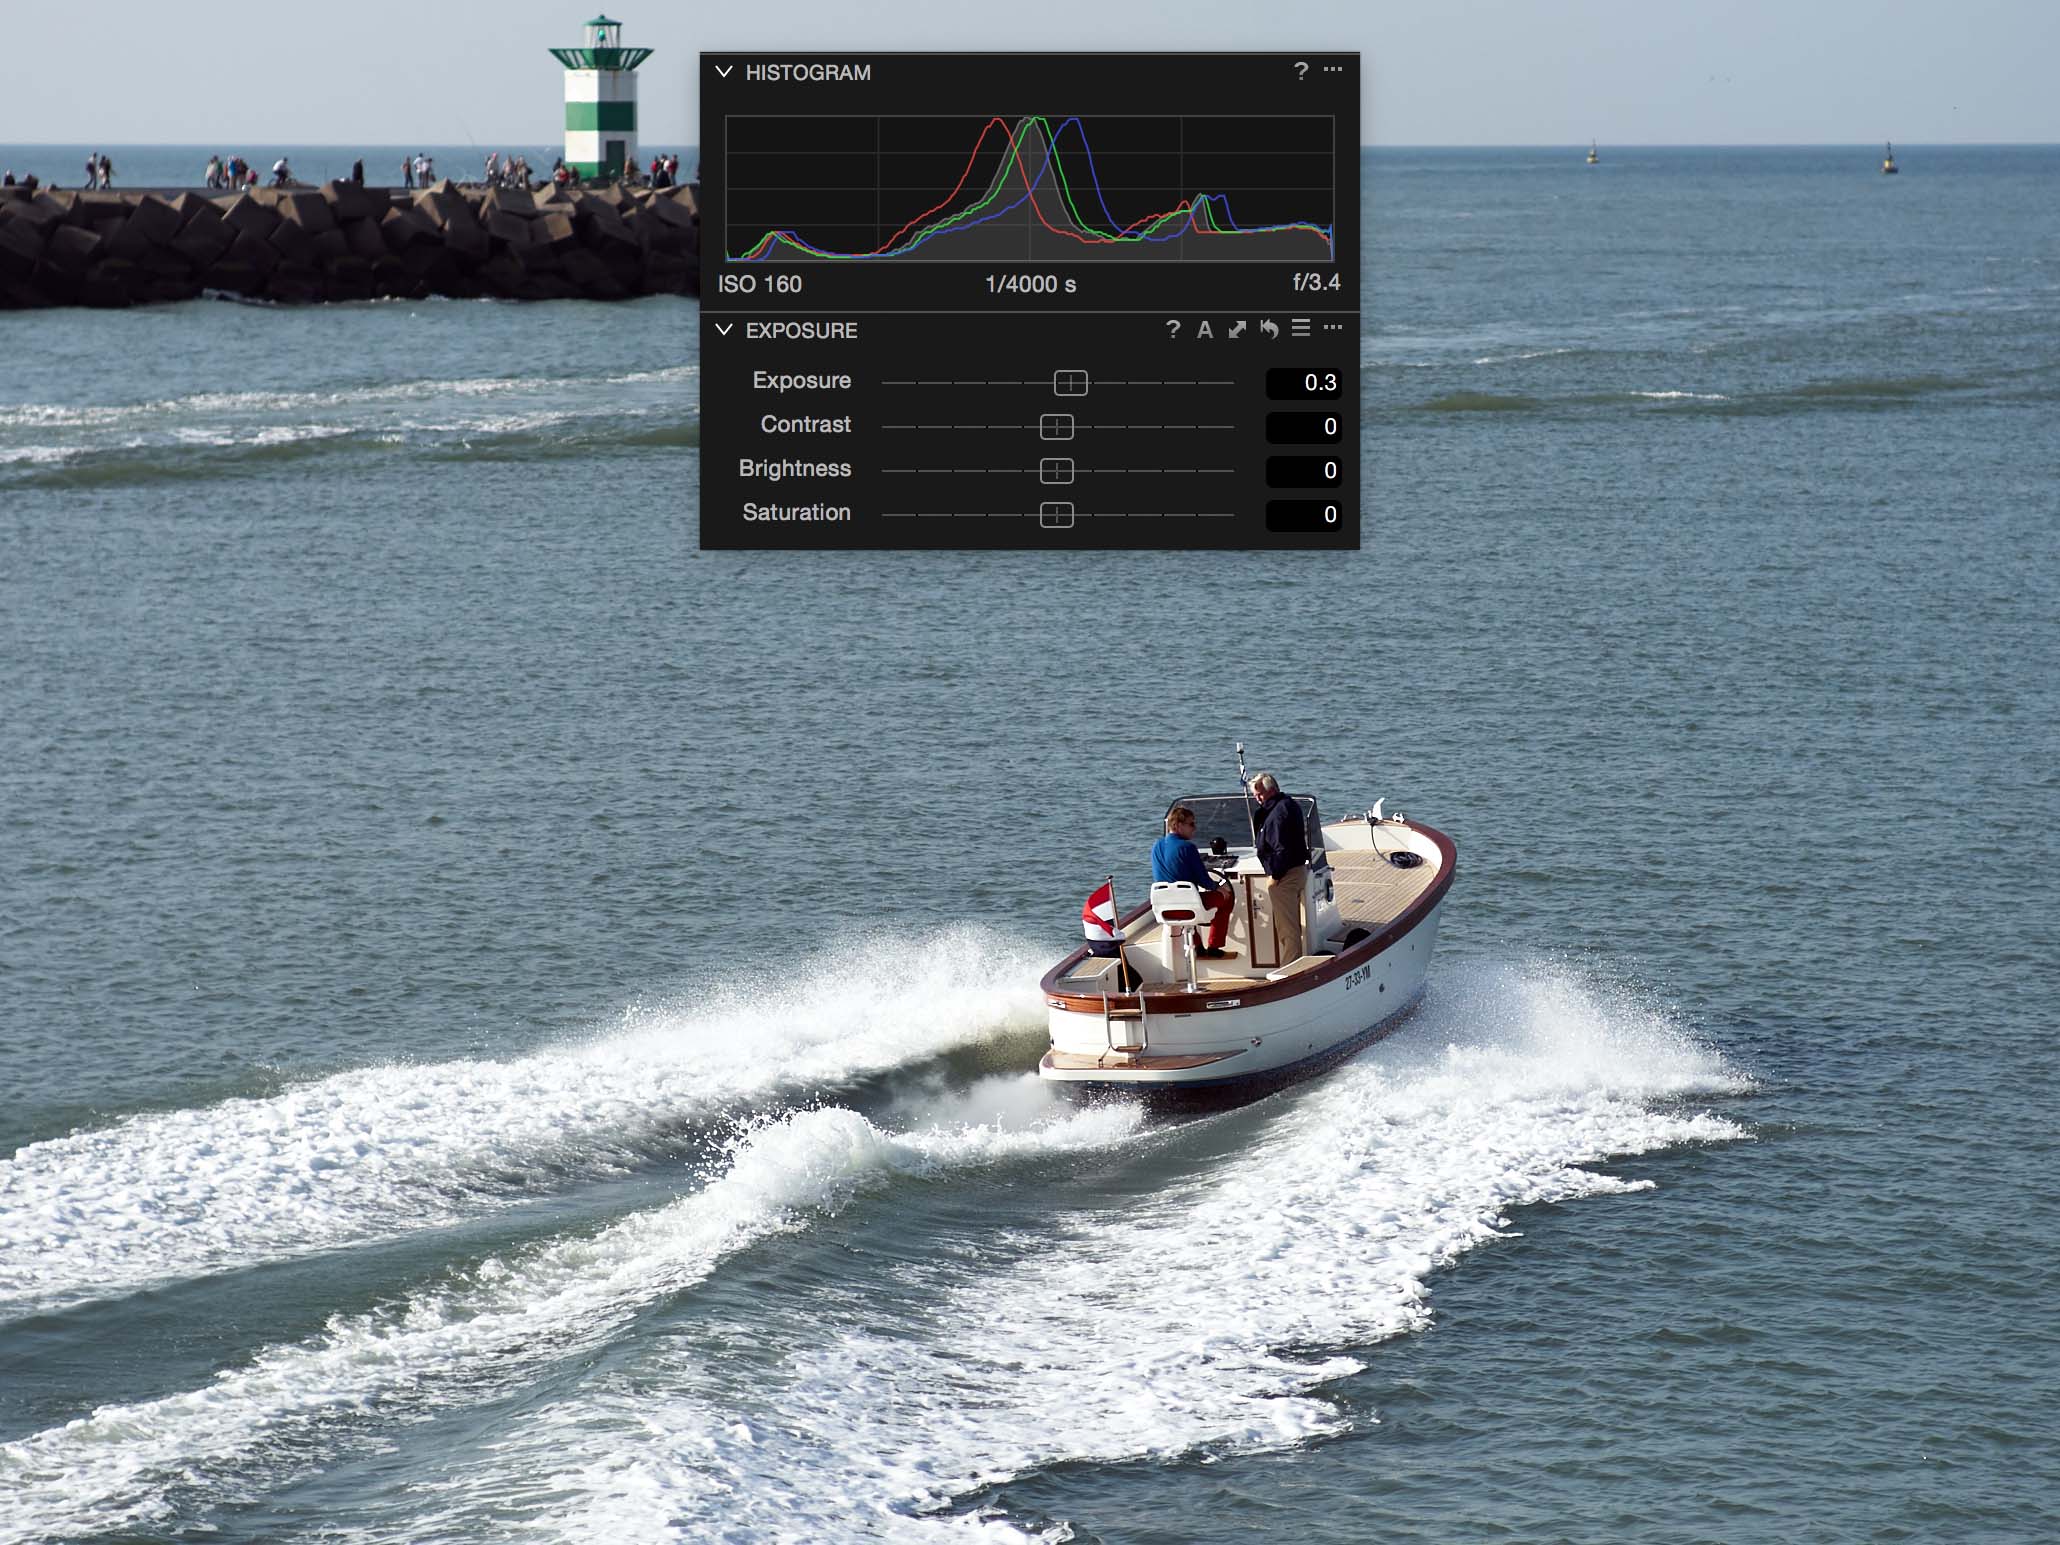
In the example above you can clearly see that all brightness levels are affected by the Exposure adjustment.
I consider the Exposure slider in Capture One as a kind of ‘main switch’. You set this first before you make any other exposure or brightness related adjustment.
A best practice guideline for using the Exposure slider is that you make sure you have minimal or no clipping at the ends of the histogram. This mainly applies to medium and high contrast images. Even when overall brightness does not seem right (too dark/bright), go for unclipping first.
Low contrast images are often too dark due to how the automatic exposure works in our cameras. Upping the Exposure slider helps a lot here too.
Contrast Slider
Increasing contrast effectively pushes mid-tones towards the edges, both dark and bright, and vice versa. The more you raise the contrast, the fewer pixels with mid-tones you will have in your image, in favor of the amount of both the darker and brighter tones.

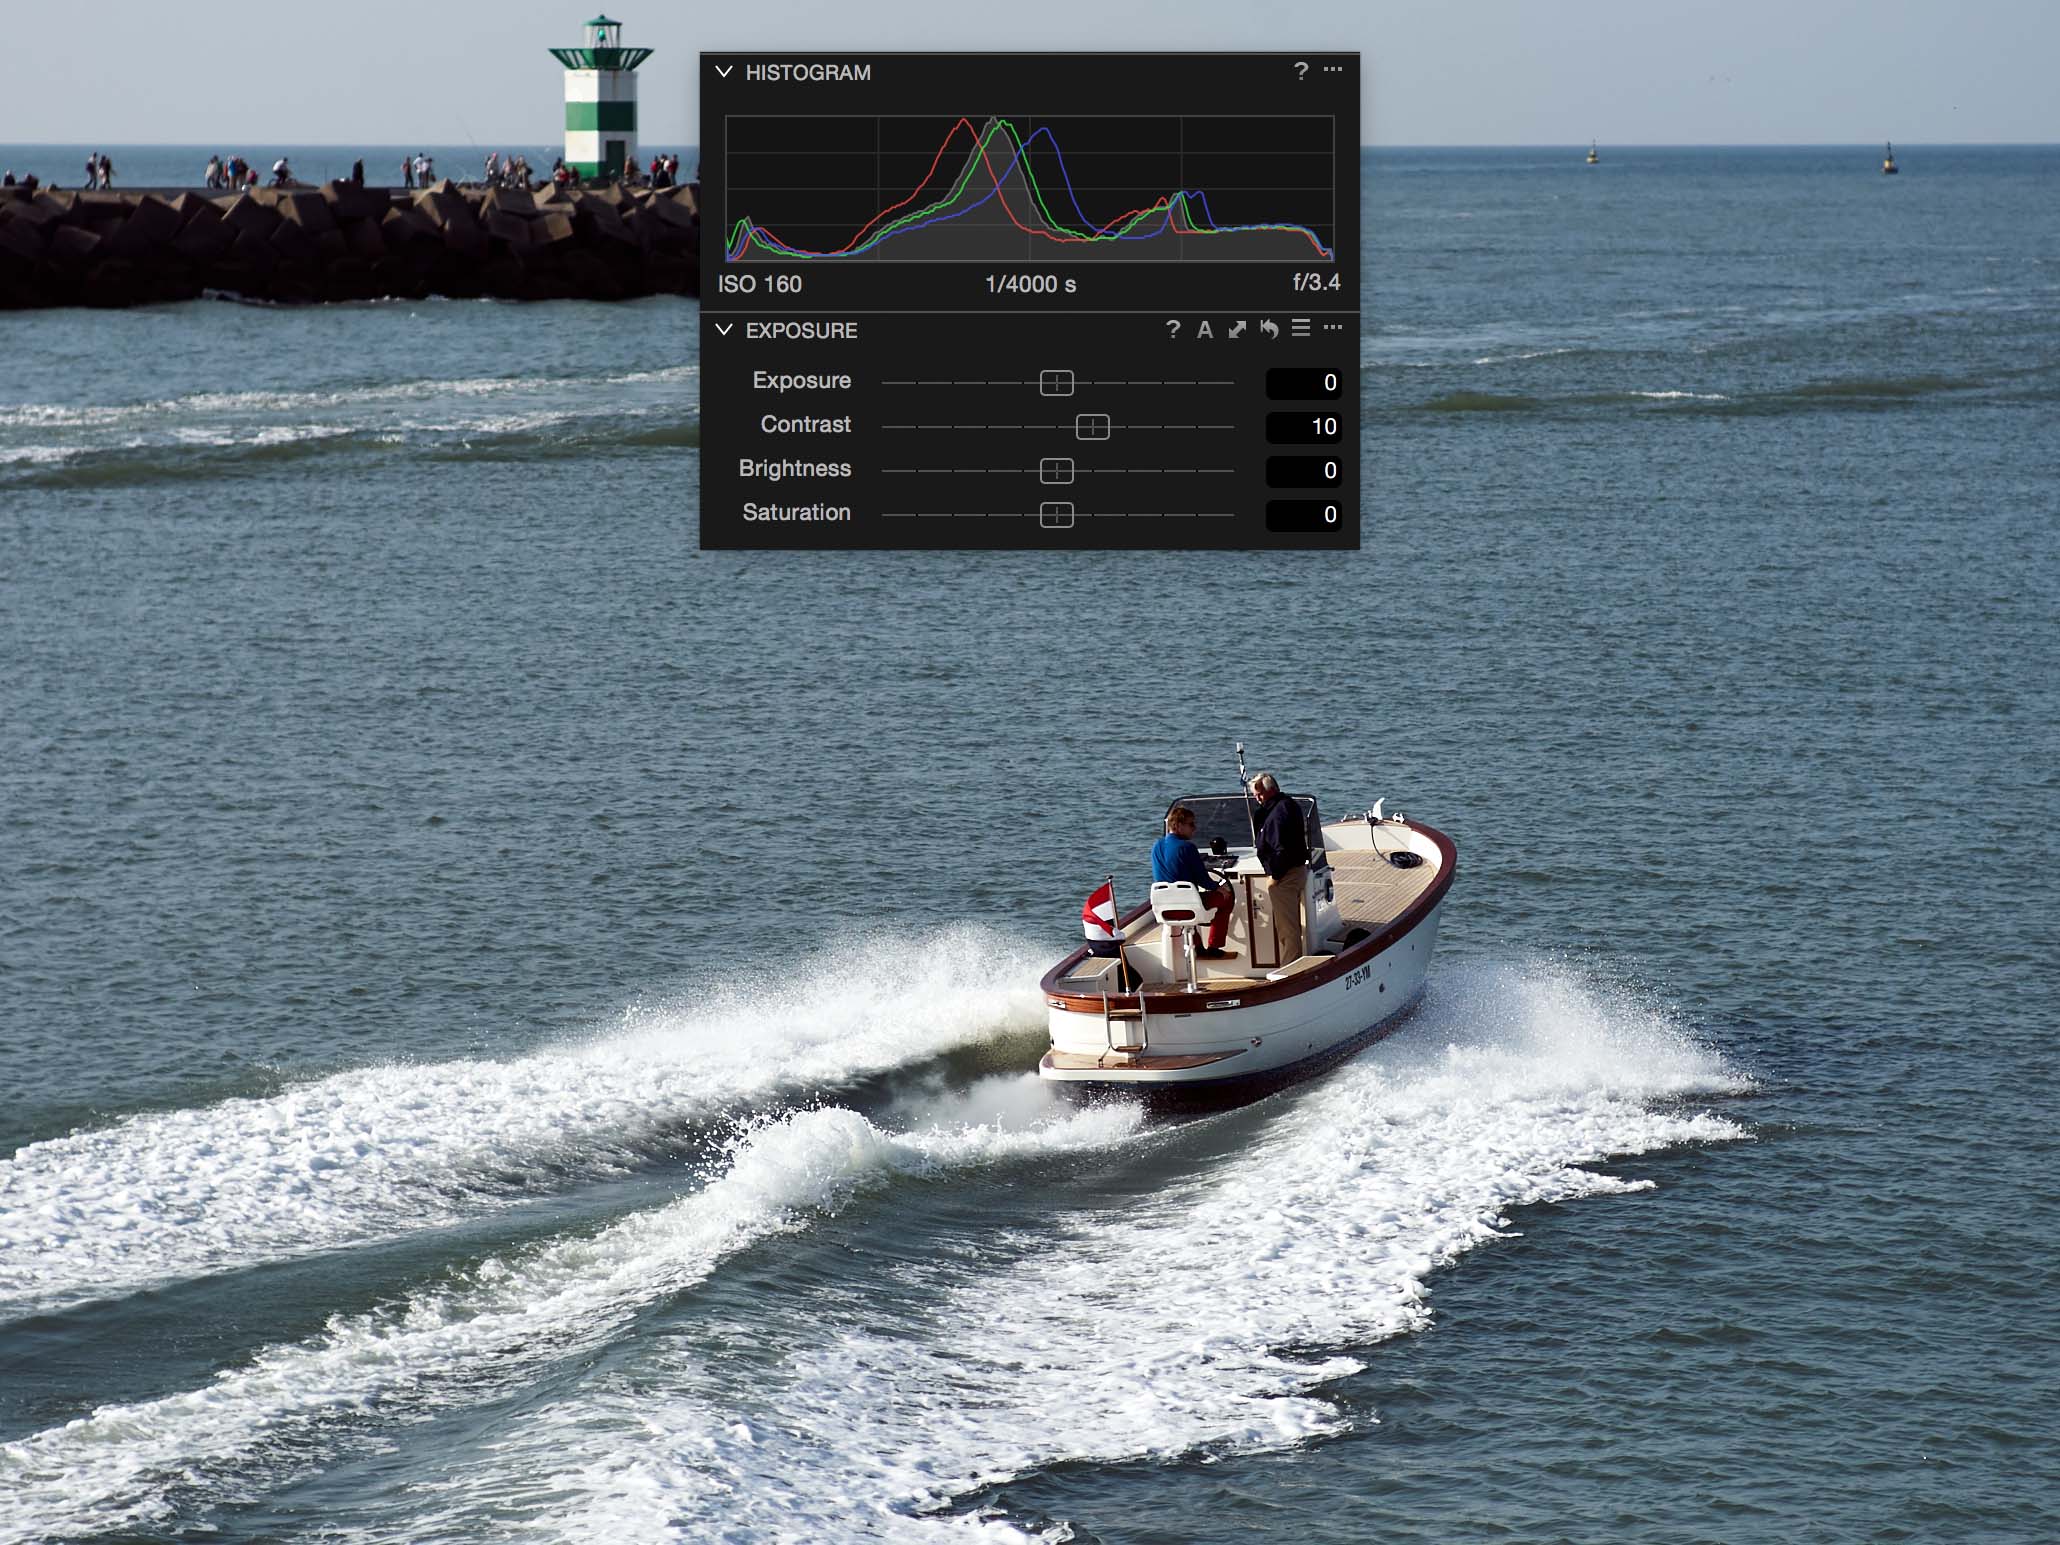
The example above gives you the idea of what Contrast does. Overall brightness is not affected, but the distribution of brightness levels is changed.
Obviously, when you increase the contrast clipping can occur. That is why it is important to set the Exposure slider first.
Tip: if you really need to raise the contrast considerably, you could also use a High Contrast film curve in the Base Characteristics tool.
Brightness Slider
This slider effectively moves the mid-tones around, to the left (negative adjustment) or right. The effect on the outer edges of the histogram is minimal, hence the little risk of clipping. Because the Exposure slider also affects the brightness, I prefer to set that first before making finer adjustments with the Brightness slider.
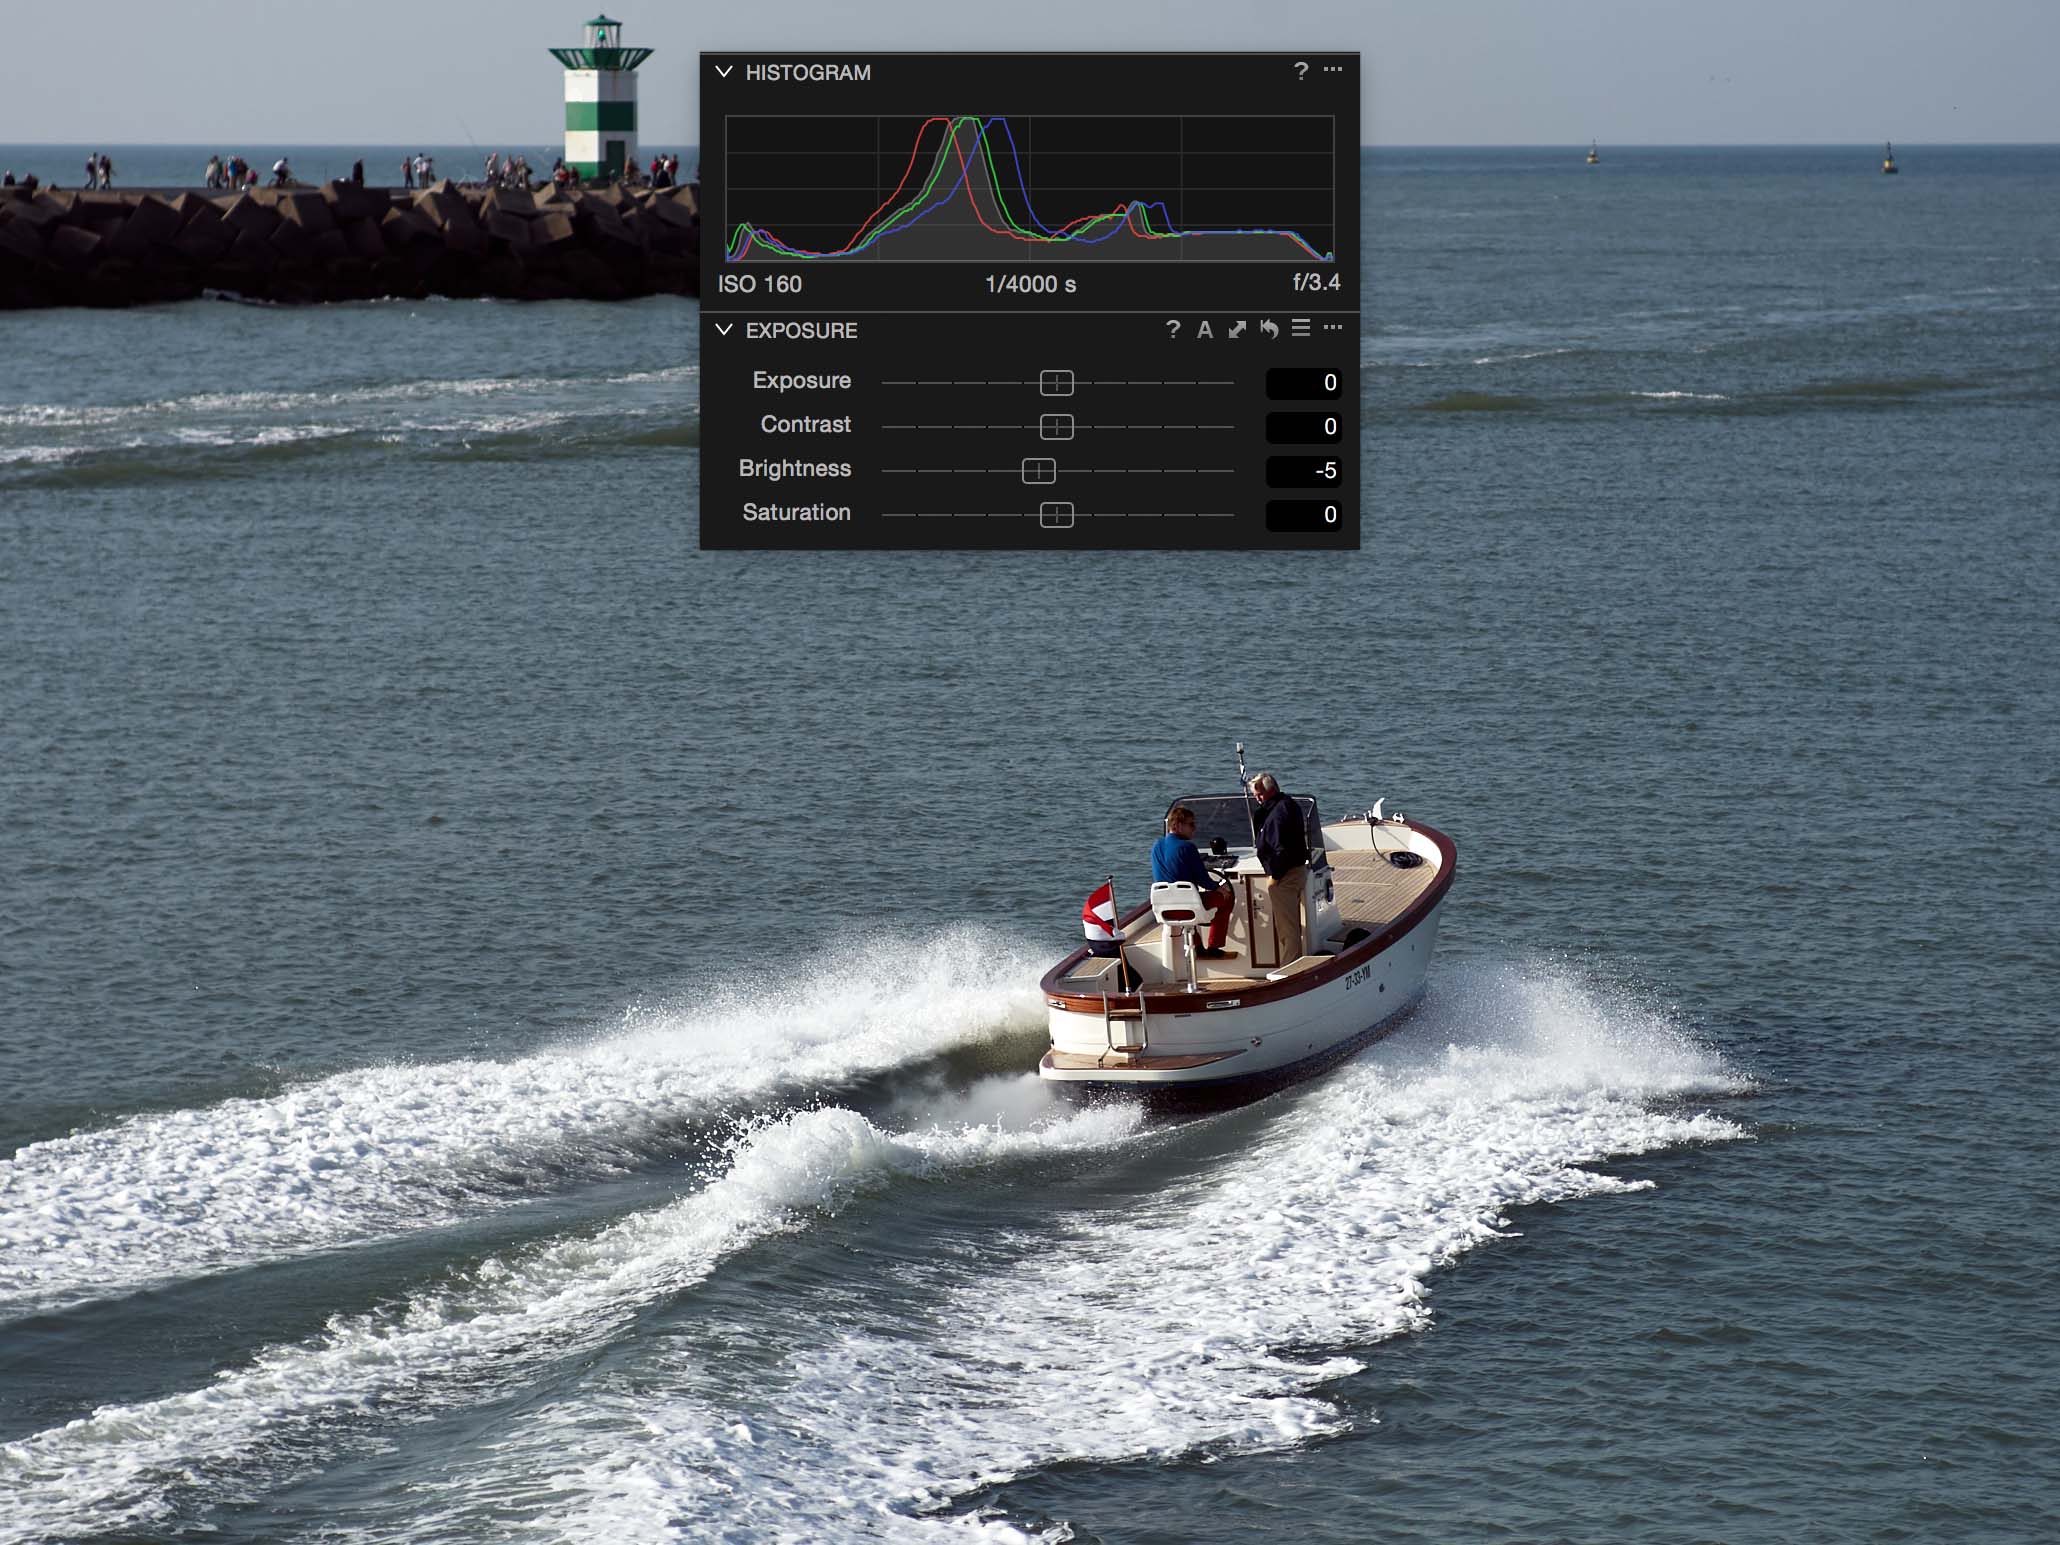
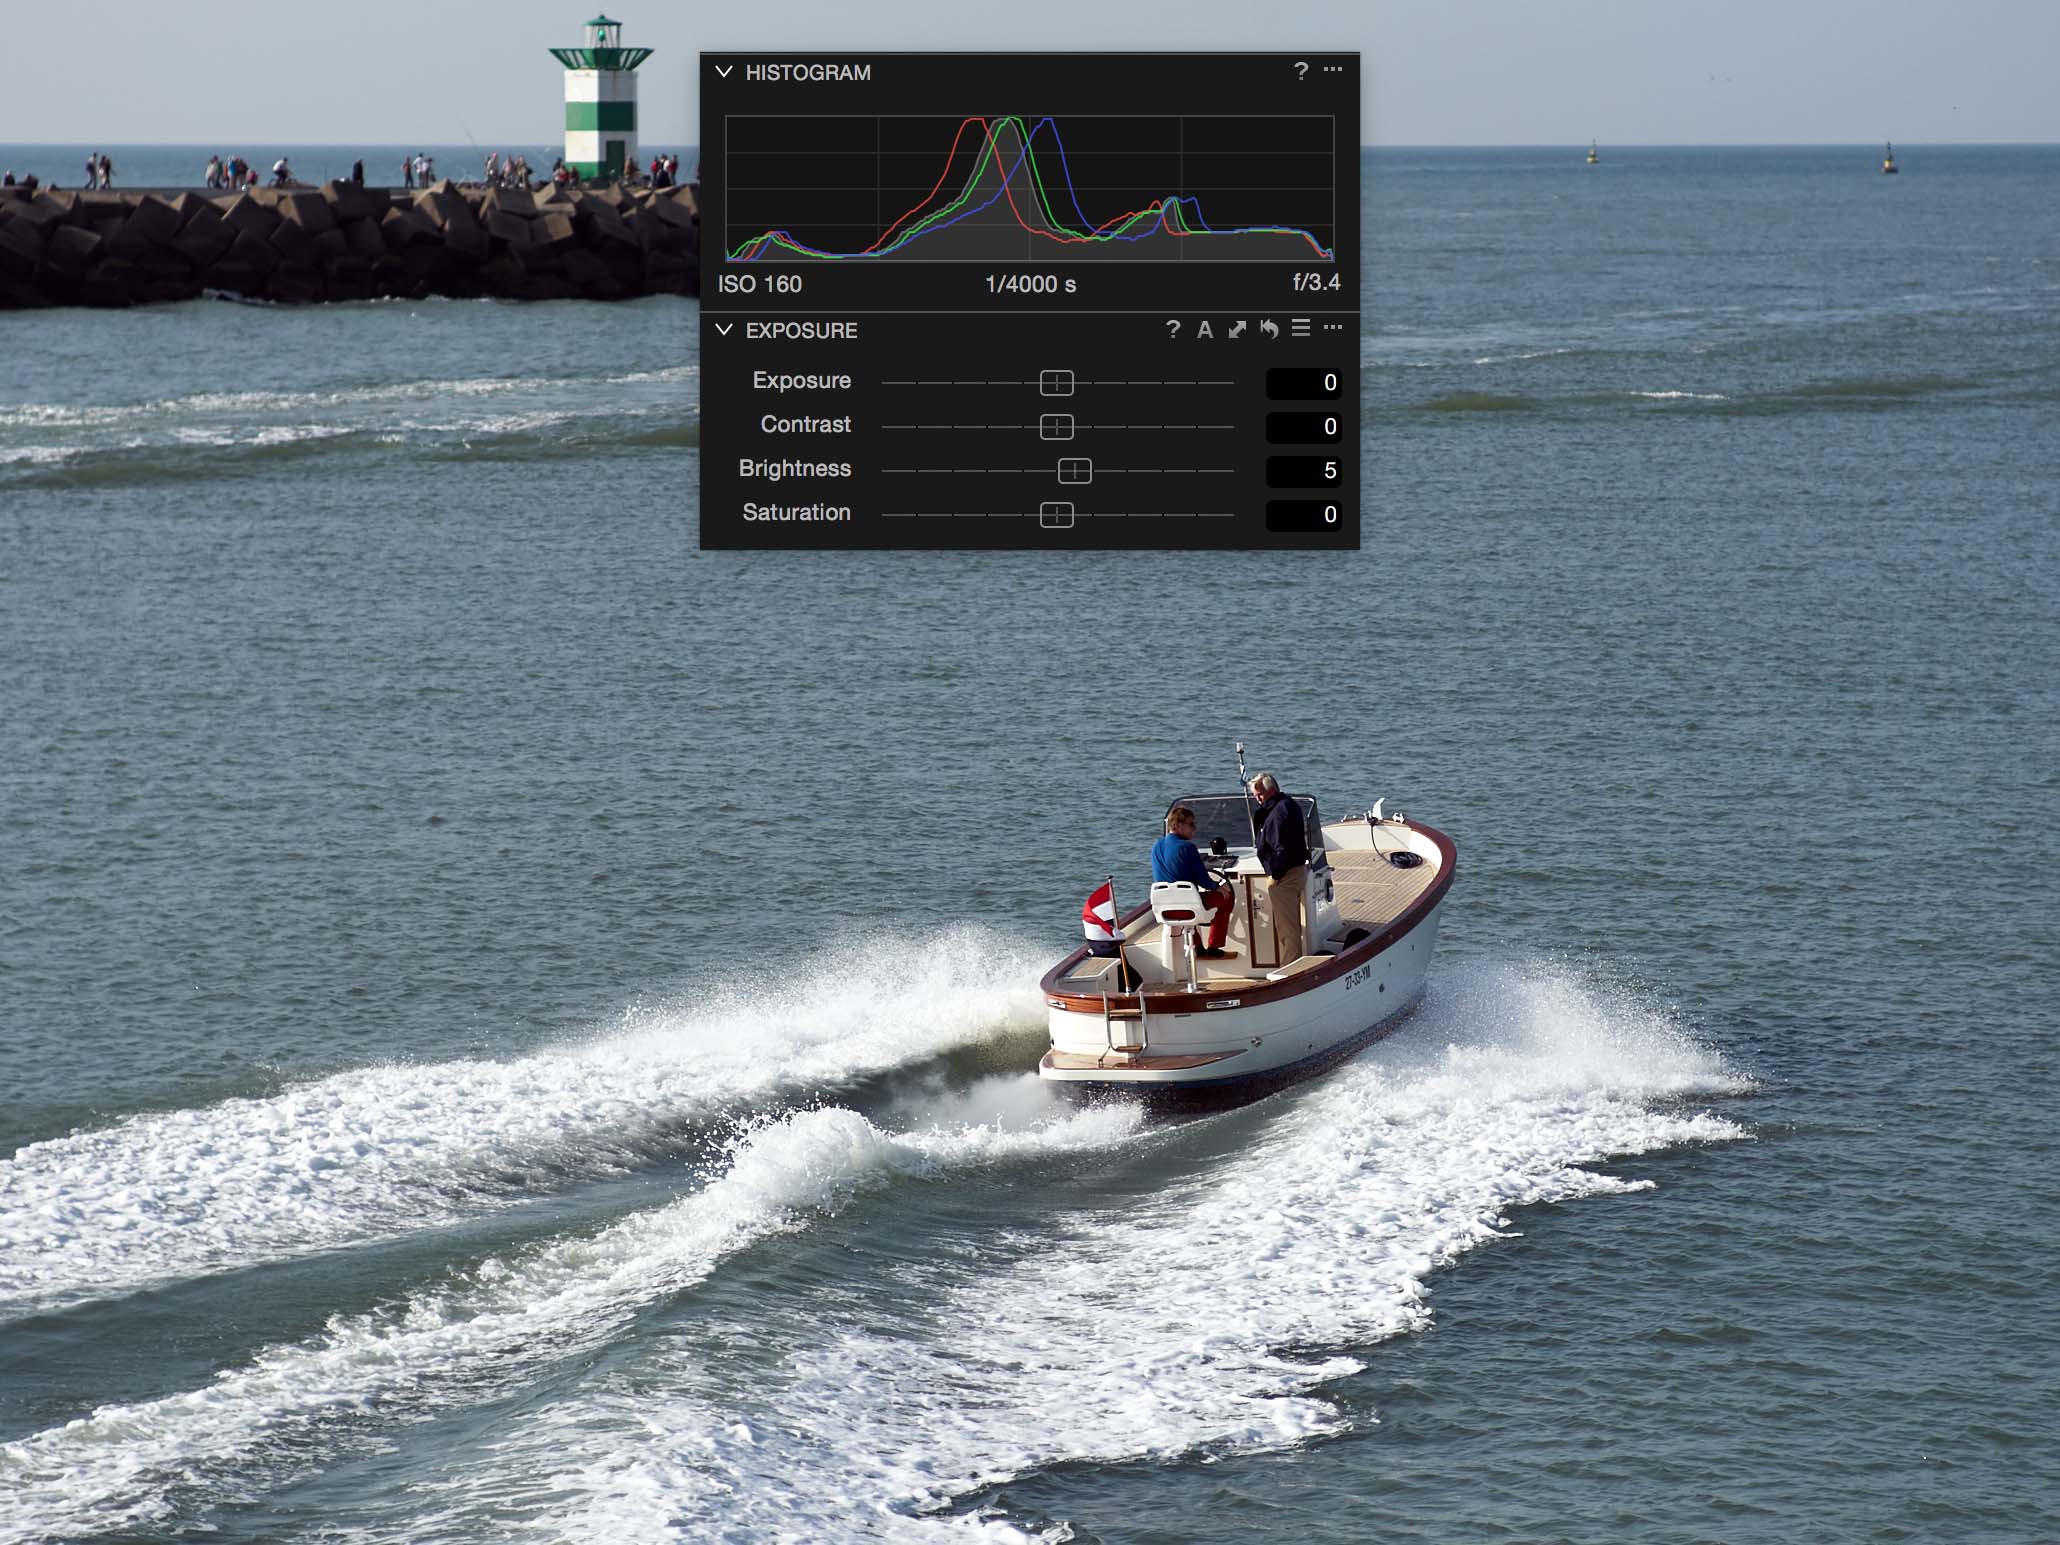
The example above shows different brightness levels (darker, brighter) but the black and white points are not affected.
The Brightness slider is by far the easiest and fastest way to adjust the brightness of the image. Other tools you can use for that purpose are the mid-tone marker of the Levels tool and the Curve tool for which I prefer much the Luma curve in Capture One 9. I will discuss these in separate blogs together with their respective presets I created. Fortunately, I also have some older blogs on Levels and on Curve.
Saturation Slider
The Saturation adjustment affects color, and color contrast in particular. Together with the Contrast and Brightness slider, you can easily create the correct tone in your image. The Saturation adjustment is smart, meaning that it is less progressive on already saturated colors when you increase saturation.

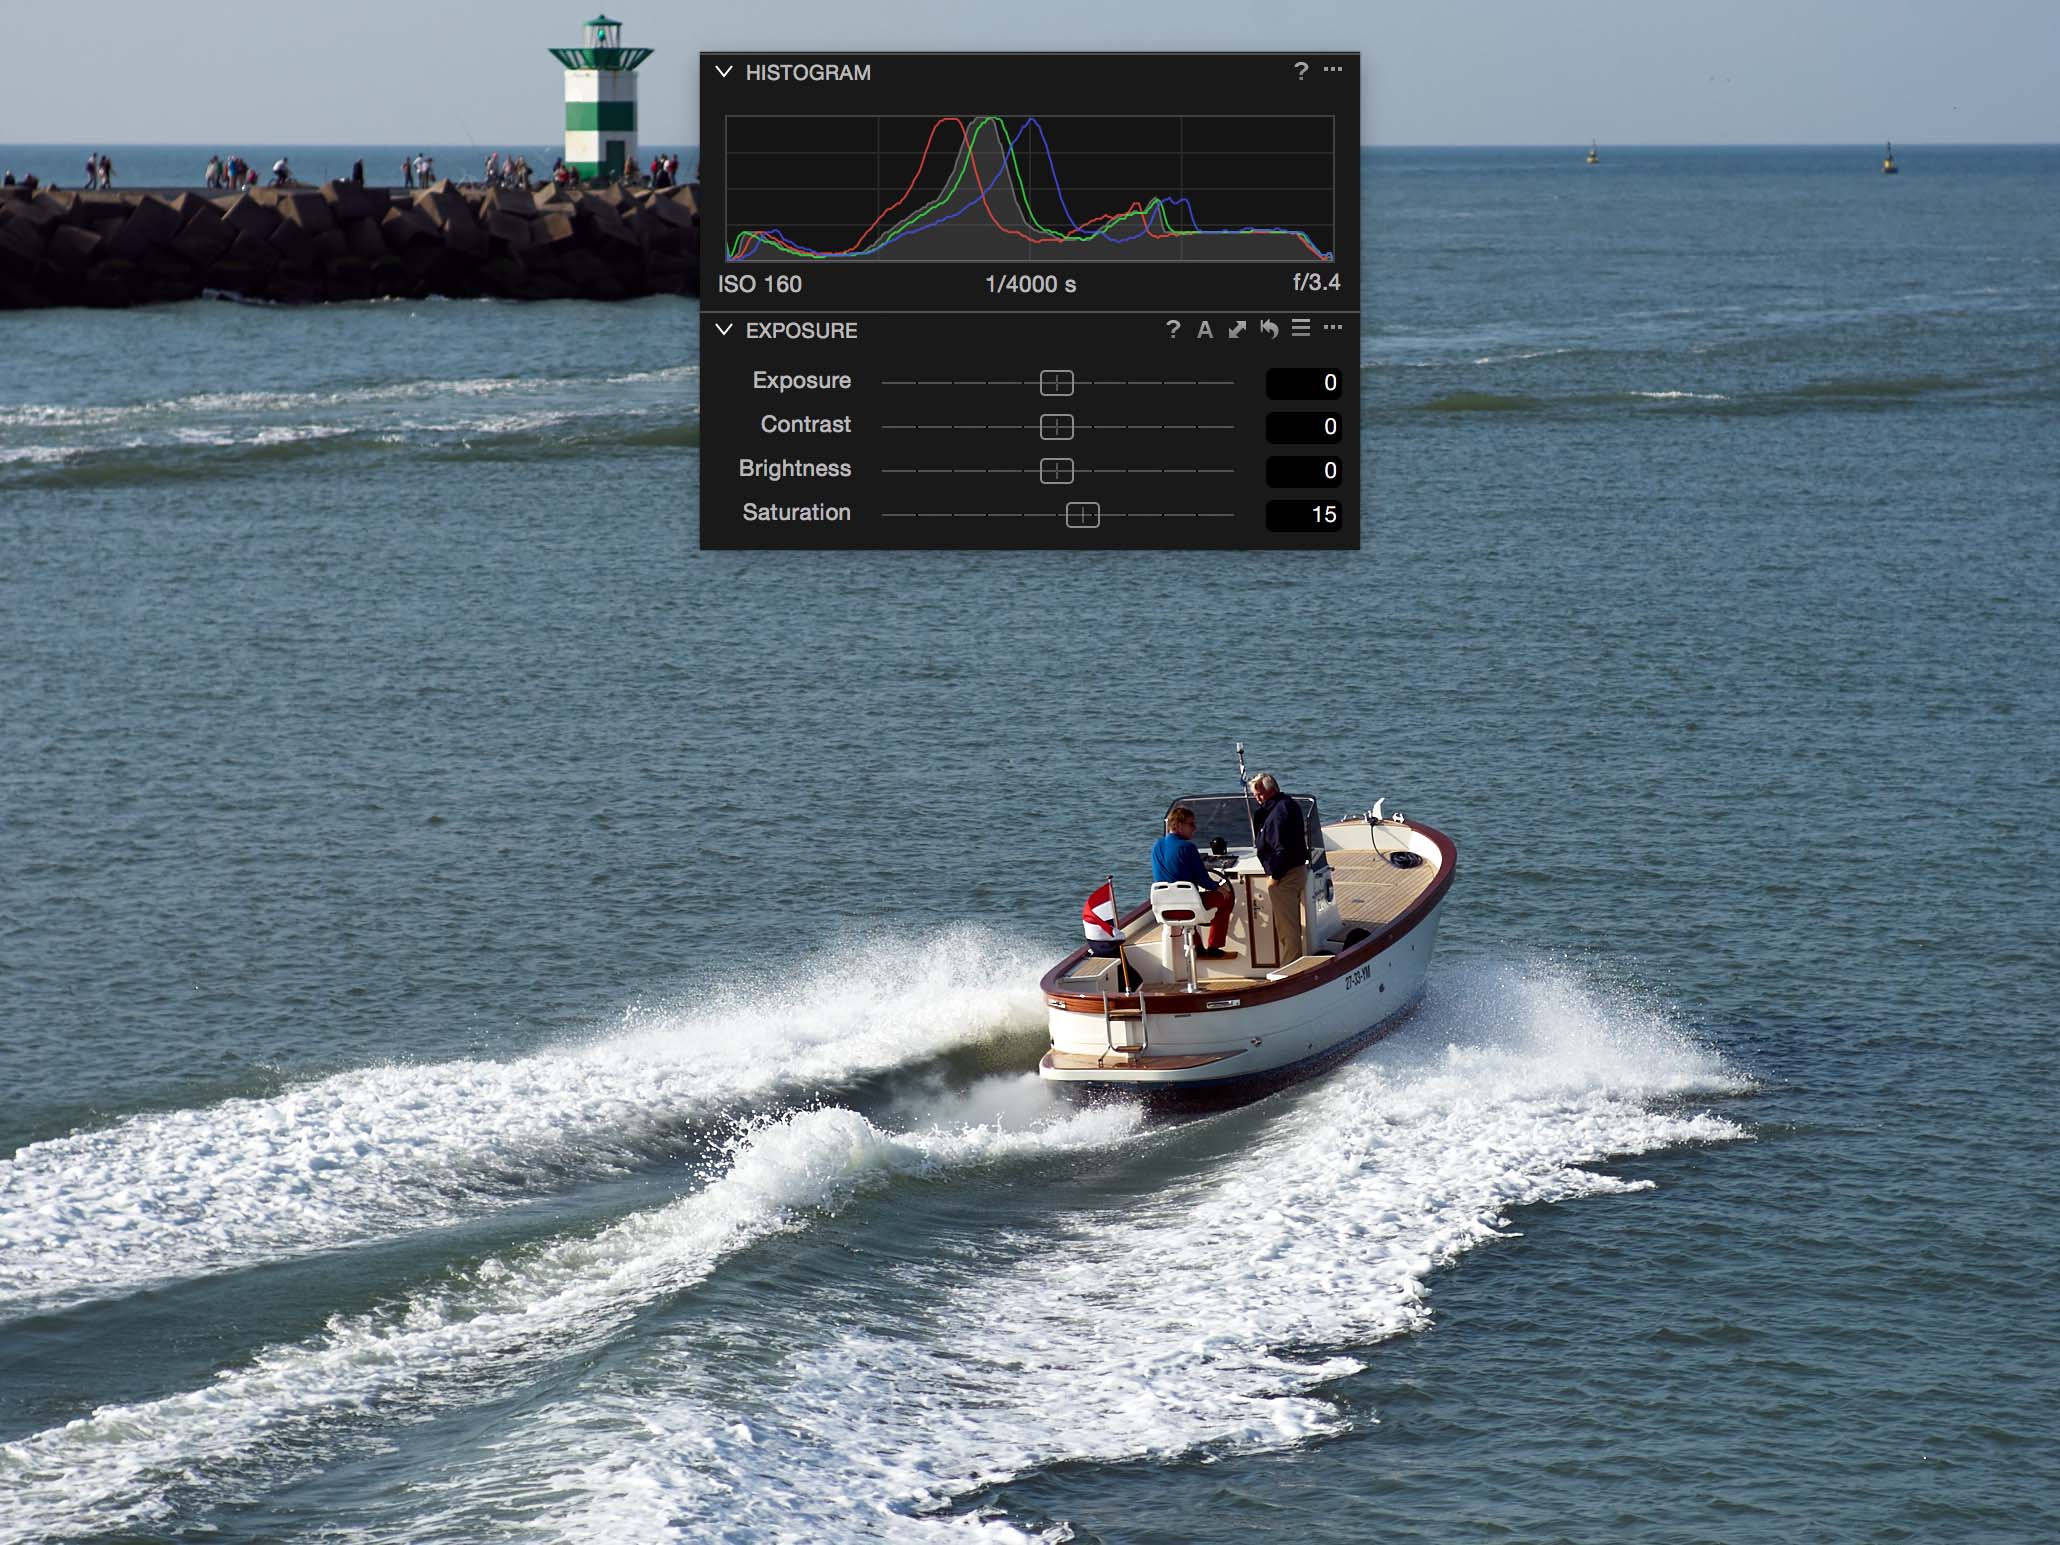
The image above shows a moderate Saturation adjustment both negative and positive. Like with the Contrast slider, the overall brightness of the image remains unaffected but the contrast, and in particular those of colors, are.
Auto-Adjust
Another feature of the Exposure tool in Capture One is Auto Adjust. There are two types of Auto Adjust in Capture One 9. One is from the Adjustments menu > Auto Adjust. This command controls different tools (configurable) but as far as the Exposure tool is concerned it adjusts the Exposure, Contrast, and Brightness sliders. The Saturation slider is not affected.
The other way of Auto Adjust is accessible from the Exposure tool’s title bar, on which you see a capital A at the right. This only affects the Exposure slider.
Note that this auto-adjust description applies to Capture One 9. Previous versions can show different behavior.
Exposure Warning
You can enable the Exposure Warning in the Viewer through the View menu > Show Exposure Warning, a shortcut or the toolbar. It is a toggle, so selecting it again switches it off.
In Capture One you can configure the Exposure Warning in the Preferences. The threshold for the warning can be set from the Preferences, Exposure tab, where you can also enable Shadow Warning. You can change the color for the warning here too if it does not contrast with the colors in your image.
Adjustments Layers
All sliders of the Capture One Exposure tool can be used in adjustments layers. Capture One adds or subtracts all the values set in the respective layers to determine the end result.
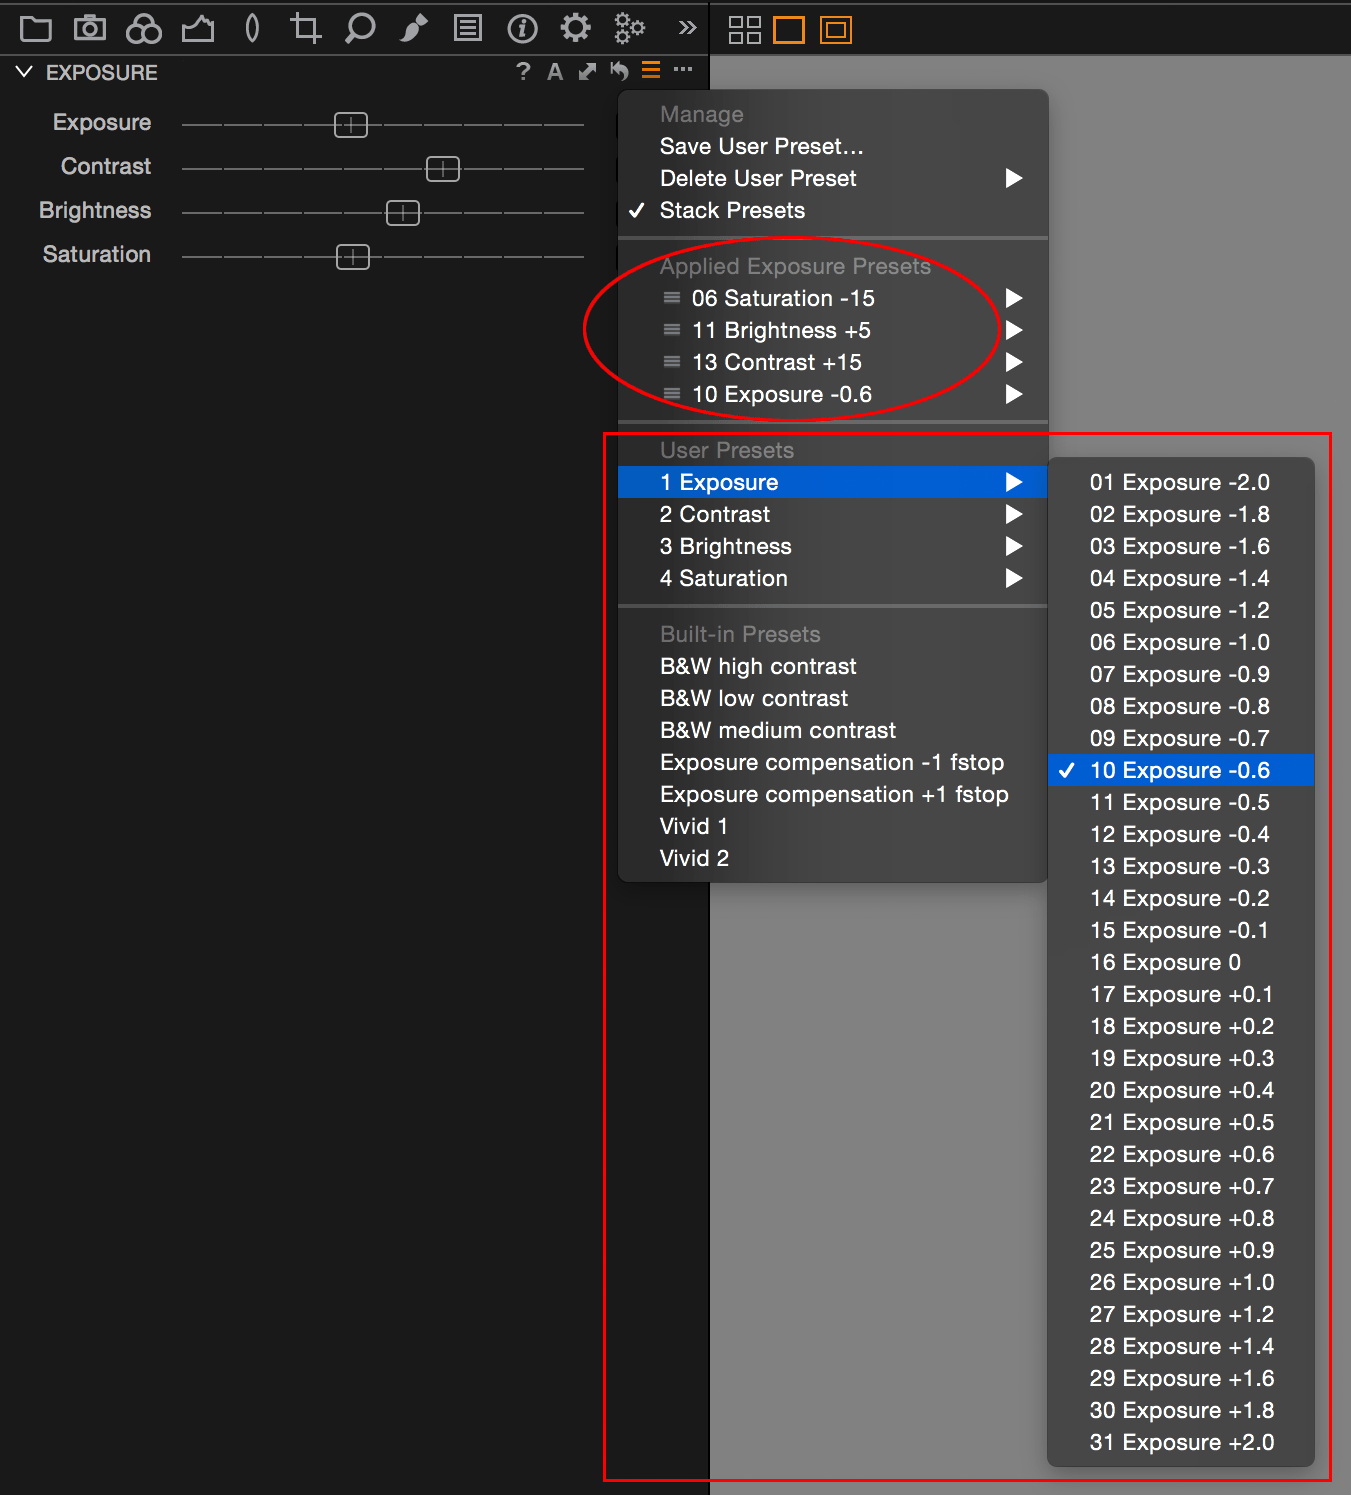
Exposure Presets
Capture One comes with a few built-in presets: different B&W contrast presets, high saturation presets, and two exposure presets. They can give you a taste of what is possible.
The Capture One Exposure presets from Image Alchemist offer a set of 75 presets that cover all the sliders of the tool. You can use all different presets individually as well as combine them through stacking.
The basic idea behind the set is that you explicitly use the presets for adjusting your images, instead of using the sliders. A combination of using preset and slider is always possible, of course. Using presets instead has numerous workflow benefits like directly adjusting multiple images simultaneously and having an adjustment history. You can find more details in the Capture One Presets blog.
Related Tools
Several tools relate to the Exposure tool in Capture One, meaning that you can achieve similar results with these other tools or that these other tools are affected by the Exposure tool or vice versa.
- The Histogram tool shows all the changes you make on the Exposure tool tab.
- The High Dynamic Range tool can be used in conjunction with the Exposure slider.
- The Levels and Curve tools can also change contrast and brightness. These tools are affected by adjustments made with the Exposure tool, so that comes first.
- The Vignetting tool is actually an Exposure slider, but not equally working on the entire image, hence the vignette
- The Clarity tool is a kind of micro-contrast tool and should be used in balance with the Contrast slider.
- Cropping is a tool you might not expect here, but consider cropping before you use an automatic adjustment. Cropping out a bright sky has a great impact on the Auto Adjust!
- The renewed Color Balance tool got three new color wheels for shadow, mid-tone, and highlight. These have a kind of brightness adjustment, but different from the Brightens slider. I cover this tool later in a blog.
Thank you
For reading. Please feel free to leave a comment. Like us on Facebook or subscribe to our newsletter to stay informed about new blogs.
Best Regards,
Image Alchemist







Leave a Reply
Want to join the discussion?Feel free to contribute!