Capture One Levels (part 2)
The Capture One Levels tool is your next stop in your adjustments workflow after you have set exposure and contrast. But what does the Levels tool actually do and why is it so important to use this tool in Capture One? We started with part 1 and continue here to dig deeper. Read on.
Capture One Levels (part 2)
In Capture One Levels (part 1) I showed you the basics. I entirely focussed on the controls at the bottom of the histogram, the so-called Input Levels.
We now shift gear and take a look at the controls at the top, the so-called Target Levels. There are two of them, the Target Black Point and Target White Point respectively.
Where the base or input levels are for generic use, the target or output levels are more for the advanced user. I will explain how it works.
Output Levels
You have determined the darkest and brightest points in your image and set the black and white points where necessary. The next question is: how dark and how bright needs the output to be?
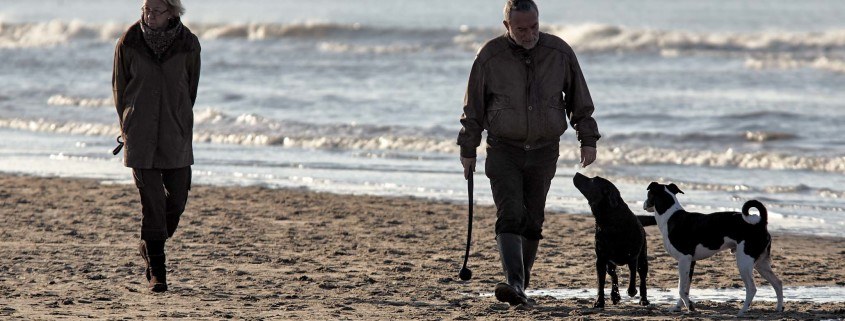
The default range from 0 to 255 goes from the darkest target level zero (0) up to the brightest of 255. To explain this in detail, let us take the image above.
Set the black point level 26. This means that this level and all lower levels represent the darkest tones in your images. Now, at the top, you see the Target Black Point set to 5. This means that on output the darkest value in your image will have a level of 5.
In a similar way, you see that the white point is set to level 247. This level and all the above represent the brightest value in your image. Now, at the top, you see the Target White Point set to 250. This means that on output the brightest value in your image will have a level of 250.
The default 0 and 255 target levels are considered fine for viewing images on the screen and for the web. But for printing and pre-press this is often not desirable. The limited density range of a reflective image may need adjusted output levels, from 5 to 250 for example.
In addition, when preparing for pre-press which will convert your image to a CMYK color space, some headroom is necessary at the end of the histogram. A non-clipping image in RGB might be clipping in one of the CMY channels, with unexpected color casts in the printing as a result.
Similar Tools
The Levels tool is not the only tool in Capture One that does affect the tonal range of your image. There are several similar tools. You might ask yourself “when do I use which tool?”
In the Exposure tool, you have the Brightness slider. I was not much a fan of it but since Capture One 9 it is doing a great job. The working has a great similarity with the Mid Tone control of the Levels tool. Which one to use?
If you do not need the Levels tool’s black and white point, like with high dynamic range images, you might like to adjust Exposure and Brightness from the Exposure tool. Vice versa, with black and white point adjustments in place, the Mid Tone control makes more sense than the Brightness slider from the Exposure tool.
The Curve tool has been enhanced since Capture One Pro 8 in that you can move the endpoints of the Curve. The result is similar to adjusting the black point and white point. Also, with a Curve, you can mimic the Mid Tone adjustment.
Which to use? It all depends on which tool you prefer to work with. The Levels tool has an Auto Adjust which the Curve tool lacks. In general, the Levels tool is faster to work with.
I will discuss the Curve tool in detail in an upcoming blog but have already done so in the past in Create your Atmosphere with Curves.
Preferences
In the Preferences, Exposure tab you can find three settings that relate to how the Levels tool work.
Channel Mode
First, you have the Channel Mode where you can choose between:
- RGB Channel
- Red, Green, and Blue channels
The selection of the Channel Mode affects which channels are affected by Auto Adjust on the Levels tool, and which channel(s) have the Shadow and Highlight picker.
Note that the generic Auto Adjust from the Adjustments menu or the toolbar is always working on the RGB channel, independent from the channel mode set.
Pick Target Levels
This option has to be enabled first with the checkbox. It relates to the use of the Shadows and Highlights picker. With these pickers, you set the base Levels (input), but additionally, you can set the Target Levels (output) too to predefined values. Here you can set these values.
Auto Levels Clipping Thresholds
The third option is related to the Auto Adjust feature, both the generic as well as the one on the tool. Here you can set the percentage of pixels that may be clipped when you use Auto Adjust. The default is 0.10% for both Shadows and Highlights Levels.
Capture One Levels RGB Presets
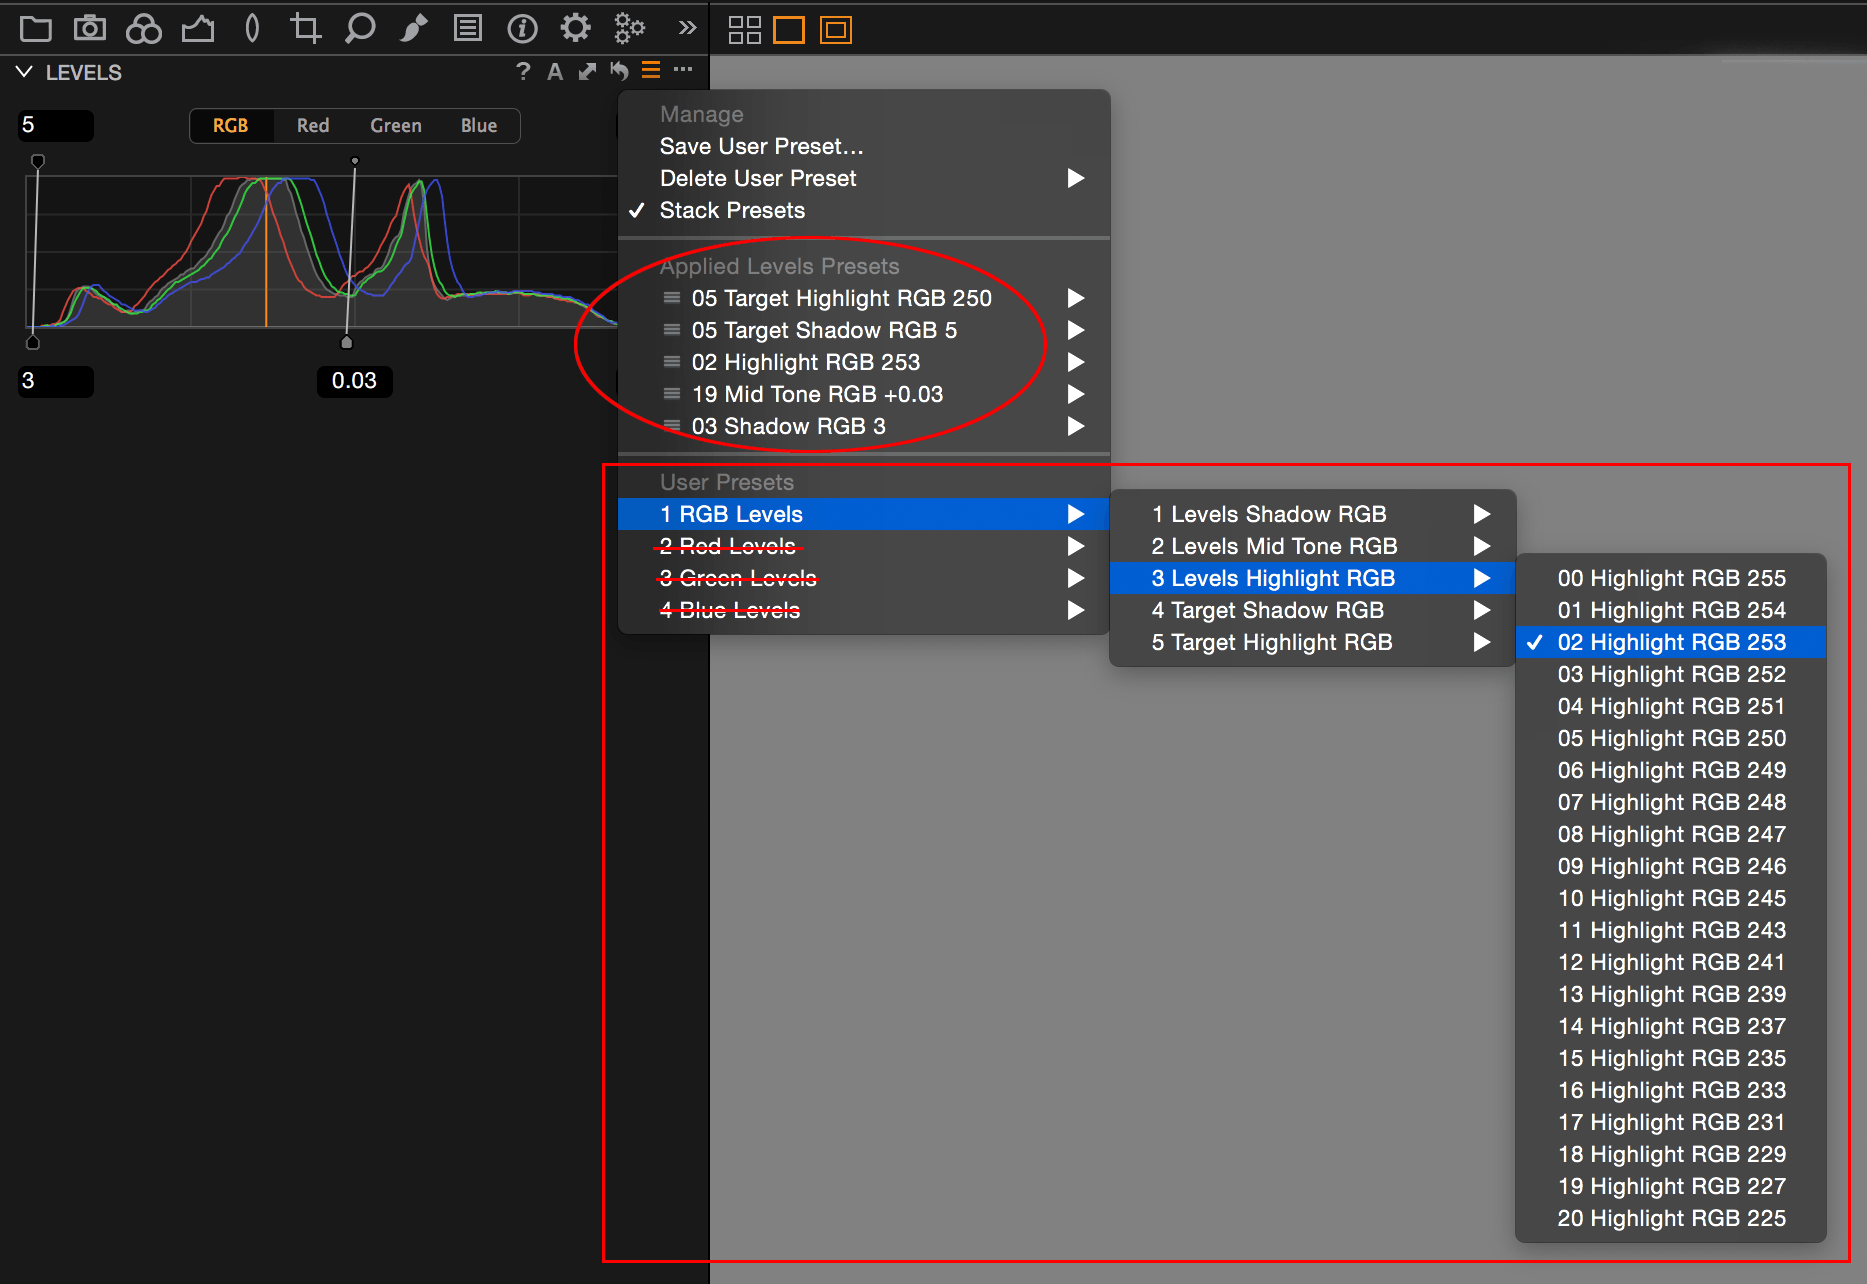
Capture One Pro does not come with built-in presets. The Image Alchemist has created two extensive sets with presets for the Levels tool. One is for the RGB channel, the other set is for the Red, Green, and Blue channel combined. There are 115 presets per channel in each set.
The set mimics the different controls in a series of Presets. Hovering your mouse over a list allows you to review the effect of each adjustment and select your best with a click.
You will find lists of adjustments as presets in 5 folders, one for each control:
- Levels Shadow RGB / Mid Tone RGB / Highlight RGB
- Target Shadow RGB / Highlight RGB
Note that the presets in this set work beyond normal operation. The preset save-option of the Levels tool allows you to select either the Levels (3 controls combined) and/or Target Levels (2 controls combined).
With the set from the Image Alchemist, you have individual control of all 5 control handles. Even more, with stacking enabled, you can apply presets for all 5 controls independently and simultaneously. Note that this is currently supported only on Mac.
You are encouraged to run a test with the free trial set. Please visit the separate download pages for the Capture One Levels RGB and for the Capture One Levels Channels sets respectively.
Summary
You now have learned that the Levels tool in Capture One Pro is extremely powerful and very versatile. The tool greatly affects the look of your images. The adjustments you make with this tool can – for a part – not be achieved with other tools.
It is best to get familiar with the tool one step at a time. The steps, beginning with the RGB channel, are:
- understanding the input levels (black point, white point, mid-tone) at the bottom
- becoming familiar with the controls by dragging with the mouse, enter values, or use Auto Adjust, the cursor tools, or presets (see below)
- understanding the output (target) levels and their application
- setting Auto Adjust thresholds in Preferences
As you might have noticed, you have similar Levels and Target Levels control handles in the separate color channels, Red, Green, and Blue. In the next and last Capture One Levels (part 3) of this series, I will look into these Color Channels with you.
Thank you
For reading. Please feel free to leave a comment. Like us on Facebook or subscribe to our newsletter to stay informed about new blogs.
Best Regards,
Image Alchemist


Leave a Reply
Want to join the discussion?Feel free to contribute!