Using Tangent with Capture One Pro
Tangent devices are high quality input devices well known among movie editors. They let you control sliders, toggles and wheels in the software in a more natural way. The result is a faster and more accurate workflow. Read on for my review on Tangent hardware and software solutions.
Using Tangent With Capture One Pro
With the release of Capture Pro 10, I became aware of the existence of Tangent input devices. What are they and what are the benefits of having those tools on your desk?
Phase One offered me a line of four Tangent Element devices for review. Here you read experience with them.
What is Tangent?
Tangent Wave Ltd is a UK based manufacturer of high-quality input devices. They sell a number of products like the Ripple, the Element series, and the Wave. In addition, there is an iPad software emulation called Element-Vs in both a free and paid version.
All tools aim to give you a better – say more analogous – control through buttons, knobs, and trackerballs.
Tangent Element
In this review I discuss the four Element devices, aimed at the high-end:
- the Element-Bt or Button (1U)
- the Element-Kb or Knob (1U)
- the Element-Mf or Multifunction (2U)
- the Element-Tk or Trackerball (3U)
The addition 1U, 2U, and 3U designate the width meaning a 1, 2, or 3 unit size. The unit width is 11 cm or 4.33 inches. You can physically connect multiple devices with a magnetic pin to allow them to line up nicely on your desk.
Each Element device is connected with a USB cord to your system. A powered USB hub or Thunderbolt docking device is recommended to service multiple Element devices on a single system.
Build Quality And Setup
Each Tangent Element is a sturdy device with a nice touch of rubberized finish on its surface. The buttons have clear tactile feedback when pressed. The knobs turn fluidly but not too easy and have a subtle but clear tactile feedback when pressed.
The trackerball feels smooth and accurate when rotating. The ball feels heavy enough but not too much. The ring around the trackerball moves smoothly as well.
To summarise, very well build stuff, easy to handle, expected to last long.
Installing Tangent Hub
Setting up the Element devices with Capture One Pro requires a one-time installation of the Tangent Hub software. You can download the software from the Tangent website support page. The download is application-specific, so you select Phase One Capture One Pro from the list of supported applications.
Note that the Tangent Hub software links deeply into Capture One Pro. This results in the fast and reliable control of all the adjustments it can control. Tools and switches that you control do not need to be visible on your monitor. For example, you adjust Exposure while Capture One has the Color tool tab selected. Keyboard shortcuts, which you may have altered, are bypassed and do not interfere with the Tangent Elements working.
You need at least Capture One 10 and it works with Pro, Pro (for Sony) and DB. Make sure that you have enabled Tangent Integration in the Preferences, which is the default. You can find more on Preferences in my post Capture One Preferences (part 1).
Elements One By One
The Tangent Element family has four members, as outlined above. I will look into each one in more detail. I start with the smallest and end with the largest.
The kind of controls you get are buttons (on/off), knobs (rotate and press to reset), and the trackerball with ring (roll and turn) plus reset buttons. In addition, it has each Element device an A and B button.
Note that what all controls do in Capture One is already predefined but can be changed to your liking. I will explain that below, see Tangent Mapper.
From A To B
When you press Button A or Alternative, you give a control (button, knob, ball, ring) a different function. It is like the Shift-key on the keyboard, changing a lowercase character into uppercase. On release, the original function of the control is reinstated.
Pressing Button B or Bank switches all controls to the next series of functions. For example, the Element Bt has 12 buttons that are linked to 12 functions. Press B (and release) and you have another 12 functions at your disposal.
Devices have two or three banks and repeatedly pressing the B button rotates through all banks.
Element Bt
The Element Bt, which stands for Button, has a display, 12 buttons in a 3×4 configuration, and an A and B button at the bottom. The display shows the function of the buttons. The Element Bt is great for toggles and switches in Capture One Pro.
The top 3 buttons control the Exposure Warning, Focus Mask and Grid & Guidelines for example. The 3 buttons at the bottom show/hide the Tools, the Viewer, and the Browser respectively. Both the A and B buttons are not configured in the predefined mappings.
Yes, you can do all this from the keyboard as well if you know the shortcuts. But now comes the interesting part: despite knowing the shortcuts, using physical buttons is a totally different experience. I am intrigued, but let’s move on.
Element Kb
The Element Kb, which is short for Knob, has a similar layout as the Element Bt with a display, 12 knobs in a 3×4 configuration, and an A and B button at the bottom. Note that you can not only rotate but also and press each knob, and that is how it becomes more interesting. The Element Bt is great for controlling sliders in Capture One Pro.
The four left knobs control the four sliders of the Exposure tool. You can also find controls for the Clarity, High Dynamic Range, White Balance, Vignetting, and Purple Fringing tool. But that is not all. Press the B button and the knobs control another 12 sliders, and press again for the third set of 12 controls.
Now for some fun:
- press a knob and the sliders reset to the default (often zero) position
- with a slider in the default position, a small square next to the name is displayed
- when turning a knob a scale and the current position is displayed
My conclusion is that the Element Kb is a powerful input device that allows you to remove a lot of tools from your Capture One workspace, and send your keyboard and mouse/trackpad for a vacation.
Element Mf
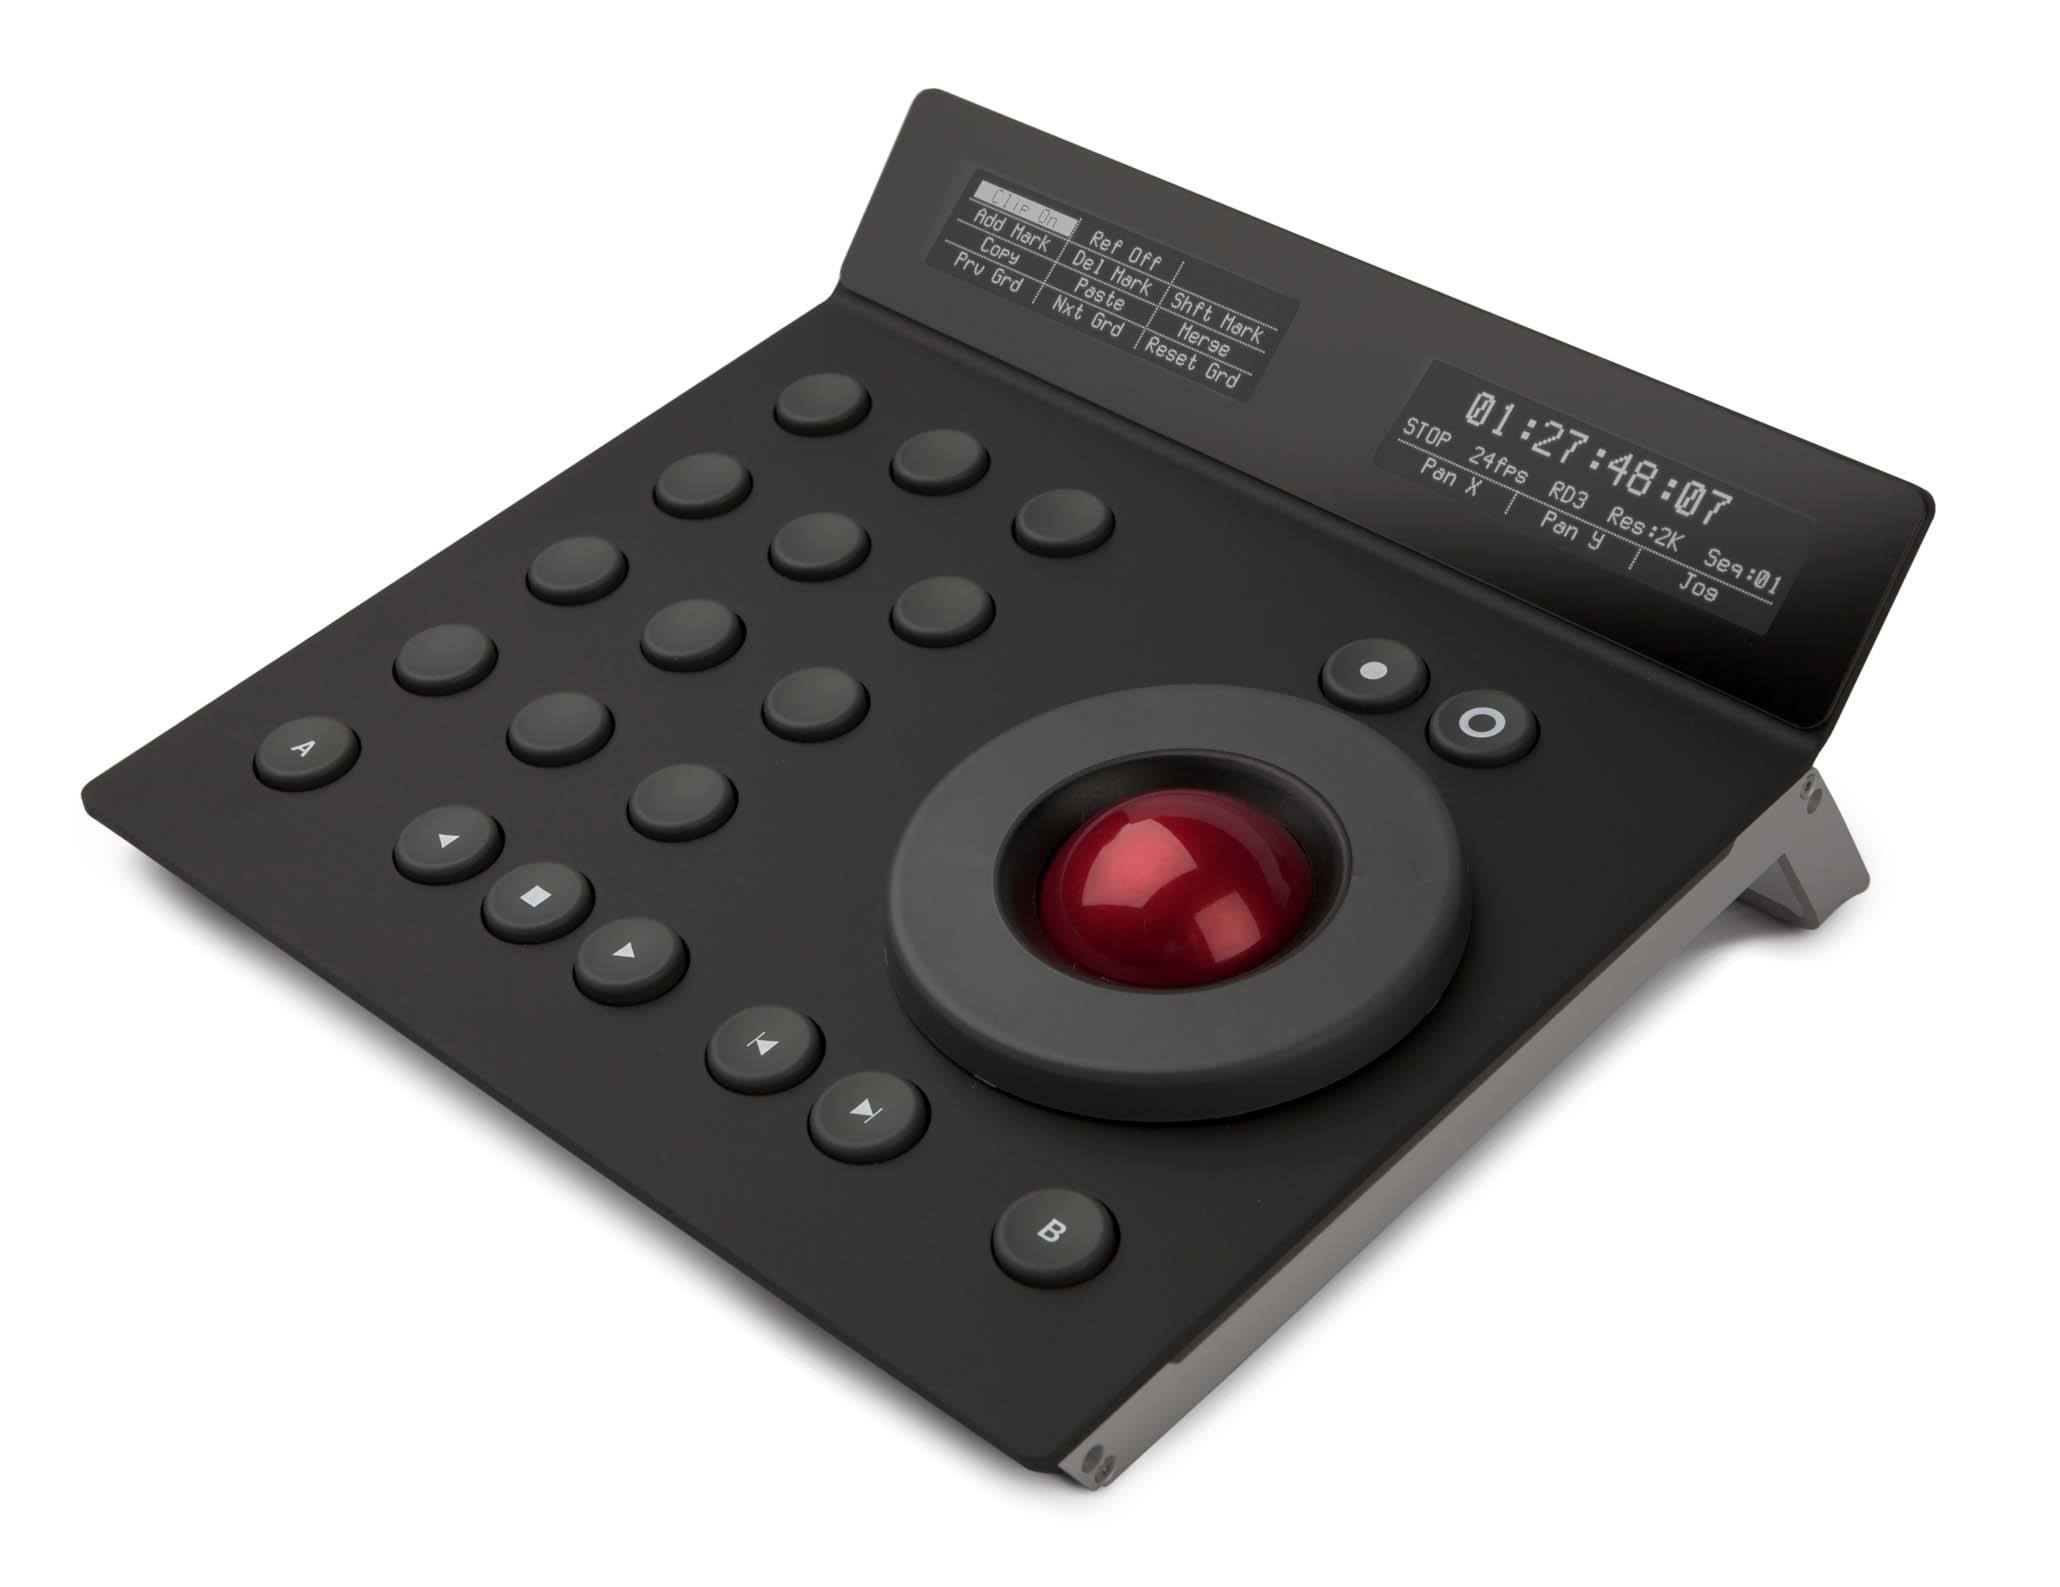
The Element Mf, short for Multifunction, is a 2U sized device with 12 buttons, a trackerball, forward/backward buttons, two displays, and an A and B button.
The Element Mf is actually two units glued together. One is a series of 12 buttons like the Element Bt. The other is the trackerball with a ring and a reset button for each one.
The knobs control Black & White, Auto Adjust, Analyze (chromatic aberration), and Layers on the first bank. On the second bank, it controls Color Tags, Selections and Albums.
The trackerball is dedicated to the overlay feature. Position the overlay with the ball, size with the ring and opacity with the A-button and ring. There are also two knobs above the trackerball for reset size and reset position. I was immediately sold on this one. If you used the overlay a lot. Try the Element Mf, you are hooked.
Element Tk
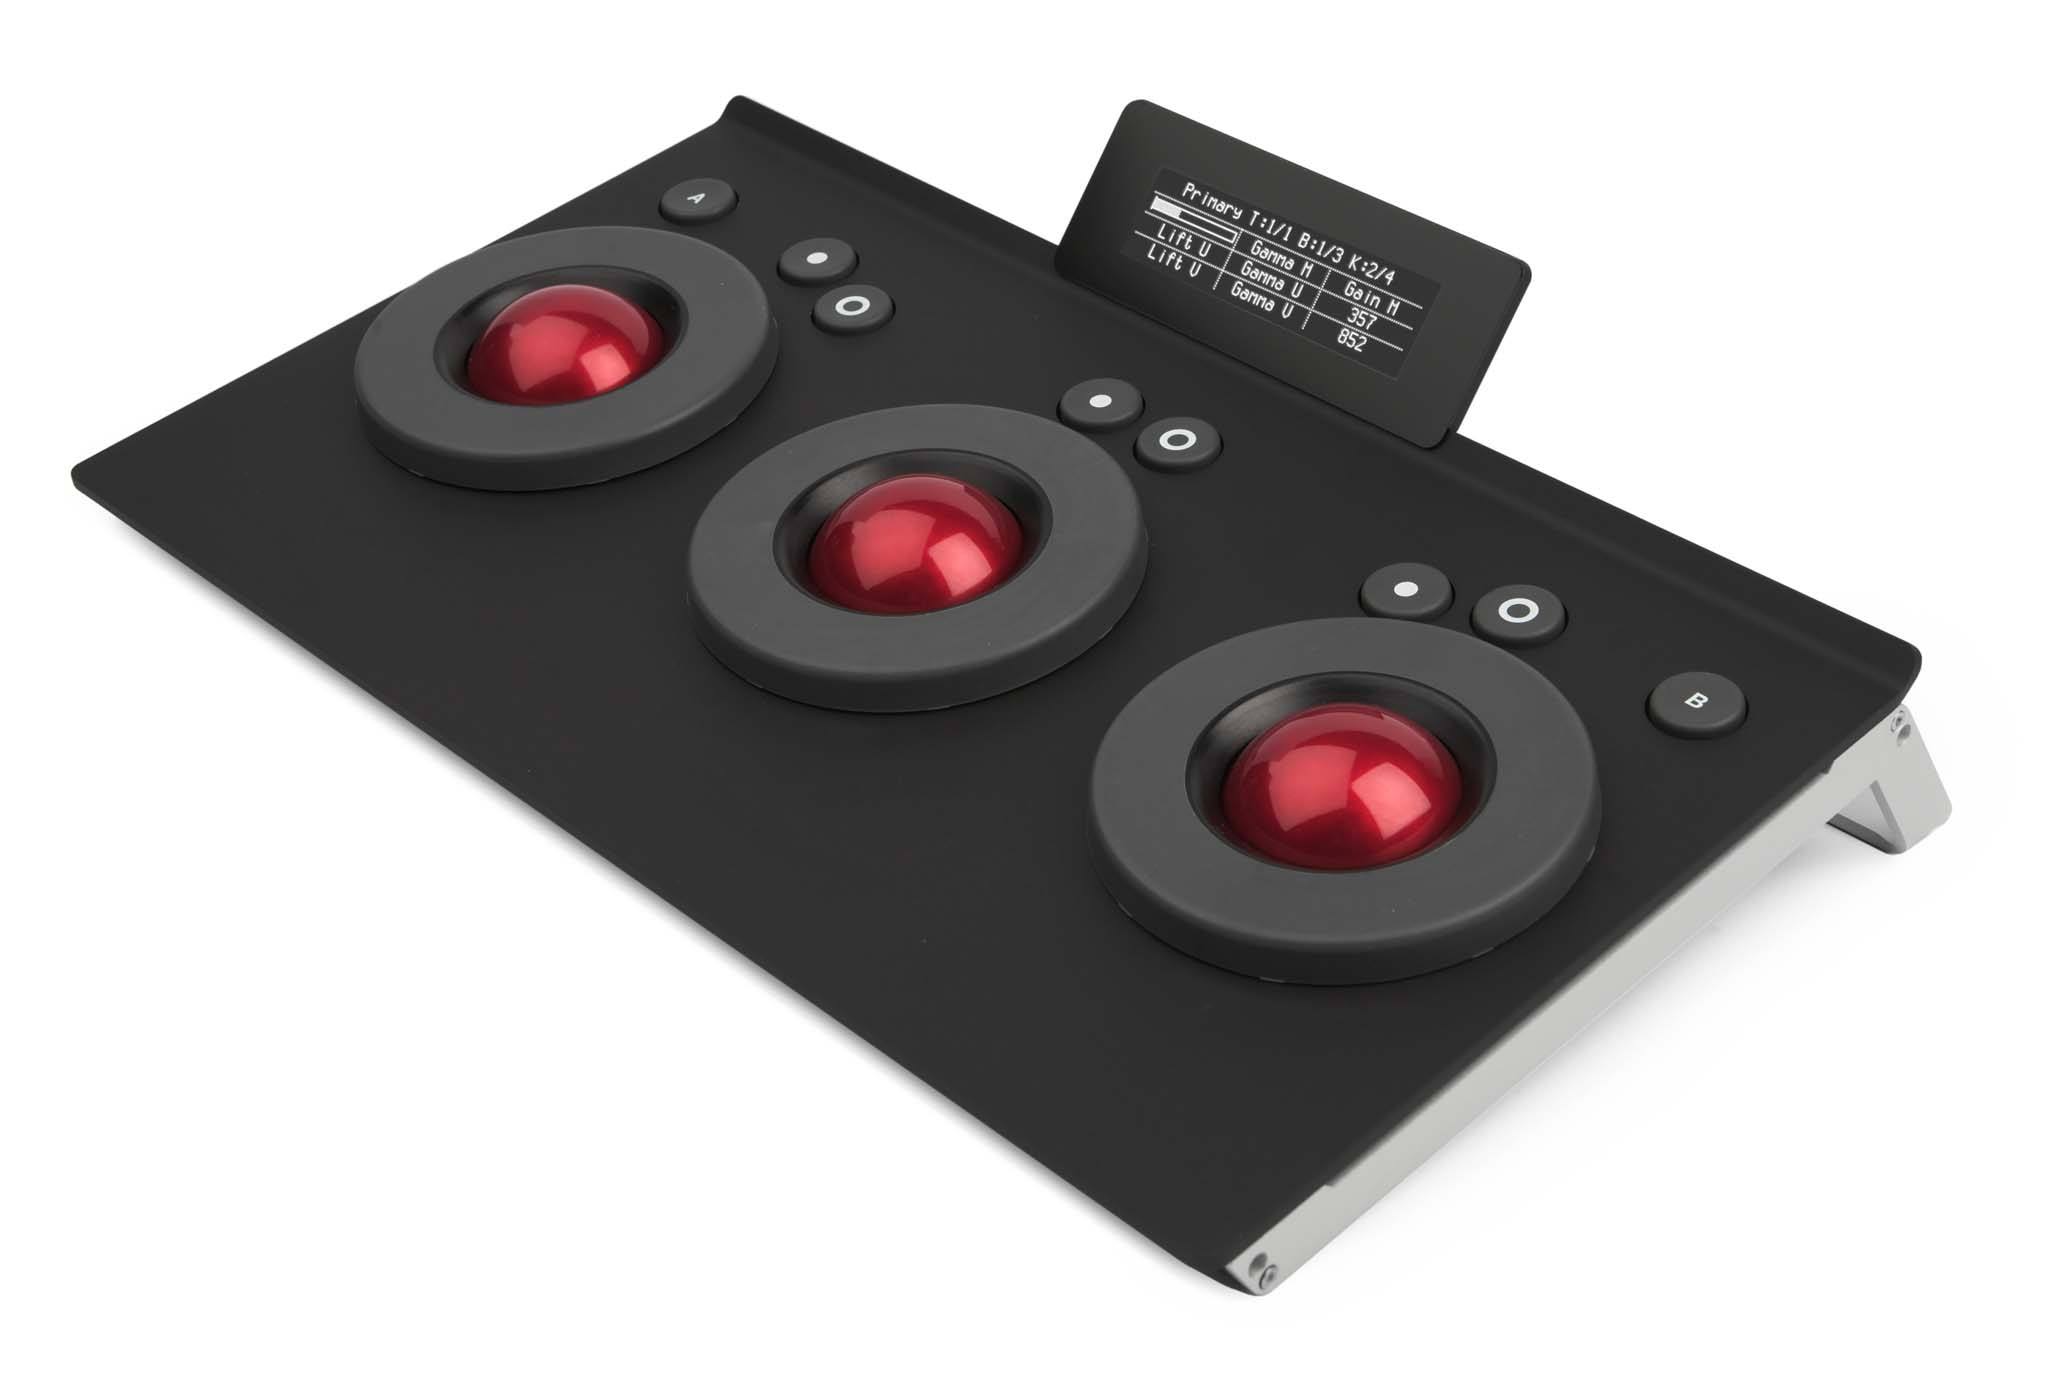
The Element Tk or Trackerball for short is a 3U sized device with 3 trackerballs including rings and reset buttons and a single display. It also includes the A and B buttons. This is the biggest kit in the setup.
Its purpose as to how it is set up with Capture One (and other image or film editing software I presume) is to control coloring. The Element Tk will wake the colorist in you.
And we all know that awesome Color Balance tool in Capture One Pro! The three trackerballs with their respective ring control the Shadow, Midtone, and Highlight color circle of the Color Balance tool respectively. The ball controls the Hue and Saturation, while the ring controls the Lightness.
Each trackerball has two buttons, with a closed and an open circle respectively. These symbols represent the ball and the ring! Their function is to reset the Color/Saturation done with the ball or Lightness adjustment done with the ring.


I only needed to play around for 5 minutes to become speechless. My wife came to see me whether I was alright. I mean, I made the best Presets on the globe for this tool, expressing my humbleness, but the Element Tk blows them out of the water!
The Color Balance tool is extremely well designed and has a nifty mouse and trackpad controls only a few people know about. But nothing comes close to the ease of use of the trackerballs of the Element Tk.
At the end of the day, I managed to get much better creative coloring effects in a fraction of the time thanks to the Tangent Element Tk.
Adding All Up
I discussed each part of the whole set individually to give you an idea of what they are up to. Your desire to use a Tangent Element may be limited to a few of the four devices. It depends on your needs. You can start with one and work your way up.
You also need some time to get used to the new toys, I mean tools, although I expect that it does not take long. In particular, I found the trackerballs very intuitive and the knobs as well.
Tangent Mapper
When you install the Tangent Hub software to connect the Element devices with Capture One Pro, you also install the Tangent Mapper application. With the Tangent Mapper, you can see all mappings. Any link between a knob, button or trackerball with a function in Capture One Pro is a mapping.
Interestingly enough, you do not have to connect any Tangent device to see the mappings. It is a software-only party. Just start Capture One Pro 10 and Tangent Mapper and you can view and change all mappings.
With the Tangent Mapper, you change any mapping or add new mappings since not all possible positions are filled in. Next, save it as a new control set.
According to Phase One, there are about 460 mappings to choose from. Note, however, that some tools are not available for the Tangent, like Levels and the Curve tool. You still need your mouse for that. Fortunately, there are excellent Levels and Curve presets that can help you with this job.
Through export and import of control sets, it is easy to transfer a custom control set of mappings to other systems or use the export as a backup.
Element-Vs On iPad
Try before you buy is always a good plan. To give any reader a basic idea of what the Tangent Element can do for you, just grab your iPad and install the app Element-Vs from the AppStore.
The Element-Vs app is a full software simulation of the entire Element range. It is obviously not the experience but it gives you an excellent idea of what this gear is capable of.
There is a free and a paid version. Functionality is the same, but the free version limits you to work 1 hour a day after which it reminds you to consider buying the unconstraint version.
Note that you need to install the Tangent Hub software as well for the iPad version to work. You pair your system from the Tangent Mapper.
Phase One Webinar Video
When you are interested in the capabilities of the Tanget Element devices in combination with Capture One, I strongly advise you to view the webinar video that David Grover of Phase One held and published in December 2016.
Capture One Pro 10 Webinar | …with the Tangent Element System
Thanks to the webcam David had mounted above his desk, you can see what he is doing with his hand at the controls of the Tangent Element.
Conclusion
I am impressed. I had never thought I would like to work with the Tangent Element devices this much. Phase One did an excellent job of implementing it on Capture One Pro. I am sorry to send them back; the life of a reviewer can be tough.
Setting personal sentiment aside, these tools are a whole new ballgame. Literally. Having physical controls is one, but the combination of buttons, knobs, and trackerballs is both an intelligent and more analog kind of working. It allows you to work more intuitively as well as more efficiently. Faster and better.
How about justifying the investment? Are you demanding regarding yourself and your output, both in terms of quality and/or quantity? Or do you also have video editing software to work with? Go for a test drive with the local distributor. It is the only way to find out. You won’t be disappointed.
Also, consider the alternatives. The Ripple and the Wave, as well as the Element-Vs app on the iPad, provide valid alternatives.
Thank you
For reading. Please feel free to leave a comment. Like us on Facebook or subscribe to our newsletter to stay informed about new blogs.
Best Regards,
Image Alchemist


Leave a Reply
Want to join the discussion?Feel free to contribute!