Capture One Layers Explained
In Capture One Layers Explained you become familiar with Layers, Masks, and Brushes as well as local adjustments in Capture One. Layers Explained is the first post in a serie of four, followed by Layers Continued and Layers In-Depth.
Capture One Layers Explained
Adjustments you make in Capture One normally affect the entire image. Whether it is a White Balance, Exposure or Sharpening adjustment, each pixel is affected.
Capture One Pro 6 (December 2010) introduced Local Adjustments through the Adjustments Layer. The feature has evolved over the years.
Capture One Pro 11 greatly improved the features with a new Layers tool, Layer Opacity, Mask refinement tools, Styles and Presets on Layers and much more. If you like Layers, you love Capture One Pro 11!
In Capture One Layers Explained I show you the basic principles and tools to use Layers successfully.
Some Basics First
A Layer contains a Mask and you are free to give the Mask any shape you like. You use a Brush to create the Mask. Only the masked areas are affected by the adjustments that you make for that Layer.
You can create multiple Layers on top of the standard Background Layer. Each Layer has its own Mask. The Background Layer is the actual image so to speak. All the adjustments you make in the Background Layer and subsequent Layers add up to create the final result.
A single Layer is often all you need to lift a dark shadow, correct a color cast in a mixed light setting or enhance sharpness in the foreground.
For different adjustments on different areas of your image, you can make multiple Layers with their respective Masks for maximum flexibility. You can create up to 16 Layers on top of the Background Layer.
Pro Only
You find the Layers feature in Capture One Pro and its derivates Pro (for Sony) and DB. Capture One Express (or Sony) does not provide this feature.
For more on the different running modes please read Capture One Modes. Express (for Sony) users can upgrade to Pro (for Sony) or Pro.
Contents Overview
This is the first in a series of four posts on Layers with Capture One. Here you learn how to:
- create a Layer with the Layers tool
- brush an area in your image to create a Mask on a Layer
- make adjustments to the masked area
In the second episode – Capture One Layers Continued – you learn about:
- Layer options
- create/remove, show/hide, create filled Layer,
- change Layer order and Opacity
- Brush options
- alternate between Brush and Eraser, Brush settings like Opacity and Flow
- Airbrush, Pen Pressure, Link Brush and Eraser settings
- copy Mask from other Layer, invert Mask, fill Mask, clear Mask
The third post – Capture One Layers In-Depth (part 1) – explains:
- Auto Masking
- copying Layers between images
- Clone and Heal layers
And Capture One Layers In-Depth (part 2):
- using Preset and Styles with Layers
- understanding Selection Points
- workflow with Layers
A Room With A View
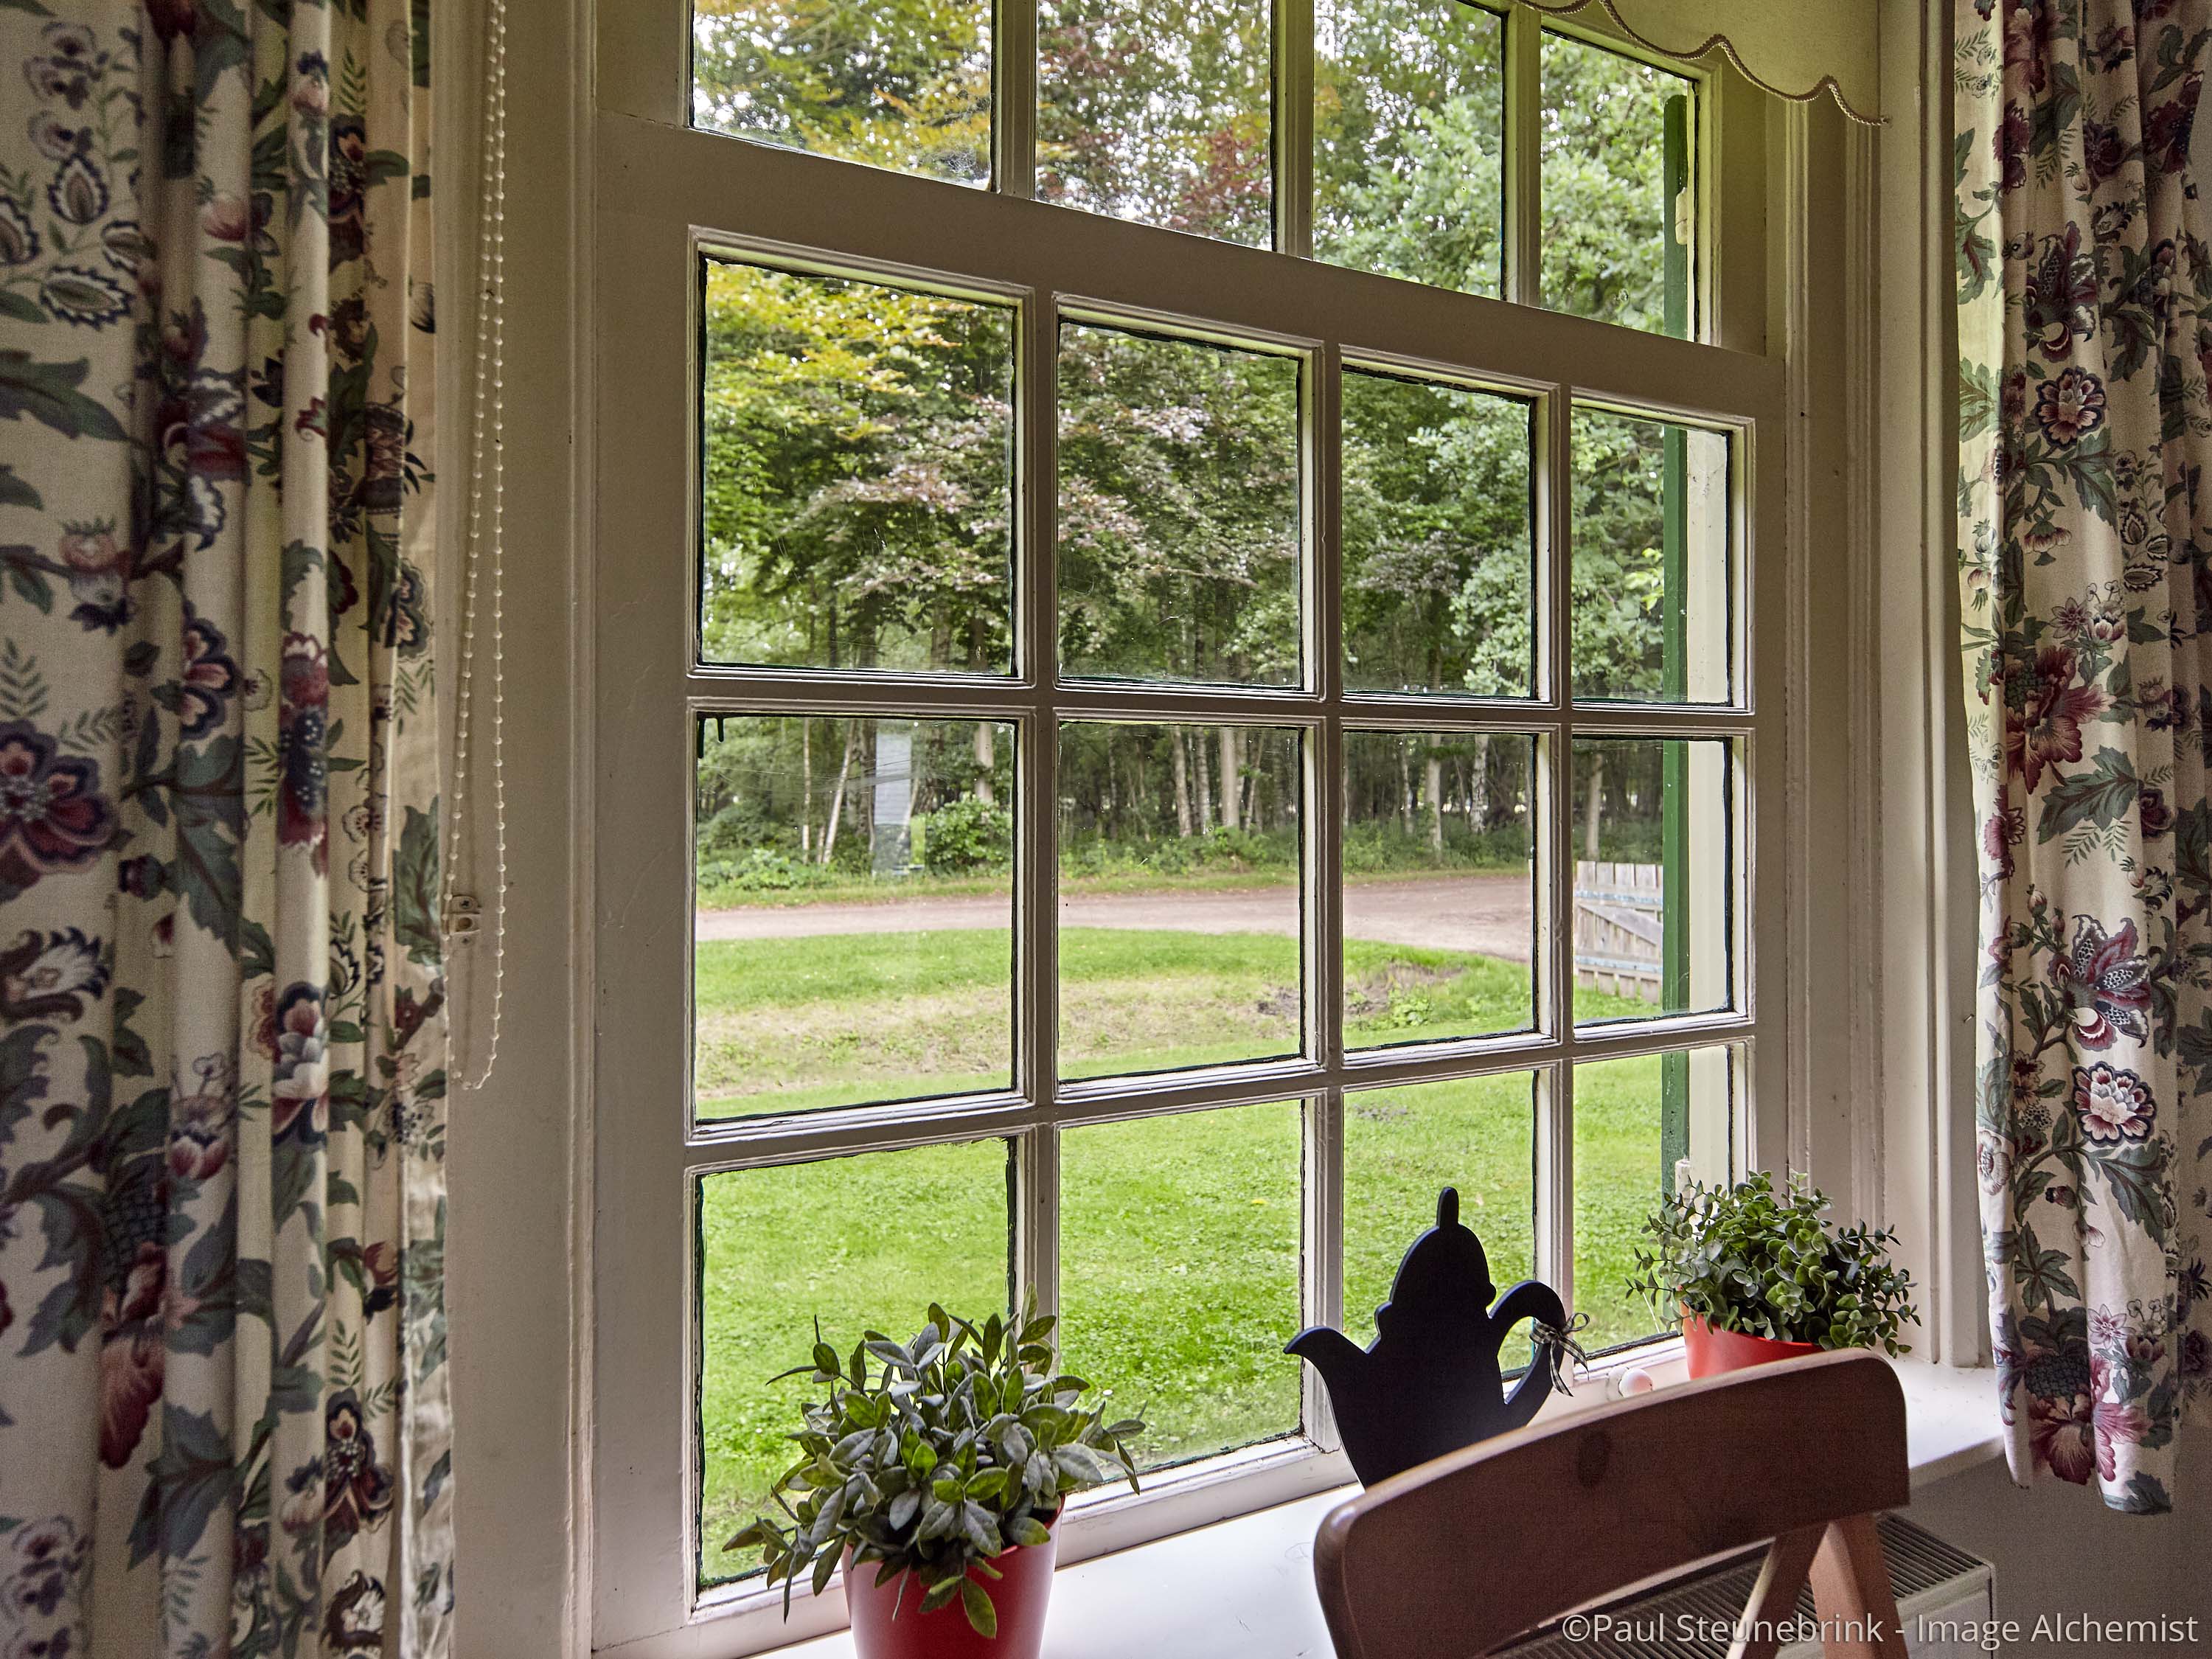
Let us dive into the world of Layers and Local Adjustments. I use a rural scene with a look through a window made with available daylight. Obviously the setting outside is too bright and inside the house too dark. The before/after stack below shows the start and finished image with adjustments to the Background Layer and two Adjustments Layers.
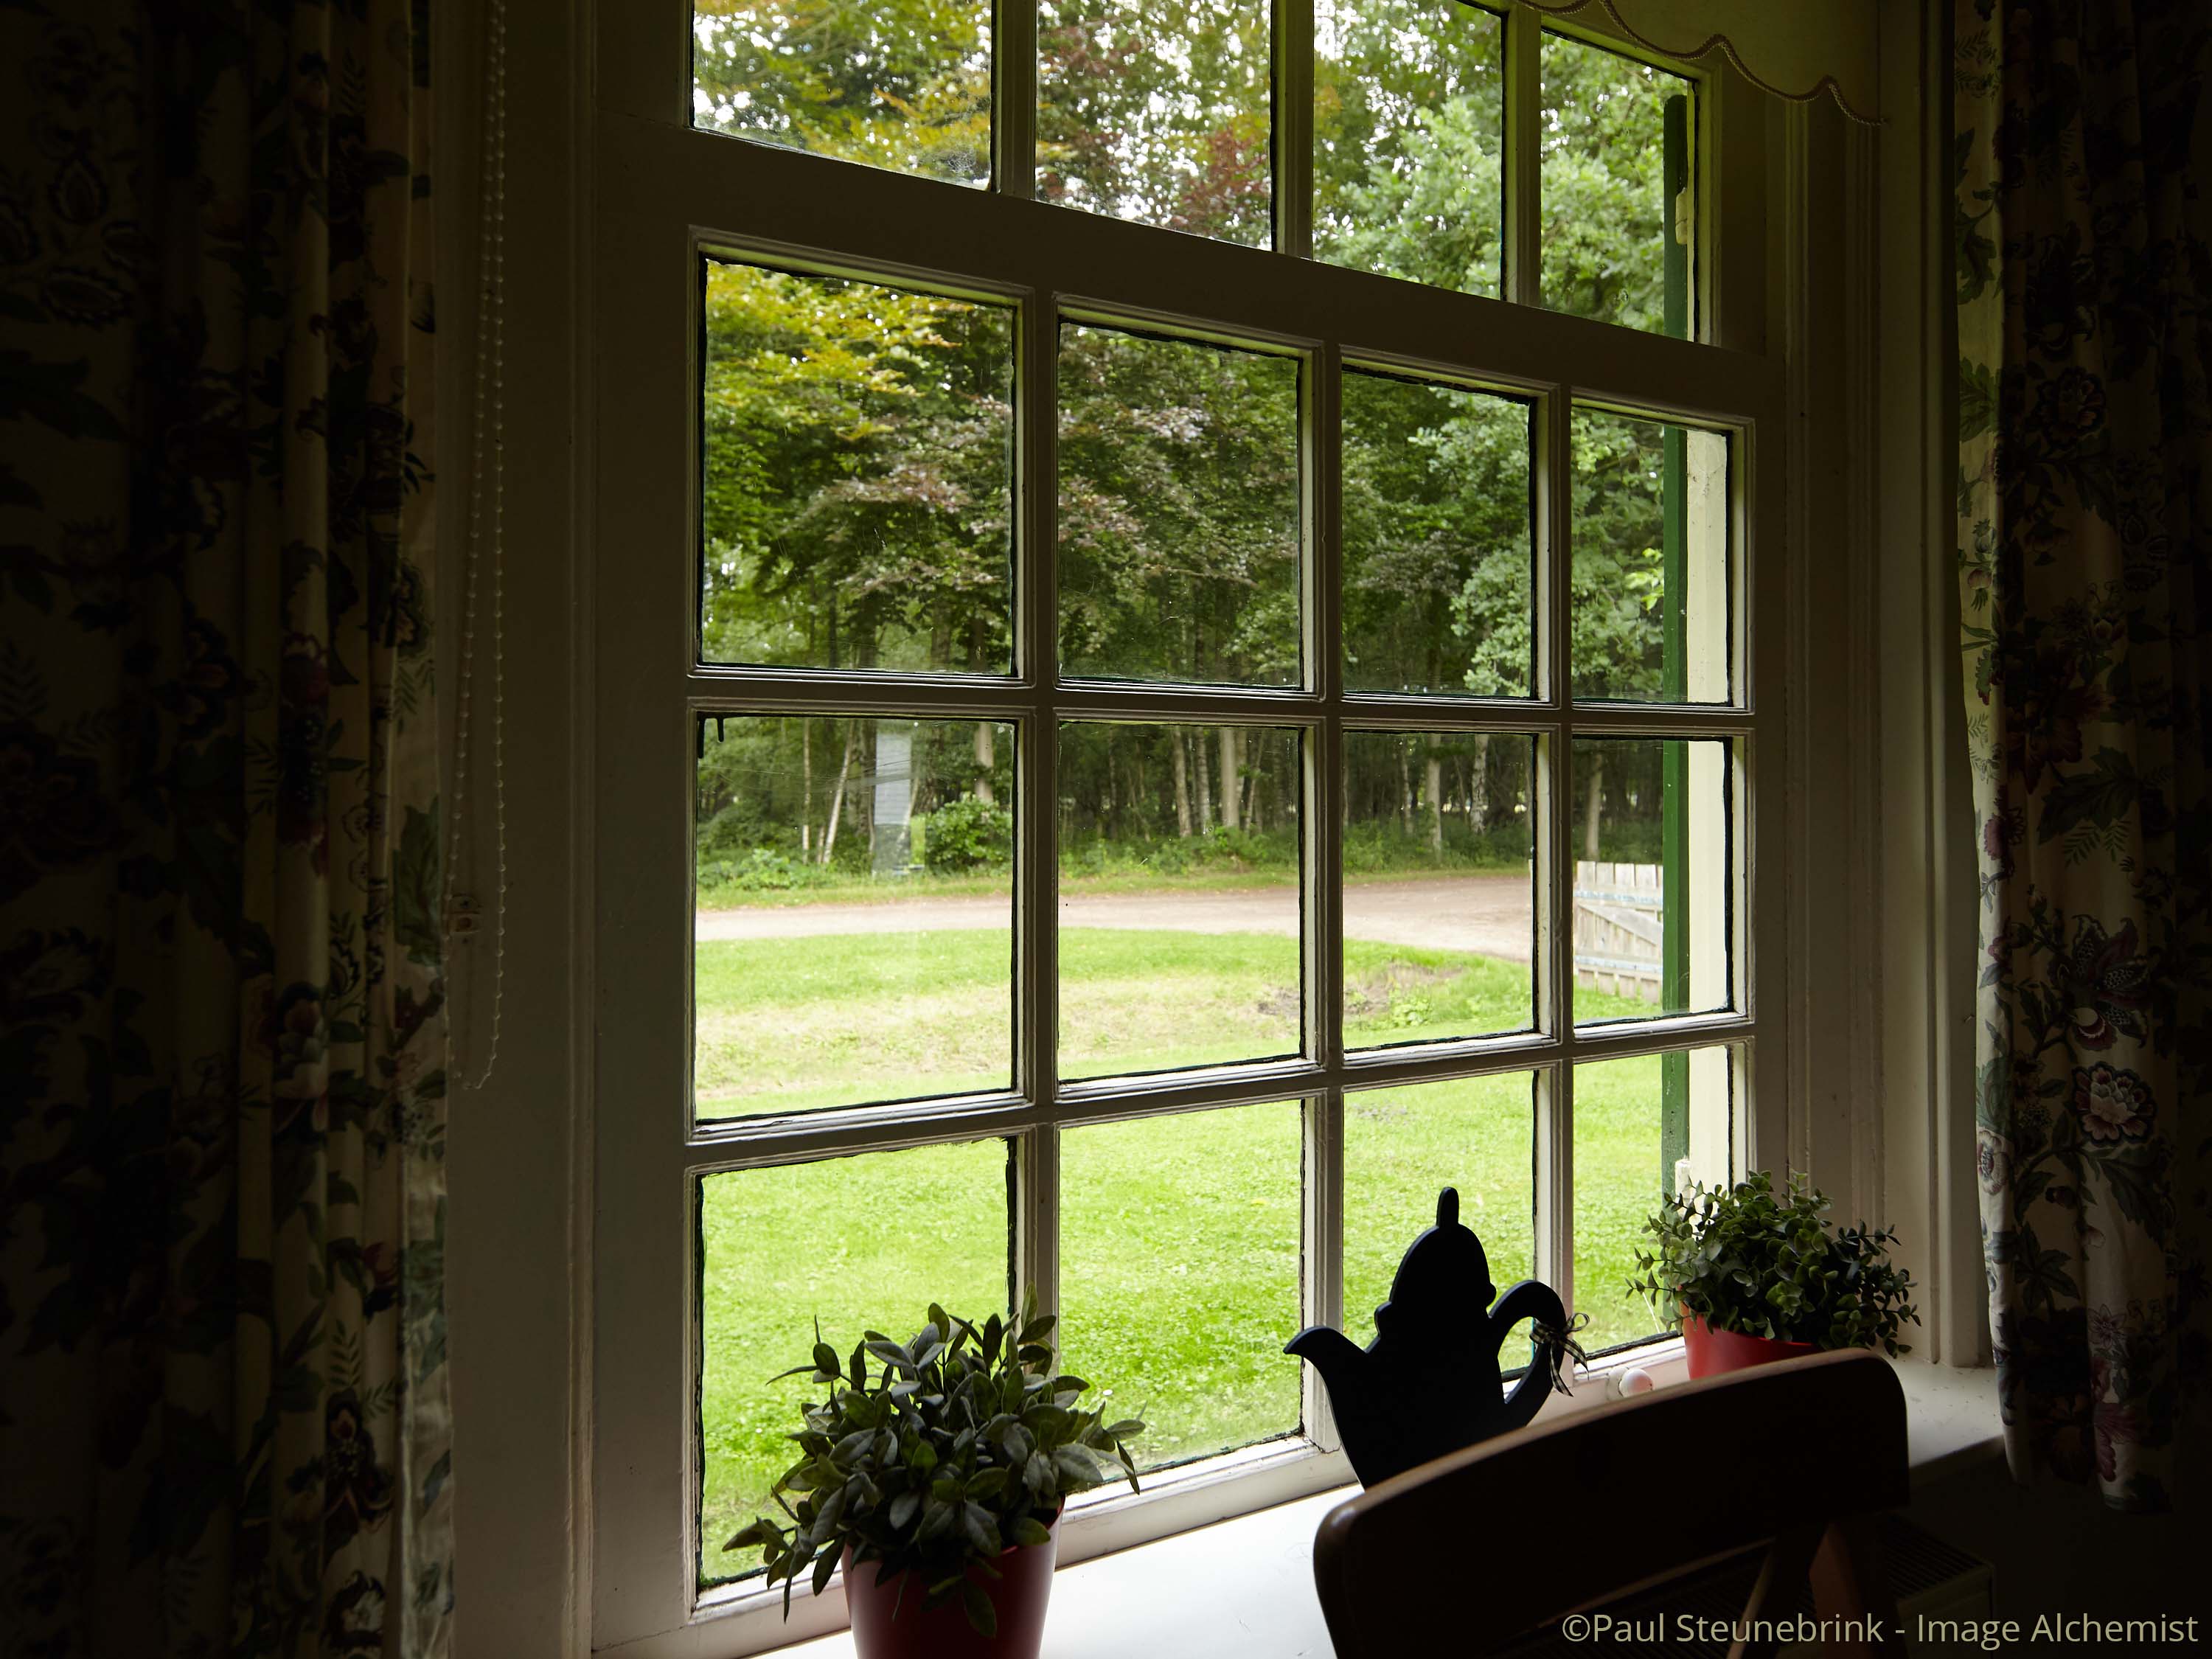

A High Dynamic Range – Highlight adjustment would help a lot to see the grass and the trees as well as the curtains. However, extreme High Dynamic Range adjustments make an image look dull.
The solution I chose is to make some local or selective adjustments. The process is outlined in three easy steps:
- first, you make a Layer
- next, you make a Mask
- last, you make Adjustments
Let’s have a look at each step.
Make A Layer
First, locate the Layers tool. In Capture One 11 you find the Layers tool on the Color, Exposure, and Details tool tab. In earlier versions, there was a separate Local Adjustments tool tab.
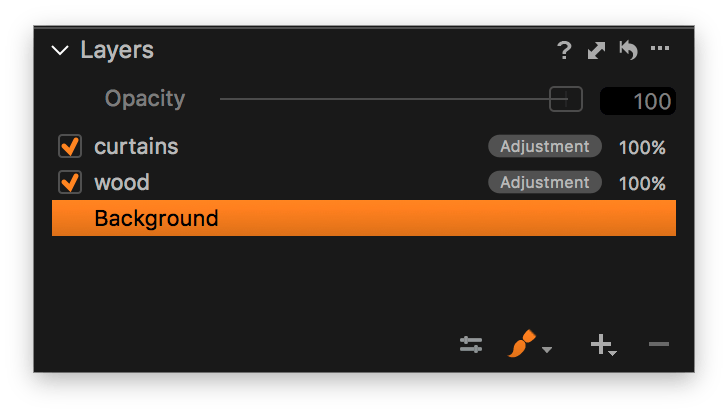
Click on the plus sign at the right bottom. A new Layer without a mask named Layer 1 appears in the tool. Notice the Adjustment label and 100% notation at the right. We will discuss this in a later post. Click on the Layer and give it a meaningful name like “wood” and press Enter to confirm.
Alternatively, long click on the plus sign and select New Empty Layer.
I discuss other options in a later post.
Make A Mask
First, select the Brush cursor tool from the Layer tool or from the cursor tools at the toolbar. Next, adjust the settings for the Brush.
You can open de Settings pane in two ways:
- from the Layers tool, click the symbol of two horizontal arrows, next to the Brush icon
- right-click in the preview after you selected the Brush tool
The latter option I use the most. With regard to the settings, I now focus on Size and Hardness. Set the Opacity and Flow to 100 and do not check Airbrush or Auto Mask (all defaults).
The setting for Size is probably obvious and is represented by the inner of the two circles that appear. The Hardness settings is the outer circle. The setting affects the distance between the two circles where the opacity of the Brush goes from 100 to 0. If you do not have any experience with masking and Hardness of a Brush, go for 50 for a start.
Next, I start brushing the windows. This creates the Mask. Don’t be afraid of the borders. Just do like you were washing the window! See the before/after stack below for the Masks of the two Layers I made for this image.
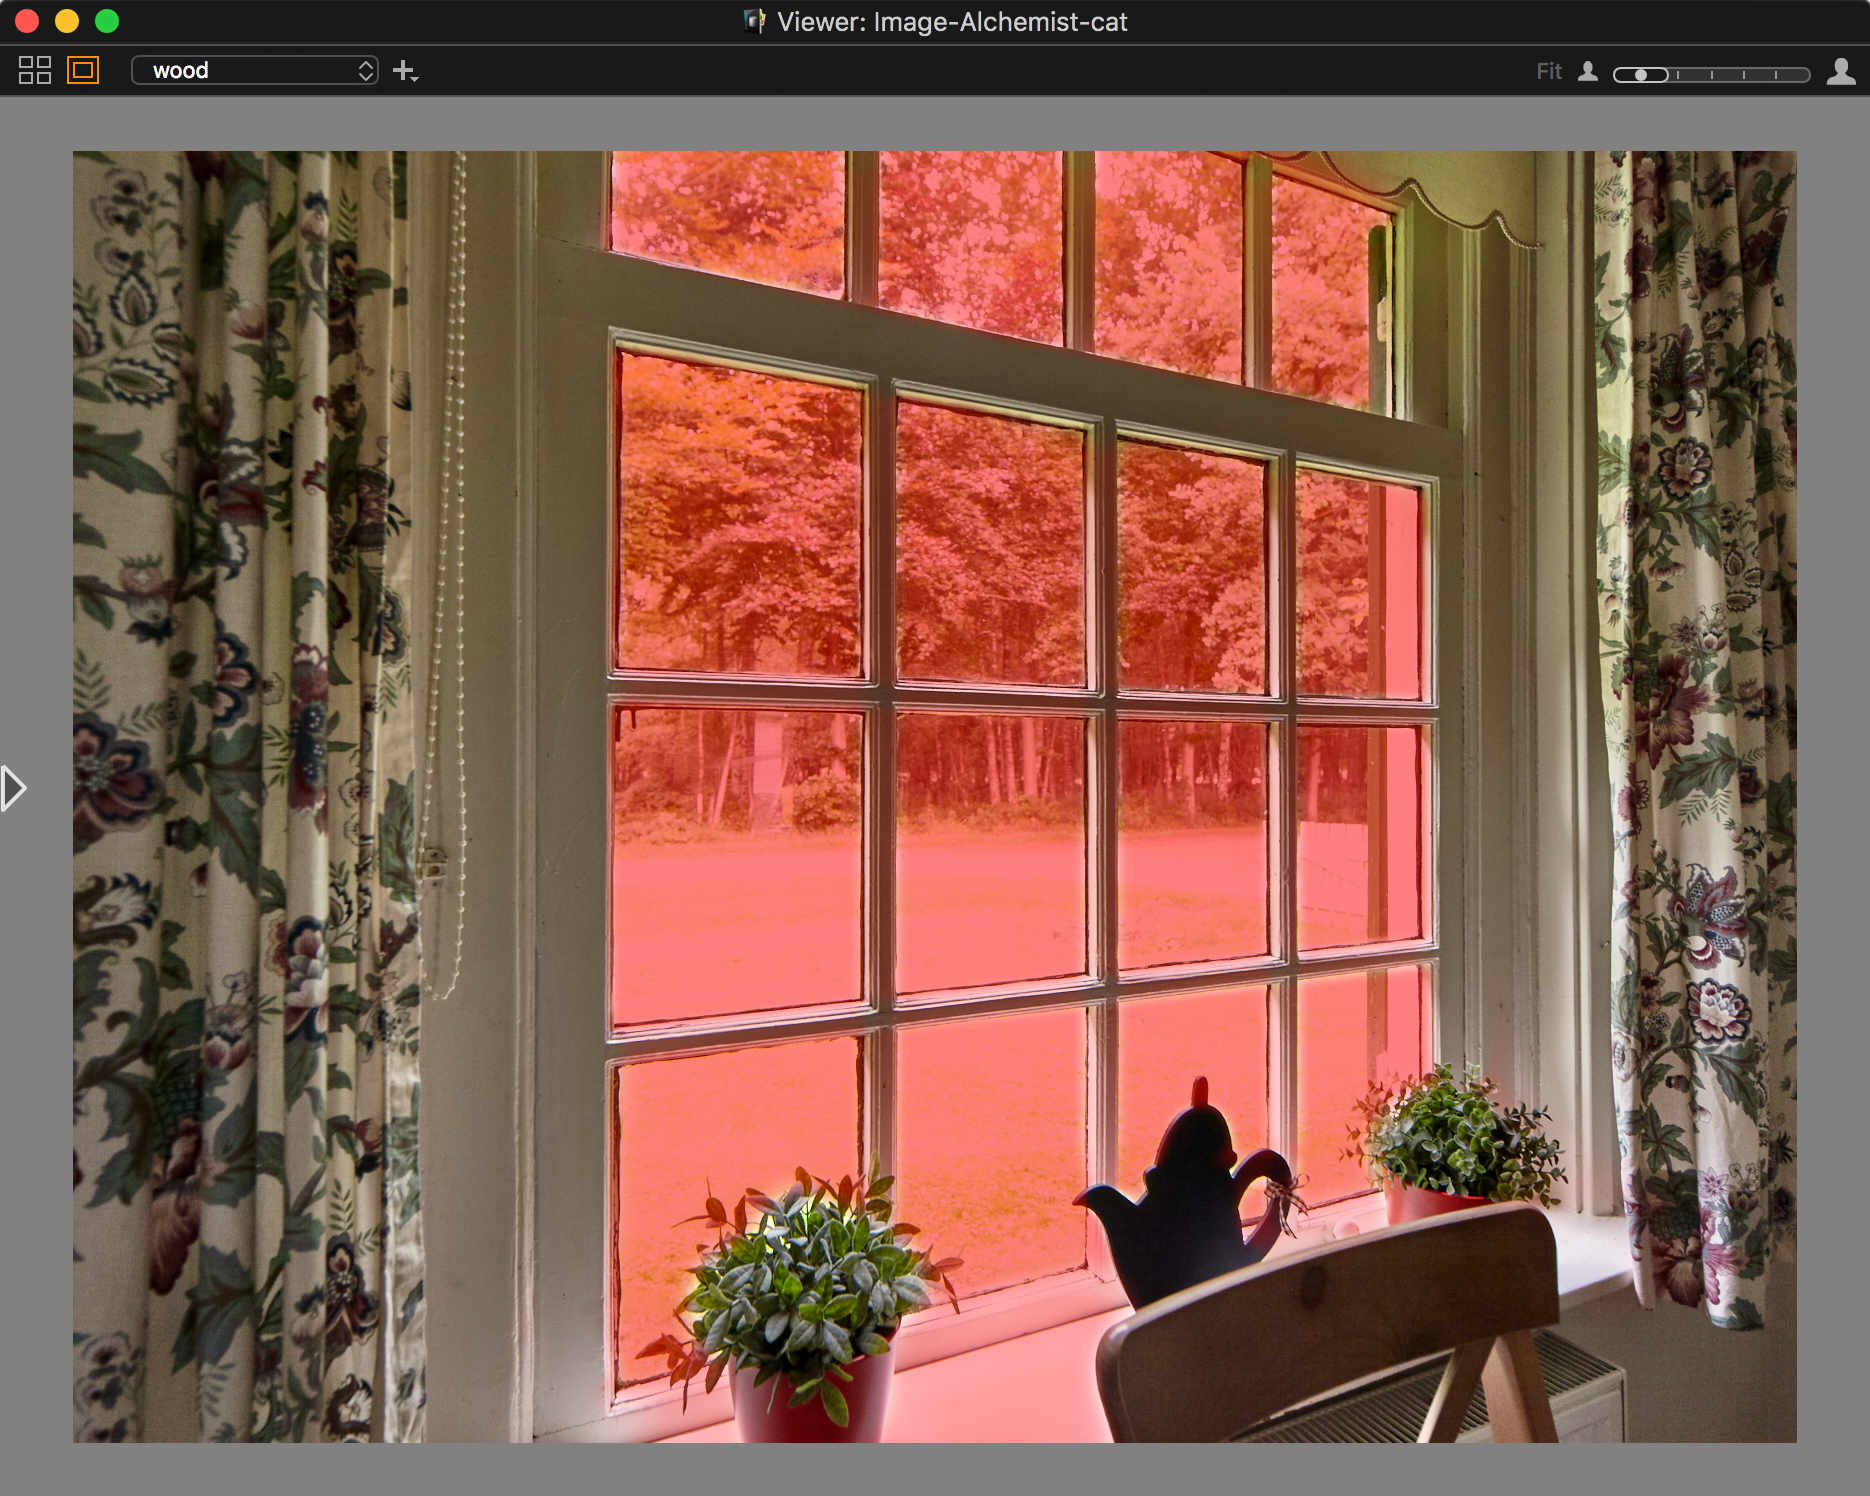
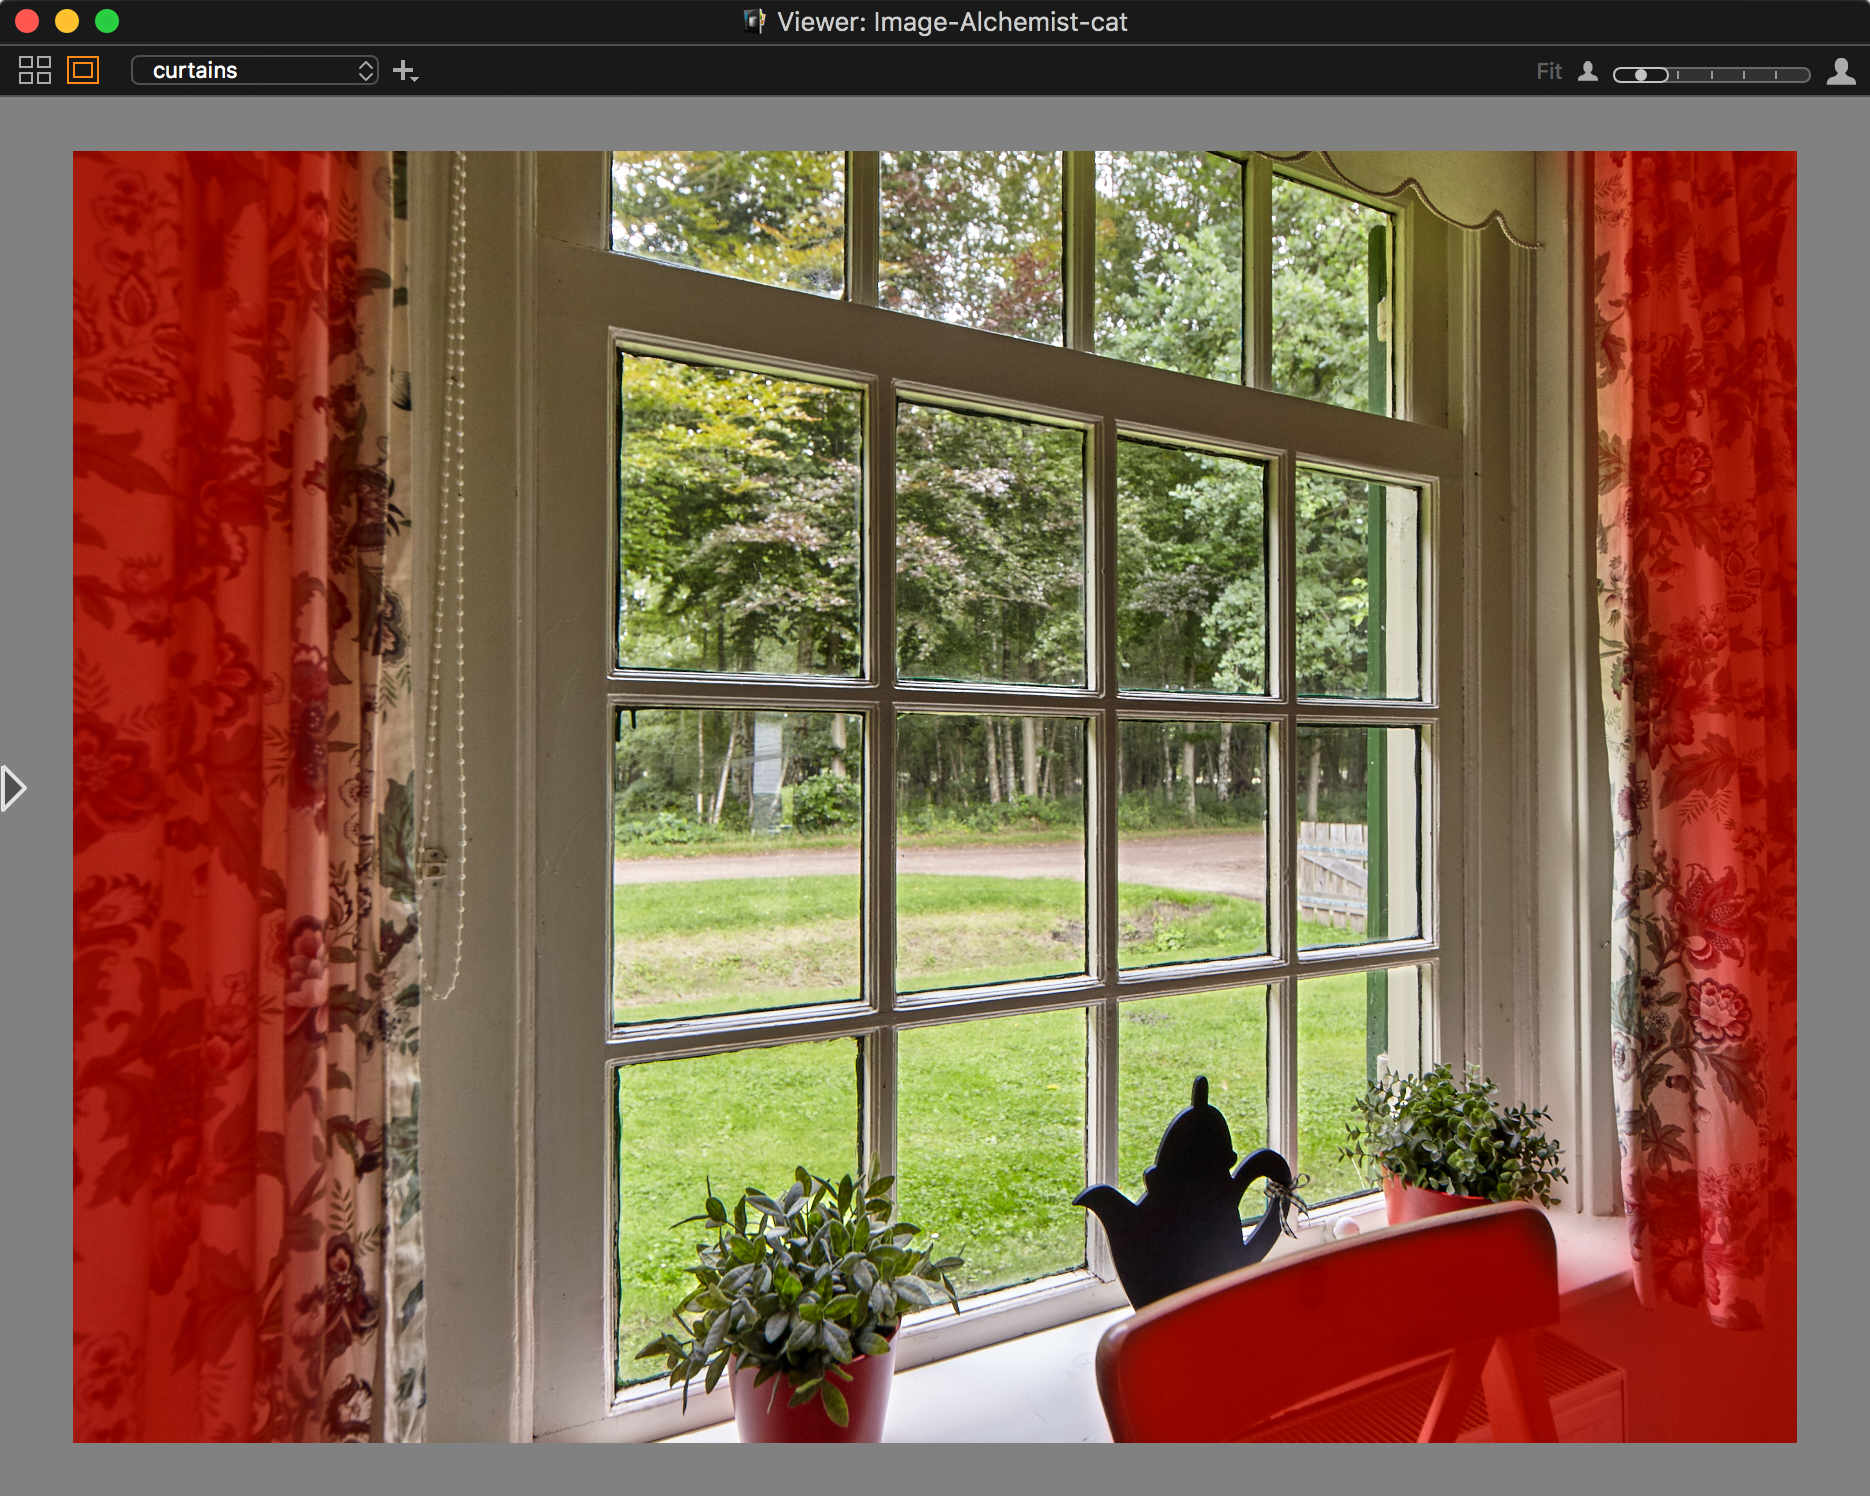
You do not yet see anything happen. This is because you have not set any adjustments yet. Also, by default, the Mask is not displayed.
Show Mask
There are several options regarding the mask’s visibility. The following screenshot lists them with keyboard shortcuts. You can toggle the most used settings with M on the keyboard or select all manually at the Layer tool or the cursor tools.
The Mask is red by default but you can change that in the Capture One Preferences > Appearance tab. This might be handy when you mask a red Ferrari!
Important Note
It is important to note that you either display the Mask or the Adjustments. In other words, when you display the Mask, your Adjustments are not displayed, and vice versa. When you change an adjustment while the Mask is displayed, the adjustment is shown during a few seconds.
Notes On Brushing
If you skipped the step of making a Layer, Capture One will automatically create the first one as soon as you start brushing and create the mask for that Layer. With multiple Layers in an image, it is important to create and select the Layer before you start brushing to avoid mistakes.
Make Adjustments
With the Layer selected, go to your tools and make the necessary adjustments. You can make adjustments with the mouse and keyboard or digitizer tablet like you are used to. You can also apply Presets and Styles to Layers since Capture One Pro 11.
For the image of this post, I made two Layers, wood and curtains. The wood (or window) needs darkening, the curtains at the edges of the image need brightening.
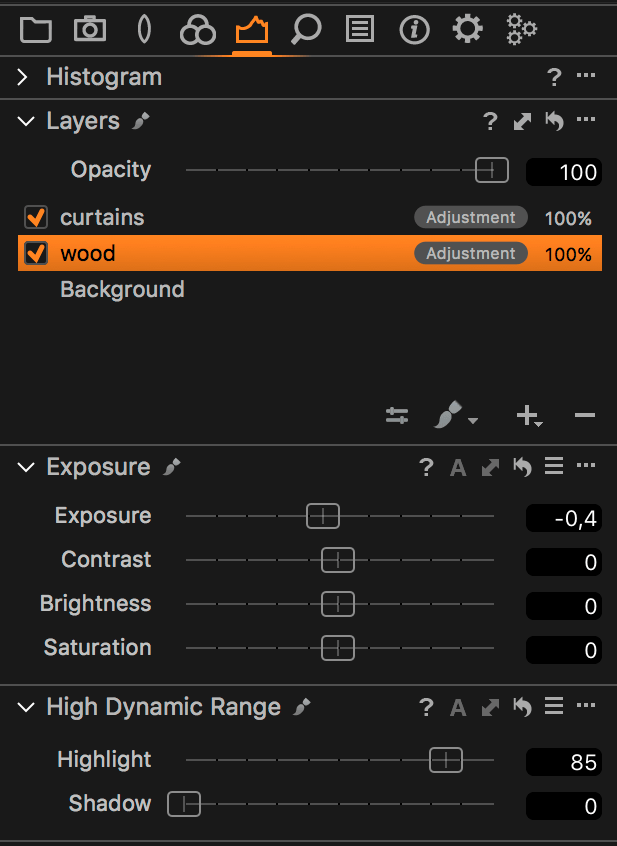
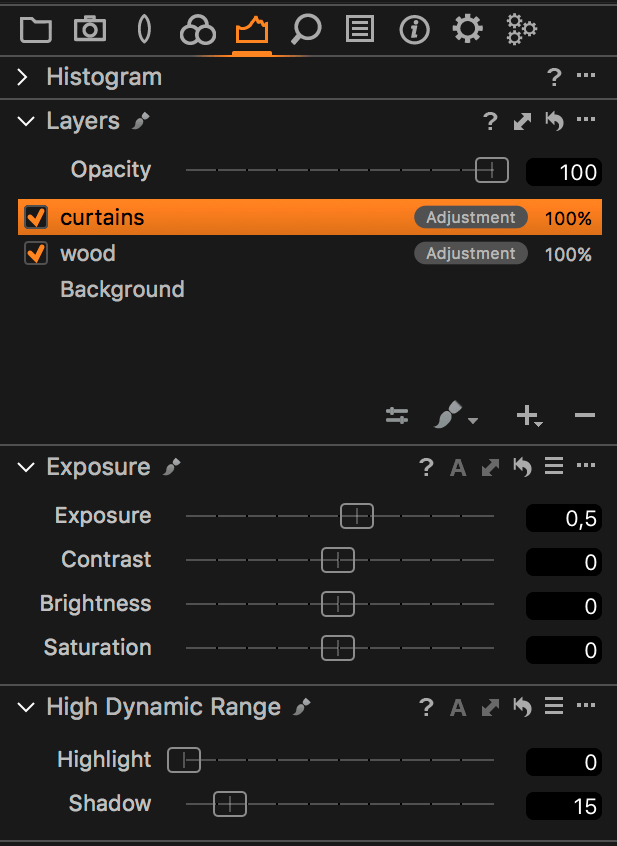
I often use a combination of the Exposure and the High Dynamic Range sliders as you can see from the two stacked screenshots above. With the Exposure adjustments, I change the overall brightness, and with the High Dynamic Range sliders, I address the darkest/brightest areas.
Also note the small brush icon in the header of the tools, indicating that you work on the selected Layer.
Tips And Alternatives
- instead of masking first and adjusting next, you can reverse the order; the advantage is that you immediately see the effect of your masking
- instead of using the Brush, use the Gradient cursor tool; not only for a sky above a flat horizon but also for and gradual change in light amount of color in an image
Erase Mask
Now that you have made adjustments and noticed the effect on the masked area, you may want to further refine your Mask with the Eraser.
Here’s the catch: I almost always use the Eraser, the non-Brush, that removes what I have brushed too much. The window of my image is a nice example. While working with the Brush, I crossed the edges of the window. I need to clean that up.
Select the Eraser in the Layers tool or cursor tool area where you also found the Brush.
Erase With Shift
Capture One has a neat trick to erase parts of the Mask along a straight line: the Shift key! In my example, I clicked at one side of the wall, just above the window. Next, I pressed Shift+Click on the other side. Capture One will act as if I moved the Eraser in a straight line with the speed of light!
Please note that the Shift-key trick works with the Brush as well for brushing in a straight line.
Gradient Brush
Or just Gradient for short is a special Brush and very easy to use. From the Layers, tool or cursor tools select the Gradient. Click and drag the Gradient from maximum to minimum density of your Mask.
Be aware though that the Gradient replaces any mask on a Layer. You can Brush additional areas after you made a Gradient to complete your Mask. In our example, I used the Gradient for the curtains at the left and brushed the right curtains.
The Gradient has a Shift-key trick as well. The line along which the Gradient is drawn jumps to the next 45° angle while holding the Shift-key.
Update
Capture One Pro 12 introduced the Linear Gradient and Radial Gradient, two parametric masks. The Gradient Brush as discussed above is no longer available from this version onwards. You can read more about the two Gradients in Capture One Pro 12 Review.
Next Steps
This concludes the first episode on Layers. Local adjustments are more work but more fun also. No surprise that it’s a very popular feature in Capture One Pro.
The saga continues in an upcoming post Capture One Layers Continued.
Thank you
For reading. Please feel free to leave a comment. Like us on Facebook or subscribe to our newsletter to stay informed about new blogs.
Best Regards,
Image Alchemist







Leave a Reply
Want to join the discussion?Feel free to contribute!